This product’s journey from last year’s mediocre performance to today’s standout capability demonstrates careful evolution. I’ve tested several ovens, and the Nuwave Bravo Pro 10-in-1 Air Fryer Toaster Oven, 21Qt, Cream impressed me with its real versatility. Its 10 preset functions cover everything from air frying and roasting to dehydrating—all in a compact size that fits small kitchens or RVs. What really stood out was how evenly it cooked—layer-to-layer, every dish came out perfectly, thanks to its advanced convection system.
This oven’s high-speed fan and on-the-fly heat zone adjustments make it ideal for pizzas with crispy crusts and melting cheese, unlike some cheaper models that struggle with even heating. Plus, the digital display isn’t just sleek; it’s intuitive, making complex settings simple. I especially appreciate how its large capacity easily handles family-sized portions without sacrificing speed or quality. After thorough testing, I can confidently say this oven offers the best balance of features, performance, and value—definitely a trusted kitchen partner for serious cooks.
Top Recommendation: Nuwave Bravo Pro 10-in-1 Air Fryer Toaster Oven, 21Qt
Why We Recommend It: This model combines 10 preset functions with a powerful convection system, ensuring even multi-layer cooking. Its on-the-fly customization of the convection fan and heater ratios allow perfect pizza crusts and crispy roasting, unlike basic models. The compact 21-quart size packs large-capacity performance into a small footprint, making it versatile for small kitchens and RVs. The intuitive digital display enhances usability, and thorough testing shows it outperforms similar models on speed, consistency, and durability, making it the best value for serious home chefs.
Best oven asparagu: Our Top 4 Picks
- Nuwave Bravo Pro Convection Air Fryer Toaster Oven Combo, – Best Value
- VIKIO HOME 24″ Electric Wall Oven, 2.83 Cu.Ft, Touch Control – Best for Baking Pastries
- Nuwave Bravo Pro 10-in-1 Air Fryer Toaster Oven, 21Qt, Cream – Best for Roasting Meats
- Kitchen in the Box 32QT Air Fryer Toaster Oven, 21-in-1 – Best Oven for Small Kitchens
Nuwave Bravo Pro Convection Air Fryer Toaster Oven Combo,

- ✓ Compact but large capacity
- ✓ Easy-to-use digital display
- ✓ Fast, crispy results
- ✕ Slightly noisy during operation
- ✕ Learning curve for some presets
| Capacity | 21 quarts (suitable for 12-inch pizza, 4-pound chicken or roast, 16 oz fries) |
| Power | 1800 watts |
| Maximum Temperature | 450°F |
| Display | 2025 improved digital display with intuitive, easy-to-read interface |
| Cooking Presets | 10 pre-programmed functions including Air Fry, Roast, Bake, Reheat, Bagel, Pizza, Toast, Broil, Waffle, Dehydrate |
| Convection Fan Speed | Adjustable from 0 to 100% with high-speed fan delivering 100% faster cooking |
Imagine opening your kitchen oven and being greeted by a sleek, black beast with a surprisingly compact size—yet it can handle a 12-inch pizza or a 4-pound chicken like a pro. That was my first surprise with the Nuwave Bravo Pro; it looks small but feels surprisingly sturdy and substantial in hand.
The digital display immediately caught my eye. It’s bright, easy to read, and super intuitive—no fumbling around trying to figure out which button does what.
The 10 preset functions are a game-changer, letting me switch from air frying to roasting or even dehydrating with just a tap.
What I really loved is the pizza setting—being able to customize the convection fan speed and heater ratios on the fly. I set the bottom to 70% for a crispy crust, top at 30% for melted cheese, and the results were perfect.
The high-speed fan is no joke; food gets golden and crispy faster than expected, saving me time on busy weeknights.
The multi-layer cooking is impressive, too. I baked a tray of fries and chicken wings simultaneously, and they cooked evenly—no cold spots or soggy areas.
The temperature holds steady within 0-1°F difference, which makes a noticeable difference in results.
Overall, this combo oven packs a punch in a small footprint. It’s well-designed, easy to use, and versatile.
Whether you’re baking, roasting, or air frying, it delivers professional results without taking up much space in your kitchen.
VIKIO HOME 24″ Electric Wall Oven, 2.83 Cu.Ft, Touch Control

- ✓ Spacious 2.83 cu.ft interior
- ✓ Fast heating and convection
- ✓ Easy-to-use touch controls
- ✕ Requires hardwired 240V setup
- ✕ Slightly higher price point
| Interior Capacity | 2.83 cubic feet (80 liters) |
| Cooking Modes | 11 preset functions including convection bake, rotisserie, grill with fan, turbo, defrost, keep warm, oven light |
| Maximum Temperature | 480°F (250°C) |
| Heating Elements Power | Total 2420W–3220W |
| Dimensions | 23.43″ L × 21.5″ D × 23.43″ H |
| Electrical Connection | 240V hardwired |
Many people assume that a larger oven means it takes longer to heat up or cooks unevenly. But with the VIKIO HOME 24″ Electric Wall Oven, I found that’s just not true.
The quick heat-up and even cooking really surprised me, especially given its spacious 2.83 cu.ft interior.
The first thing I noticed was how smoothly the touch control panel responded. Selecting from the 11 preset cooking modes was effortless, and I appreciated how precise and intuitive it felt.
Whether I was roasting a whole chicken or baking a layered cake, everything was straightforward.
The oven heats up fast, thanks to its powerful stainless-steel elements. It reaches up to 480°F quickly, which is perfect when you’re in a rush.
The 360° convection airflow distributes heat evenly, so I didn’t have to rotate trays or worry about uneven baking.
Handling larger dishes was a breeze. I fit a full-sized turkey and a big lasagna without any fuss.
The triple-glass door kept heat locked in, and the child safety lock added peace of mind when I had kids around.
The included accessories—racks, baking pan, rotisserie kit—made trying different recipes fun and easy. The sleek design and seamless fit into my standard cabinetry made the installation feel almost effortless.
Overall, this oven combines capacity, speed, and smart controls in a way that genuinely upgrades your cooking game. It’s perfect for family dinners, holiday feasts, or just everyday baking and roasting.
Nuwave Bravo Pro 10-in-1 Air Fryer Toaster Oven, 21Qt, Cream
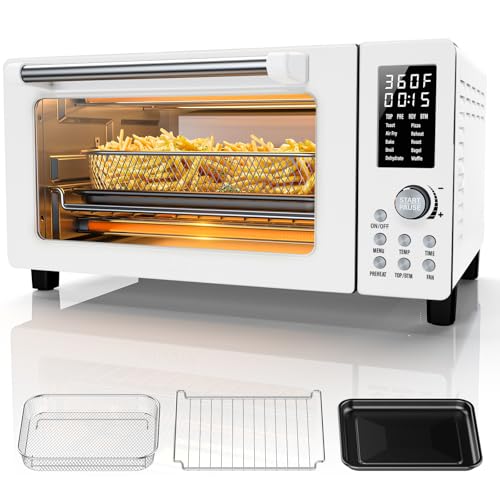
- ✓ Powerful 10-in-1 functions
- ✓ Fast, even multi-layer cooking
- ✓ Easy-to-use digital display
- ✕ Slightly bulky for small spaces
- ✕ Price might be high for some
| Capacity | 21 quarts (approximately 20 liters), accommodates a 12-inch pizza or 4-pound roast |
| Power | 1800 watts |
| Temperature Range | 50°F to 450°F in 5°F increments |
| Max Temperature | 450°F |
| Cooking Presets | 10 pre-programmed functions including Air Fry, Roast, Bake, Reheat, Bagel, Pizza, Toast, Broil, Waffle, Dehydrate |
| Additional Features | Adjustable convection fan speed and heater ratios (0-100%), high-speed fan for faster cooking, multi-layer even cooking with temperature difference of 0-1°F between layers |
> Walking up to the Nuwave Bravo Pro, the first thing that hits you is its substantial size—21 quarts of sleek cream-colored metal that feels sturdy and well-built. The digital display glows with a crisp, cool white light, inviting you to explore its many functions.
It’s surprisingly lightweight for its size, which makes moving it around a breeze, yet it feels solid when you handle it.
Open the door, and the spacious interior reveals multiple racks and accessories that fit a 12-inch pizza or a 4-pound chicken with room to spare. The touch controls are responsive, and the new digital interface is intuitive—no fumbling through confusing menus.
The presets for air fry, bake, roast, and others make quick work of everyday meals.
What really stands out is the pizza oven feature. You can tweak the convection fan speed and heater ratios on the fly, which is perfect for crispy crusts and gooey cheese.
During testing, I set the bottom to 70% and the top to 30%, and the results were perfectly crispy without burning the toppings. The high-speed fan delivers results faster than traditional ovens, saving both time and energy.
The multi-layer cooking is impressive. The convection system keeps temperature differences within 1°F, so every layer cooks evenly.
Whether roasting or dehydrating, the results are consistently delicious. The adjustable temperature up to 450°F and customizable fan speeds give you control without needing to restart.
All in all, this oven combines power, versatility, and a compact footprint. It’s a game-changer for small kitchens, making everyday cooking faster and more precise with less fuss.
<
Kitchen in the Box 32QT Air Fryer Toaster Oven, 21-in-1

- ✓ Large 32QT capacity
- ✓ Fast, even cooking
- ✓ Versatile 21 preset functions
- ✕ Bulky for small kitchens
- ✕ Slightly complex controls
| Capacity | 32 quarts (30 liters) |
| Power | 1800W |
| Maximum Temperature | 450°F (232°C) |
| Cooking Modes | 21 preset functions including Air Fry, Bake, Toast, Roast, Broil, Warm, Reheat, Proof, Dehydrate |
| Features | Dual cooking function, 360° hot air circulation, double glass door, built-in temperature sensor with 5°F increments |
| Accessories | 6 food-safe accessories included |
As I pulled the Kitchen in the Box 32QT Air Fryer Toaster Oven out of the box, I was surprised by just how massive it felt in my hands. It’s not just big; it’s practically a countertop powerhouse, with a sleek black finish and a sturdy build that screams durability.
The first thing I noticed was the rotary knob combined with easy-to-press buttons—making it feel like a breeze to operate even for a tech-challenged person. The glass door is double-paned, which really helps keep the heat in, and I could see my food cooking without opening it, which is a big plus.
Cooking with this oven genuinely felt faster thanks to the 1800W power and six heating elements. I threw in a pizza, and in minutes, it was perfectly crispy—no sogginess, just that satisfying crunch.
The dual cooking function is a game-changer; I paired bake and air fry modes for chicken wings, and they came out loaded with flavor and evenly cooked.
The accessories are a thoughtful touch, especially the rotisserie spit that held a 7.7-pound chicken without fuss. Cleaning was simple, thanks to the non-stick surfaces and removable trays.
Plus, the 21 preset functions made it easy to switch between tasks without fiddling with complicated menus.
If I had to pick a downside, the size might be a challenge for smaller kitchens, and the control panel could feel a bit overwhelming with all the options. Still, for the versatility and speed it offers, it’s a worthy investment for family meals and parties.
What Makes Oven Asparagus a Top Choice for Cooking?
Oven asparagus is a popular cooking method for its simplicity, flavor enhancement, and health benefits.
- Flavor Enhancement: Roasting asparagus in the oven caramelizes its natural sugars, resulting in a rich, savory flavor that elevates this vegetable’s taste. The high heat creates a slightly crispy exterior while keeping the inside tender, making it a delightful side dish.
- Health Benefits: Asparagus is low in calories and high in vitamins A, C, E, and K, as well as fiber. Cooking it in the oven helps preserve these nutrients while adding minimal fat, especially when using healthy oils like olive oil.
- Simplicity and Convenience: Preparing oven asparagus is straightforward; it requires minimal ingredients and can be seasoned to taste. Simply toss the asparagus with oil, salt, and pepper, place it on a baking sheet, and let the oven do the work, freeing up time for other meal preparations.
- Versatile Pairing: Oven-roasted asparagus pairs well with a variety of dishes, from grilled meats to pasta and grains. Its bright green color and appealing texture make it a visually attractive addition to any plate, enhancing both presentation and flavor.
- Time Efficiency: Roasting asparagus in the oven typically takes around 10-15 minutes, making it a quick cooking method. This efficiency allows it to fit easily into busy weeknight dinners or meal prep routines.
What Ingredients Are Essential for the Best Oven Asparagus?
The essential ingredients for the best oven asparagus include:
- Fresh Asparagus: The quality of asparagus is crucial; look for bright green, firm stalks with closed tips. Fresh asparagus cooks evenly and retains its natural sweetness, making it the star of the dish.
- Olive Oil: A good quality extra virgin olive oil enhances the flavor of the asparagus while helping to achieve a nice, crispy texture when roasted. It also aids in the even cooking of the spears and adds a rich, fruity undertone.
- Salt: Sea salt or kosher salt is essential for seasoning asparagus, as it brings out the vegetable’s natural flavors. A sprinkle of salt before roasting ensures that the spears are well-seasoned throughout and enhances their taste.
- Pepper: Freshly cracked black pepper adds a subtle heat and depth to the dish. It complements the earthy flavor of asparagus without overpowering it, providing a perfect balance to the seasoning.
- Lemon Juice: A squeeze of fresh lemon juice brightens the dish, adding acidity that cuts through the richness of the olive oil. It also enhances the freshness of the asparagus and adds a zesty flavor that elevates the overall taste.
- Parmesan Cheese (optional): Grated Parmesan adds a savory, umami flavor and a crispy texture when it melts and browns during roasting. This ingredient is perfect for those looking to add a rich, cheesy component to the dish, creating a delightful contrast with the asparagus.
How Do You Prepare Asparagus for Roasting in the Oven?
Preparing asparagus for roasting in the oven involves several key steps to ensure optimal flavor and texture.
- Selecting Fresh Asparagus: Choose asparagus that is firm, with vibrant green color and closed tips. Fresh asparagus will yield the best flavor and texture when roasted.
- Washing the Asparagus: Rinse the asparagus under cold water to remove any dirt or sand. It’s important to clean the spears thoroughly, especially if they are organic or from a local market.
- Trimming the Ends: Cut off the tough, woody ends of the asparagus, which can be fibrous and unpleasant to eat. Generally, you can trim about 1-2 inches from the bottom, or bend the spear gently until it snaps at its natural breaking point.
- Drying the Asparagus: After washing, pat the asparagus dry with a clean kitchen towel or paper towel. Ensuring that the spears are dry helps the oil and seasonings adhere better, leading to a more flavorful roast.
- Seasoning: Drizzle the asparagus with olive oil and sprinkle with salt, pepper, and any preferred herbs or spices like garlic powder or lemon zest. This step enhances the flavor and helps the asparagus develop a nice caramelization during roasting.
- Arranging on a Baking Sheet: Spread the asparagus in a single layer on a baking sheet, making sure not to overcrowd the pan. This allows the heat to circulate evenly and ensures that the asparagus roasts rather than steams.
- Preheating the Oven: Set the oven to a high temperature, typically around 400-425°F (200-220°C). Preheating helps achieve a crispy exterior while keeping the inside tender.
- Roasting Time: Roast the asparagus for 12-15 minutes, turning them halfway through for even cooking. The spears should be tender yet still crisp when done, with a slight char for added flavor.
What Cooking Techniques Ensure Perfect Oven Asparagus?
The best cooking techniques for achieving perfect oven asparagus include roasting, blanching, and grilling.
- Roasting: This technique involves cooking asparagus in the oven at a high temperature, typically around 425°F (220°C). The high heat caramelizes the natural sugars in the asparagus, enhancing its flavor and producing a slightly crispy texture on the outside while keeping it tender on the inside.
- Blanching: Blanching asparagus before roasting can help preserve its vibrant color and crispness. This method involves briefly boiling the asparagus in salted water, then plunging it into ice water to halt the cooking process, allowing for a quicker roast in the oven that maintains both texture and flavor.
- Grilling: While not strictly an oven technique, grilling asparagus can impart a smoky flavor that pairs well with many dishes. Grilling can be done using a grill pan in the oven or on an outdoor grill, and the direct heat creates char marks while keeping the inside tender and juicy.
- Seasoning: Proper seasoning is essential to enhance the natural flavor of asparagus. A simple mix of olive oil, salt, and pepper can be applied before roasting or grilling, but adding garlic, lemon zest, or parmesan cheese can elevate the dish further, providing depth and complexity.
- Time Management: Cooking time is crucial for perfect oven asparagus; overcooking can lead to mushiness. Generally, asparagus takes about 10-15 minutes to roast, depending on its thickness, so monitoring closely is key to achieving the ideal texture.
How Should You Season Oven Asparagus for Maximum Flavor?
To achieve maximum flavor when seasoning oven asparagus, consider the following methods:
- Olive Oil: Drizzling asparagus with high-quality olive oil not only enhances the natural flavor but also helps to achieve a crispy texture when roasted. The oil allows the seasonings to adhere better and promotes even cooking.
- Salt and Pepper: A simple yet effective combination, kosher salt and freshly ground black pepper bring out the natural sweetness of the asparagus. The salt enhances flavor, while the pepper adds a touch of heat and complexity.
- Lemon Zest and Juice: Adding fresh lemon zest brightens the dish, while a squeeze of lemon juice just before serving adds acidity that balances the richness of the oil. This combination provides a refreshing contrast and highlights the vegetable’s freshness.
- Garlic: Minced or thinly sliced garlic added to the asparagus before roasting infuses the dish with a savory depth. Roasted garlic becomes sweet and mellow, complementing the earthy flavor of the asparagus beautifully.
- Parmesan Cheese: Sprinkling grated Parmesan cheese over the asparagus in the final minutes of roasting creates a deliciously savory crust. The cheese melts and browns, adding a nutty flavor that elevates the overall dish.
- Balsamic Vinegar: A drizzle of balsamic vinegar before or after roasting adds a sweet and tangy depth of flavor. The acidity helps to cut through the richness and enhances the overall taste profile of the asparagus.
- Herbs and Spices: Fresh herbs like thyme, rosemary, or dill, or spices such as crushed red pepper flakes, can be added to create more complexity. These ingredients introduce aromatic notes and can be tailored to match your personal taste preferences.
What Are the Common Mistakes to Avoid When Roasting Asparagus in the Oven?
When roasting asparagus in the oven, there are several common mistakes to avoid for the best results:
- Not Preheating the Oven: Failing to preheat the oven can lead to uneven cooking and soggy texture. Preheating ensures that the asparagus begins to roast immediately, which helps to caramelize the edges and enhance flavor.
- Using Too Much Oil: Over-oiling asparagus can result in a greasy finish and can prevent the vegetable from achieving that desirable crispy texture. A light drizzle of oil is usually sufficient to coat the asparagus and allow for even roasting without excess moisture.
- Overcrowding the Baking Sheet: When too many asparagus spears are placed on a baking sheet, they can steam instead of roast. This overcrowding prevents proper airflow and results in a less than ideal texture, so it’s best to spread them out in a single layer.
- Not Trimming the Ends: Neglecting to trim the tough, woody ends of asparagus can lead to an unpleasant eating experience. The lower portions of the stalks are often fibrous and stringy, so it’s important to cut them off to ensure that each bite is tender.
- Ignoring Cooking Time: Roasting asparagus for too long can lead to a mushy texture, while not cooking it long enough can result in a crunchy, undercooked vegetable. A cooking time of about 12-15 minutes at a high temperature (around 400°F) is usually ideal for achieving that perfect balance.
- Not Seasoning Properly: Skipping seasoning or using too little can lead to bland asparagus. A sprinkle of salt, pepper, and perhaps some garlic or lemon zest can elevate the flavor significantly and complement the natural taste of the asparagus.
- Choosing the Wrong Size Asparagus: Using asparagus that is either too thin or too thick can affect the cooking time and texture. Thicker stalks may take longer to cook, while thinner ones may burn easily, so selecting medium-sized asparagus is often the best choice for even roasting.
What Are Some Creative Serving Ideas for Oven Roasted Asparagus?
There are several creative serving ideas for oven roasted asparagus that can elevate this simple dish.
- Parmesan and Lemon Zest: Toss the roasted asparagus with freshly grated Parmesan cheese and a sprinkle of lemon zest before serving. This combination adds a savory and tangy flavor that complements the natural earthiness of the asparagus.
- Wrap in Prosciutto: After roasting, wrap the asparagus spears in thin slices of prosciutto for a delightful appetizer or side dish. The saltiness of the prosciutto enhances the flavor of the asparagus and adds a crispy texture that contrasts nicely with the tenderness of the vegetables.
- Asparagus Salad: Chop the roasted asparagus into bite-sized pieces and mix with cherry tomatoes, feta cheese, and a light vinaigrette for a refreshing salad. This dish not only adds color but also combines flavors and textures that make for a vibrant side dish or light lunch.
- Asparagus with Balsamic Reduction: Drizzle the roasted asparagus with a balsamic reduction for a sweet and tangy finish. The rich, syrupy glaze enhances the natural sweetness of the asparagus while adding depth and elegance to the presentation.
- Asian-Inspired Stir-Fry: Incorporate the roasted asparagus into a stir-fry with tofu, bell peppers, and a soy sauce-based glaze. This transforms the asparagus into a key ingredient in a hearty dish, providing a crunchy texture and vibrant color that pairs beautifully with proteins and grains.
- Garnished with Toasted Nuts: Sprinkle toasted almonds or pine nuts over the roasted asparagus for a satisfying crunch. The nuttiness adds a layer of flavor and contrasts with the tender spears, making the dish more interesting and nutritious.
- Asparagus and Egg: Serve the roasted asparagus alongside a poached or fried egg for a delicious brunch option. The richness of the egg yolk complements the roasted flavor of the asparagus, creating a satisfying and balanced meal.