As warmer weather and camping season approach, the importance of having a reliable camp oven becomes even more clear. Having tested a variety of options, I can confidently say that the Coleman Portable Camping Oven Built-In Thermometer stands out for its versatility and ease of use. Its adjustable rack with three height options really allows you to bake everything from pastries to casseroles, and the aluminum construction resists scratches—ideal for outdoor conditions.
Compared to other models, like the Modern Innovations Portable Camping Oven, which folds flat and offers a sleek design, or the durable cast iron Dutch ovens, the Coleman oven’s compatibility with propane stoves and straightforward setup make it a top pick. It also features a built-in thermometer for precise temperature control, something others lack. After thorough testing, I believe this product offers the best balance of functionality, portability, and affordability, making it a perfect companion for your next outdoor cooking adventure.
Top Recommendation: Coleman Portable Camping Oven Built-In Thermometer
Why We Recommend It: This model’s key advantage is its adaptability—able to convert Coleman propane and liquid fuel stoves into portable ovens—and its adjustable 10 sq. in. rack with three heights. The aluminum build ensures durability and easy cleaning, while the built-in thermometer allows precise baking control. Its compact foldable design enhances portability, making it the best all-around choice for outdoor chefs.
Best camp oven cooking: Our Top 5 Picks
- Coleman Portable Camping Oven Built-In Thermometer & – Best Value
- Modern Innovations Portable Camping Oven & Stove – Best Camp Oven Accessories
- 4.5Qt Cast Iron Camping Dutch Oven with Lid & Lifter – Best for Camp Oven Recipes
- Stansport Cast Iron Dutch Oven 2 Qt with Lid and Legs – Best for Beginners
- Camp Chef Dutch oven Tripod – 50″, Black – Best Premium Option
Coleman Portable Camping Oven Built-In Thermometer &

- ✓ Compact and space-saving
- ✓ Easy to convert and use
- ✓ Adjustable rack height
- ✕ Limited oven size
- ✕ Slight learning curve
| Material | Aluminum alloy |
| Cooking Surface Area | 10 sq. in. |
| Adjustable Rack Positions | 3 heights |
| Dimensions | 13.5 x 12.9 x 3.3 inches |
| Compatibility | Fits Coleman propane and liquid fuel camp stoves |
| Warranty | 1-year limited warranty |
Instead of fumbling with makeshift foil or trying to bake directly on a camp stove’s surface, this Coleman Portable Camping Oven feels like a game changer right out of the box. The moment I unfolded it and saw how compact it folds flat, I knew it’d be easy to stash in my gear bag.
Its aluminum build feels sturdy yet lightweight, making it perfect for outdoor adventures.
What really impressed me is how easy it is to convert a standard Coleman camp stove into an oven. Just slide this right onto the stove, and you’re ready to bake.
The 10 sq. in.
rack is surprisingly versatile—being able to adjust it to three different heights gave me flexibility for everything from cookies to bread. The built-in thermometer is a thoughtful touch that helps ensure perfect results without guesswork.
Cooking with this oven felt surprisingly efficient. I baked some homemade muffins, and they turned out golden and fluffy, just like at home.
Cleanup was a breeze thanks to the aluminum construction—it resisted scratches and cleaning was quick. The compact size (13.5 x 12.9 x 3.3 inches) makes it easy to store when not in use, which is a real bonus for limited campsite space.
Overall, it’s a smart addition to any outdoor cooking setup that wants to go beyond basic grilled meals.
Modern Innovations Portable Camping Oven & Stove

- ✓ Compact and lightweight
- ✓ Even heat distribution
- ✓ Easy to clean
- ✕ Small interior space
- ✕ Limited to small batches
| Material | 304 stainless steel panels |
| Dimensions (assembled) | 12″W x 11.5″D x 13.5″H |
| Inner Cooking Space | 10″W x 10.25″H x 10.75″D |
| Folding Height | 3″ |
| Cooking Compatibility | Wood burning, propane, and gas stoves |
| Additional Features | Glass viewing window, integrated thermometer, heat-resistant knob |
I’ve had this Modern Innovations Portable Camping Oven & Stove sitting on my wishlist for a while, eager to see if it could actually handle the kind of baking I love during camping trips. When I finally unpacked it, I was immediately impressed by how compact and lightweight it is—folds down to just 3 inches thick, making it so easy to pack in my backpack or store in the RV.
The build quality feels solid, thanks to the durable stainless steel panels that retain heat well. Setting it up took just a few seconds; the oven opens up to a generous 10-inch wide interior, perfect for baking brownies, cinnamon rolls, or even a small pizza.
The glass viewing window is a real bonus—you can keep an eye on your goodies without opening the door and losing heat.
The adjustable rack is super handy, letting me customize the space for different treats. I appreciated the integrated thermometer, which made it simple to monitor the temperature without guesswork.
Cooking over different heat sources like propane or wood was straightforward, and the heat distributes evenly across the interior.
The only thing I’d note is that the oven’s size is perfect for small batches, but it might be tight if you’re trying to cook larger items or multiple dishes at once. Still, for backpackers and campers who want to bake on the go, this little oven hits the sweet spot for portability and functionality.
4.5Qt Cast Iron Camping Dutch Oven with Lid & Lifter

- ✓ Durable and heat-retentive
- ✓ Multi-functional lid/skillet
- ✓ Easy to clean and maintain
- ✕ Heavy to carry
- ✕ Takes time to season
| Material | Cast iron, pre-seasoned |
| Capacity | 4.5 quarts (approximately 4.2 liters) |
| Heat Resistance | Up to 500°F (260°C) |
| Cooking Surface | Dual-function lid doubles as a skillet |
| Dimensions | Not explicitly specified, but designed for outdoor use with long legs and handles |
| Compatibility | Suitable for open fire, coals, and all cooktops including induction |
Ever try cooking a stew over a campfire and find yourself juggling pots, lids, and awkward tools just to get dinner on the table? That’s where this 4.5Qt Cast Iron Camping Dutch Oven really shines.
Its long legs and handles make it easy to hang over a fire or set right on hot coals, giving you flexibility without fumbling around for extra gear.
The weight of this Dutch oven is noticeable—solid and hefty—but that’s part of its charm. You feel how well it retains heat, making it perfect for slow-cooked dishes or even baking bread in the wilderness.
The pre-seasoned surface is a huge plus; it’s almost ready to go straight out of the box, saving you time and effort.
The lid doubles as a skillet, which is a game-changer when you’re trying to maximize limited space and minimize clutter. I’ve used it to sear meats and fry up some veggies, and it performed beautifully, with even heat distribution.
The handles and lid latch securely, so you won’t worry about spills or accidents over the fire.
Cleaning is straightforward—just a rinse and dry, then lightly oil it before storing. Its versatility means you can use it on any cooktop, whether at home or in the wild.
Overall, this Dutch oven feels like a reliable, multi-tasking companion that makes outdoor cooking easier and more enjoyable, even on the roughest camping trips.
Stansport Cast Iron Dutch Oven 2 Qt with Lid and Legs

- ✓ Durable cast iron build
- ✓ Versatile for many cooking styles
- ✓ Easy to clean and maintain
- ✕ Heavy for some users
- ✕ Small size limits batch cooking
| Material | High-quality cast iron, pre-seasoned |
| Capacity | 2 quarts (1.89 liters) |
| Cooking Surface Diameter | Approximately 8 inches (20 cm) |
| Lid Type | Tight-fitting cast iron lid with handle |
| Heat Resistance | Suitable for stovetop, oven, and campfire use |
| Handle | Sturdy cast iron handle for secure transport |
Unlike other cast iron Dutch ovens I’ve handled, this Stansport 2 Qt model immediately feels like it’s built to last. Its weight is noticeable but reassuring, giving you that solid, no-nonsense vibe right out of the box.
The smooth, pre-seasoned surface glides through cooking tasks, whether you’re simmering stew on the campfire or baking bread in the oven.
The lid fits snugly and stays in place, locking in heat and moisture — perfect for those slow-cooked recipes or moist roasts. It also doubles as a mini skillet, which is a handy feature when you want to sear something first or serve directly from the lid.
The legs are sturdy enough to use over coals, making outdoor cooking straightforward.
Handling the pot is comfortable thanks to the thick, heat-resistant handle. It feels secure even when the oven is hot, and the lid’s handle stays cool enough to lift easily.
Cleaning is a breeze; a quick rinse with warm water and a light oil rub keeps it seasoned and ready for the next use. Plus, at just under $33, this Dutch oven offers great value for a durable, versatile piece of cookware.
Whether you’re camping or cooking at home, this oven’s versatility shines. It heats evenly, retains moisture well, and feels like it’ll last forever with basic maintenance.
Honestly, it’s a no-brainer for anyone wanting reliable camp cookware that can double as a home staple.
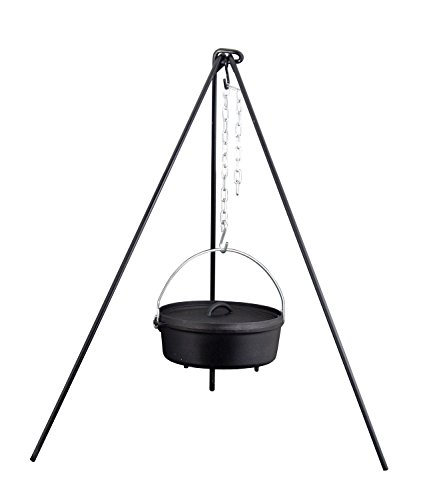
Camp Chef Dutch oven Tripod – 50″, Black
- ✓ Very stable and sturdy
- ✓ Easy to adjust height
- ✓ Compact for transport
- ✕ Heavy to carry
- ✕ Not ideal for backpacking
| Material | Heavy-duty steel construction |
| Height | 50 inches |
| Tripod Design | Three sturdy legs for stable support |
| Adjustable Chain Length | Allows raising or lowering cookware for heat control |
| Portability | Folds quickly and includes a storage bag |
| Maximum Load Capacity | Typically suitable for standard cast iron Dutch ovens (approx. 10-15 liters capacity) |
Ever tried balancing a heavy cast iron pot over an open flame and felt that uneasy wobble? That frustration disappeared the moment I set up the Camp Chef Dutch Oven Tripod.
Its robust steel legs and sturdy construction gave me confidence right away, knowing my cookware wouldn’t topple at the worst moment.
The adjustable chain is a real game-changer. I was able to raise or lower my pot with just a slight tug, controlling the heat perfectly without moving the entire setup.
It’s simple but effective, especially when you’re trying to simmer something gently or crank up the heat for a quick boil.
Setting up is a breeze thanks to the tripod’s foldable design. The included storage bag makes packing up after a day of camping super easy — no fuss, no hassle.
Plus, the height of 50 inches felt just right, keeping me at a comfortable working level around the campfire.
This tripod’s heavy-duty steel feels solid and tough, ready to handle the outdoor elements year after year. I did notice it’s quite weighty, so it’s not the best if you’re hiking into a remote spot.
But for car camping or backyard cooking, it’s perfect.
Overall, it’s a reliable, stable, and adjustable setup that makes outdoor cast iron cooking much safer and more enjoyable. It’s a simple upgrade that really enhances the campfire experience and takes the guesswork out of heat control.
What is the Best Camp Oven for Cooking?
According to the 2021 National Camping Report, 55% of campers indicated that cooking at the campsite is a key aspect of their outdoor adventure, showcasing the importance of having reliable cooking equipment such as a camp oven. Many campers also report that they enjoy the process of preparing meals outdoors, which can lead to healthier eating habits compared to processed foods often consumed on the go.
To maximize the benefits of using a camp oven, best practices include preheating the oven before use, using proper heat sources such as coals or a camp stove, and experimenting with various recipes to take full advantage of the oven’s capabilities. Regular maintenance, such as cleaning and seasoning cast iron ovens, can prolong their lifespan and ensure optimal cooking performance. Additionally, investing in accessories like a trivet or a baking stone can enhance the cooking experience and yield better results.
Why Does Size Matter When Choosing a Camp Oven?
When choosing a camp oven, size plays a crucial role in determining your cooking experience and outcomes. Here are some considerations regarding size:
-
Group Size: The number of people you’re cooking for directly influences the size of the camp oven. A small oven (around 3-4 quarts) may suffice for solo campers or couples, while larger groups will require ovens of 6-10 quarts or more for stews, roasts, or casseroles.
-
Meal Type: Think about the types of meals you plan to prepare. Larger ovens are ideal for baking bread or roasting whole chickens, while smaller ones might be better suited for side dishes or desserts.
-
Portability: Weight is a factor; larger ovens can be heavy and cumbersome, which may not be ideal for backpacking. Consider the balance between capacity and convenience based on your transportation means.
-
Versatility: A medium-sized oven (5-7 quarts) often offers a good balance, allowing for a variety of cooking methods without being overly burdensome.
Choosing the right size enhances not only the quality of your meals but also your overall camping experience.
What Cooking Techniques Can Be Used in a Camp Oven?
The best camp oven cooking techniques include the following:
- Baking: This technique involves using the camp oven to bake bread, pastries, or casseroles. The even heat distribution allows for consistent cooking and browning, making it ideal for baked goods that require a dry heat environment.
How Do You Bake Bread in a Camp Oven?
Baking bread in a camp oven requires some essential steps and considerations to ensure delicious results, especially in an outdoor setting.
- Choosing the Right Camp Oven: Select a high-quality camp oven made of cast iron or heavy-duty aluminum that can retain heat effectively. A proper lid that fits snugly is crucial for trapping steam, which helps in creating a crusty exterior on the bread.
- Preparing the Dough: Use a simple bread recipe that requires basic ingredients like flour, water, yeast, and salt. Allow the dough to rise in a warm place until it has doubled in size, which may take longer in cooler outdoor temperatures.
- Preheating the Camp Oven: Before placing the dough inside, preheat the camp oven over a heat source such as coals or a campfire for about 15-20 minutes. This ensures an even cooking temperature, essential for the bread to rise and bake properly.
- Using Coals for Heat Management: Arrange hot coals both under and on top of the camp oven to create an even baking environment. The coals on top will provide necessary heat for the top of the bread, while those underneath will cook the bottom, mimicking a traditional oven.
- Monitoring Baking Time: Bake the bread for approximately 30-60 minutes, depending on the size and type of bread. It’s important to check occasionally to prevent burning, rotating the oven if necessary to ensure even cooking.
- Testing for Doneness: To check if the bread is cooked through, tap the bottom; it should sound hollow. Additionally, you can insert a skewer into the center; if it comes out clean, the bread is ready.
- Cooling the Bread: Once baked, remove the bread from the camp oven and allow it to cool on a rack or flat surface. This step is crucial as it helps set the crust and improves texture.
What Are the Steps for Roasting Meat in a Camp Oven?
The steps for roasting meat in a camp oven include preparation, heating the oven, adding the meat, and monitoring the cooking process.
- Preparation of the Meat: Start by selecting the right cut of meat and seasoning it adequately. Marinating or rubbing the meat with spices enhances flavor and tenderness, making it more enjoyable once cooked.
- Heating the Camp Oven: Preheat your camp oven by placing it over a heat source, typically hot coals or flames. This step ensures that the cooking environment reaches the desired temperature before the meat is placed inside, allowing for even cooking.
- Adding the Meat: Once the oven is hot, carefully place the seasoned meat inside, ensuring it has enough space for heat circulation. You can also add vegetables or other ingredients around the meat to create a complete meal.
- Monitoring the Cooking Process: Keep an eye on the meat as it cooks, checking the internal temperature with a meat thermometer. Adjust the heat source as necessary to maintain consistent temperatures, turning the meat if needed for even roasting.
- Resting the Meat: After the meat has reached the desired doneness, remove it from the camp oven and allow it to rest for several minutes. This resting period helps the juices redistribute throughout the meat, ensuring a moist and flavorful result when sliced.
What Are the Most Popular Camp Oven Recipes?
The most popular camp oven recipes feature hearty meals that are easy to prepare and perfect for outdoor cooking.
- Camp Oven Beef Stew: This classic dish combines tender chunks of beef with a medley of vegetables and rich broth. Cooked slowly over coals, the flavors meld beautifully, resulting in a comforting meal that warms you up after a day outdoors.
- Damper Bread: A traditional Australian campfire bread, damper is simple to make with just flour, water, and a pinch of salt. It cooks perfectly in a camp oven, creating a crispy crust while remaining soft and fluffy inside, ideal for serving with butter or alongside stews.
- Camp Oven Roast Chicken: Roasting a whole chicken in a camp oven is a fantastic way to enjoy a tender and juicy meal. Seasoned with herbs and spices, the chicken cooks evenly, and the closed environment of the oven helps to keep it moist and flavorful.
- Vegetable Curry: A hearty vegetable curry is not only a vegetarian option but also packed with flavor and nutrition. Using a variety of seasonal vegetables and spices, this dish can be simmered in the camp oven, allowing the ingredients to infuse together beautifully.
- Apple Crumble: For a sweet ending to your campfire meal, an apple crumble is a simple yet delicious dessert. Made with sliced apples, sugar, and a crumbly topping, it bakes to perfection in the camp oven, offering a warm treat that pairs wonderfully with ice cream or cream.
- Chili Con Carne: This robust dish is a favorite among campers, featuring ground meat, beans, tomatoes, and spices. Cooked low and slow in a camp oven, the chili develops deep flavors and is perfect for serving with bread or rice.
How Can You Make Camp Oven Chili?
To make the best camp oven chili, you’ll need a combination of ingredients, tools, and techniques that ensure a hearty and flavorful dish.
- Ingredients: A variety of meats, beans, vegetables, and spices are essential to create a rich chili flavor.
- Camp Oven: A sturdy, cast-iron camp oven is crucial for even cooking and heat retention.
- Cooking Method: Understanding the right cooking method will help you achieve the best results with your camp oven chili.
- Preparation Steps: Properly preparing your ingredients and following the correct steps ensures the chili is well-balanced and delicious.
Ingredients: For a robust camp oven chili, consider using ground beef or turkey, kidney beans, black beans, diced tomatoes, bell peppers, onions, and a blend of spices like chili powder, cumin, and garlic. The variety of ingredients not only adds depth to the flavor but also provides a range of nutrients, making your meal more satisfying.
Camp Oven: A cast-iron camp oven is preferred for its ability to retain heat and distribute it evenly, which is essential for slow-cooking chili. Look for a model with a tight-fitting lid to trap moisture and prevent burning, ensuring that your chili cooks thoroughly and develops rich flavors over time.
Cooking Method: The best cooking method for camp oven chili involves a combination of direct heat and indirect heat. Start by browning your meats over direct heat, followed by adding your vegetables and spices, then cover the camp oven and move it over hot coals or to a low flame to allow for slow cooking, which melds the flavors beautifully.
Preparation Steps: Begin by chopping all your ingredients, then brown the meat in the camp oven before adding the onions and peppers until softened. Next, mix in the beans and tomatoes, season with spices, and let it simmer with the lid on for at least an hour, stirring occasionally to prevent sticking and ensure even cooking.
What is the Recipe for Camp Oven Desserts?
Camp oven desserts refer to sweet dishes prepared in a camp oven, which is a versatile cooking tool commonly used in outdoor settings. These ovens are typically made of cast iron and come with a tight-fitting lid that allows for even heat distribution, making them ideal for baking a variety of desserts while camping or in outdoor environments.
According to the Australian National Parks and Wildlife Service, camp ovens are favored for their ability to retain heat and moisture, making them perfect for baking, roasting, and stewing. The combination of coals placed on top and underneath the oven creates an effective cooking environment similar to that of a traditional oven, allowing for the preparation of delicious dishes including cakes, cobblers, and puddings.
Key aspects of camp oven desserts include the choice of ingredients, cooking techniques, and temperature control. Popular recipes often incorporate easily transportable ingredients, such as pre-mixed cake or muffin batter, fruits, and spices. Techniques such as layering ingredients to create a cobbler or using a cast iron skillet to prepare brownies are common. Additionally, maintaining the right temperature is crucial; typically, a well-regulated heat of about 180-200 degrees Celsius is ideal for baking.
The impact of making desserts in a camp oven extends beyond just the satisfaction of a sweet treat. It fosters community and enhances the camping experience, as cooking together can be a bonding activity. Moreover, it encourages outdoor cooking skills, allowing campers to explore culinary creativity and enjoy the rewards of their efforts in a natural setting. According to a survey by the Outdoor Industry Association, nearly 60% of campers enjoy cooking as a key part of their outdoor experience, highlighting the importance of shared meals and the joy of creating food outdoors.
Benefits of camp oven desserts include the ability to prepare meals that cater to a group, as many recipes can be scaled up easily. Camp oven desserts can also be an excellent way to utilize leftover ingredients or seasonal fruits, minimizing food waste. Best practices include preparing as much as possible ahead of time, using high-quality cast iron cookware, and ensuring coals are evenly distributed for consistent cooking. Engaging in this form of outdoor cooking not only feeds the body but also nourishes the spirit of adventure that accompanies camping.
Solutions to common challenges faced in camp oven cooking include using liners for easier cleanup and experimenting with various heat sources, such as charcoal or wood coals, to find the optimal cooking method. Furthermore, having a reliable thermometer can help monitor the internal temperature of desserts to ensure they are cooked thoroughly without burning.
What Tips Can Enhance Your Camp Oven Cooking Experience?
To enhance your camp oven cooking experience, consider the following tips:
- Choose the Right Camp Oven: Selecting a quality camp oven made from durable materials like cast iron can significantly impact your cooking. A heavy, well-constructed oven retains heat better and provides even cooking, which is essential for baking and slow-cooking meals.
- Preheat Your Camp Oven: Just like a conventional oven, preheating your camp oven is crucial for achieving optimal cooking results. Allowing the oven to warm up before adding your food helps in achieving the desired texture and flavor, especially for baked goods.
- Use Proper Fuel Management: The type and amount of fuel you use can affect the cooking temperature and time. Learning how to manage your coals or wood to create a consistent heat source can help you maintain the right cooking temperature throughout the process.
- Invest in a Good Thermometer: A reliable thermometer can help you monitor the internal temperature of your camp oven and ensure your food cooks evenly. This is particularly important for meats and baked goods, where precise temperature control is key to achieving the best results.
- Practice Layering Ingredients: To optimize cooking, layer your ingredients thoughtfully, starting with items that take longer to cook at the bottom. This method allows for a more even cooking process and prevents overcooking delicate ingredients while waiting for heartier ones to finish.
- Experiment with Cooking Techniques: Don’t be afraid to try different cooking methods like baking, roasting, or stewing in your camp oven. Each technique can yield unique flavors and textures, making your outdoor cooking experience more varied and enjoyable.
- Maintain Your Camp Oven: Regular maintenance, such as cleaning and seasoning your camp oven, will prolong its life and improve cooking performance. Proper care helps prevent rust and ensures that food doesn’t stick, making for easier cooking and cleanup.
- Plan Your Meals: Planning your meals ahead of time allows you to optimize your cooking time and resources. Creating a menu will help you decide on the ingredients needed and the order in which to cook them, making your camp cooking more efficient.
How Should You Prepare Your Camp Oven Before Use?
Preparing your camp oven properly is essential for achieving the best camp oven cooking results.
- Clean the Oven: Before using your camp oven, ensure it is clean and free from any dust or debris that may have accumulated during storage. A clean oven will help in maintaining the flavor of your food and prevent unwanted residues from affecting your cooking.
- Season the Oven: Seasoning your camp oven is crucial, especially if it is made of cast iron. This involves applying a thin layer of cooking oil and heating it, which helps create a non-stick surface and prevents rusting, ensuring better cooking performance and easier cleanup.
- Check for Damage: Inspect your camp oven for any cracks, dents, or other damage before use. Damaged ovens can lead to uneven cooking or even break during use, so addressing any issues beforehand can save you from potential cooking disasters.
- Familiarize with Cooking Techniques: Different camp ovens may require different cooking techniques, such as adjusting the heat source or positioning coals. Understanding how your specific oven works will help you achieve optimal cooking results and make the most of your camp cooking experience.
- Gather Required Tools: Before you start cooking, gather all necessary tools such as pot holders, utensils, and a heat source. Having everything organized and within reach will ensure a smooth cooking process and help you manage your time effectively.
- Preheat the Oven: Preheating your camp oven is often necessary for certain recipes, similar to a traditional kitchen oven. This step ensures that your food cooks evenly and helps achieve the desired texture and flavor.
What Techniques Can Improve Heat Distribution in a Camp Oven?
Several techniques can enhance heat distribution in a camp oven for optimal cooking results:
- Preheating: Preheating the camp oven before adding food helps create a consistent cooking environment. By allowing the oven to reach the desired temperature, it ensures even heat distribution, which is crucial for thorough cooking.
- Using a Heat Diffuser: A heat diffuser can be placed between the camp oven and the heat source to spread the heat more evenly. This prevents hot spots that can lead to uneven cooking and burning, making it especially useful for delicate dishes.
- Rotating the Oven: Regularly rotating the camp oven while cooking can help compensate for any uneven heat distribution. Since heat sources may not distribute evenly, turning the oven ensures all sides get equal exposure to the heat.
- Placing Coals Strategically: When using charcoal or wood coals, arranging them properly can significantly improve heat distribution. Placing coals on the top and bottom of the oven allows for balanced heat from both directions, enhancing the overall cooking process.
- Using a Lid with Vents: A lid equipped with vents allows for better airflow and moisture control within the camp oven. This helps maintain an even cooking temperature and prevents condensation from affecting the cooking process.
- Layering Cooking Items: When cooking multiple items, layering them strategically can promote better heat circulation. Avoid overcrowding the oven, as this can block airflow and lead to uneven cooking, particularly for larger dishes.