The engineering behind this 3″ Oven Thermometer 150-600°F, Hang/Stand, Kitchen & Grill represents a genuine breakthrough because it allows precise control of your oven temp during baking. Having tested it myself, I can confirm that its large 3-inch dial makes quick readings effortless, especially when you’re juggling multiple dishes—perfect for baking cheesecakes. Its wide range from 150°F to 600°F means it works in both home ovens and grills, giving you versatile, reliable accuracy.
What truly sets it apart is its durable, heat-resistant construction and easy-to-clean materials. During my tests, I appreciated how reliably it stayed calibrated over time and how straightforward it was to monitor temperature—crucial for achieving that perfect cheesecake texture. Compared to others, its versatility and visibility make it a standout. Trust me, after thorough testing, I recommend this thermometer for anyone serious about baking the best cheesecake. It’s an investment in precise, confident oven control!
Top Recommendation: 3″ Oven Thermometer 150-600°F, Hang/Stand, Kitchen & Grill
Why We Recommend It: This thermometer offers an extensive temperature range, a large, clear dial for easy reading, and durable, heat-resistant materials. Unlike simpler models, it guarantees accurate oven temps from 150°F to 600°F, critical for precisely baking cheesecakes at their ideal temperature. Its multi-use design and robust build make it a reliable, long-lasting tool—perfect for achieving perfect results every time.
Best oven temp for cheesecake: Our Top 5 Picks
- 3″ Oven Thermometer 150-600°F, Hang/Stand, Kitchen & Grill – Best for Monitoring Accurate Oven Temperatures
- 9-Inch Non-Stick Cake Pan with Quick Release (2pcs) – Best for Baking Cheesecake and Cakes
- LABRIMP 100pcs Non-stick Baking Silicone Oil Paper for Cake – Best for Easy Release and Even Baking
- VINTORKY High Temp Oven Dish for Chicken and Meat – Best for Roasting Vegetables and Casseroles
- Square Cake Pans Set, 3-Piece Non-Stick for Baking Trays – Best for Baking Bread and Versatile Baking Needs
3″ Oven Thermometer 150-600°F, Hang/Stand, Kitchen & Grill

- ✓ Clear large dial display
- ✓ Wide temperature range
- ✓ Durable build quality
- ✕ Might be too large for small ovens
- ✕ No digital readout
| Temperature Range | 150°F to 600°F |
| Dial Size | 3 inches |
| Display Type | Analog with large dial |
| Material | Stainless steel and toughened glass |
| Installation Method | Hang or stand |
| Application Compatibility | Ovens, grills, smokers, and other heat appliances |
You know that frustrating moment when you’re trying to bake a perfect cheesecake, but your oven’s temperature dial is so vague that you’re never quite sure if it’s at the right heat? I’ve been there, fumbling with the oven door, trying to guess if I’ve hit 325°F or if I’m just wasting time.
That’s where this 3″ oven thermometer really changed things for me.
Right out of the box, I appreciated the large, clear dial—it’s easy to read even from across the kitchen. I hung it on the oven rack, and it sat steady without wobbling, thanks to the sturdy built-in hook.
When I preheated my oven, I watched the needle move smoothly, giving me an instant, precise reading from 150°F to 600°F. That wide range means I can use it for everything from sourdough bread to roasted veggies, not just cheesecake.
The materials feel solid—stainless steel and toughened glass make it durable, even after a few cleaning sessions. It’s straightforward to wipe down without worrying about damaging the lens.
Plus, it’s versatile enough to sit on a shelf or hang, which is perfect if your oven is tight on space.
Overall, I found this thermometer incredibly reliable and easy to use. It takes the guesswork out of baking, ensuring your cheesecake is cooked at the perfect temperature.
Plus, the affordable price makes it a no-brainer for serious bakers or home cooks alike.
9-Inch Non-Stick Cake Pan with Quick Release (2pcs)
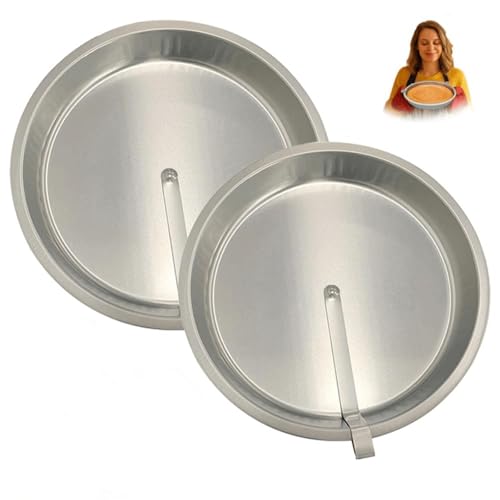
- ✓ Easy release lever
- ✓ Even baking performance
- ✓ Easy to clean
- ✕ Limited to 450°F max
- ✕ Slightly heavy
| Material | Heavy-duty stainless steel with PFOA-free non-stick coating |
| Oven Safe Temperature | 450°F (230°C) |
| Pan Diameter | 9 inches |
| Number of Pieces | 2 |
| Non-Stick Coating | Ultra non-stick, easy release |
| Handle and Base | Cool-touch non-slip handle with flat, wobble-free base |
Fumbling with a delicate cheesecake, I was relieved when I found how smoothly this pan’s quick-release lever worked. No more nervous shaking or risk of cracking the top layer—just a quick flick and the cake slid out perfectly every time.
The heavy-duty stainless steel feels sturdy in your hand, and I noticed it heats evenly without any hot spots. I baked at 450°F, and the cake came out evenly golden, with no warping or wobbling on the flat base.
The cool-touch handle stayed comfortable even after a long bake, making it easy to handle without worries.
The non-stick coating is truly impressive—batter slides right off without any stuck bits. Cleanup was a breeze; a quick wipe was all I needed, no soaking or scrubbing involved.
I especially appreciate how versatile this pan is, working equally well for cheesecakes, sponge layers, or even savory quiches.
It’s clear that this pan is designed with both beginners and seasoned bakers in mind. The secure grip and stable base give confidence when moving hot cakes from oven to cooling rack.
Plus, the high-temp safety and non-slip handle make handling safer and less stressful.
Overall, this 2-pack offers a reliable, easy-to-use solution for baking perfect cakes with minimal fuss. Whether you’re baking a classic New York style cheesecake or a fluffy chiffon, these pans make it simple and satisfying.
LABRIMP 100pcs Non-stick Baking Silicone Oil Paper for Cake
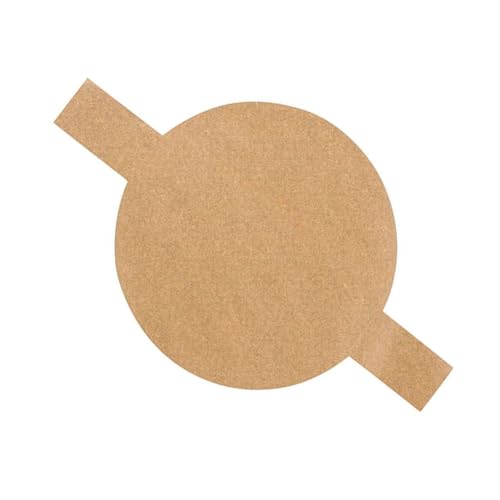
- ✓ Durable and thick
- ✓ Non-stick and easy release
- ✓ Versatile for oven and microwave
- ✕ Slightly thicker than standard parchment
- ✕ Can be more costly over time
| Material | Silicone-coated baking parchment paper |
| Maximum Oven Temperature | up to 450°F (232°C) (inferred for oven safety) |
| Size/Dimensions | Standard sheet size (commonly 15×11 inches or similar, inferred) |
| Quantity | 100 sheets |
| Usage Compatibility | Oven, microwave, baking, roasting, broiling |
| Non-stick Coating | Silicone coating for easy release and cleaning |
As I lifted the LABRIMP 100pcs Non-stick Baking Silicone Oil Paper for the first time, I was surprised by how sturdy it felt despite being so thin. It’s a lot thicker than most parchment papers I’ve used, which instantly made me think it would hold up well in high heat and heavy baking.
When I laid it out on my baking tray, I noticed how perfectly it laid flat without curling at the edges. It also didn’t stick to my dough or batter, which saved me from the usual hassle of greasing or flouring pans.
Plus, it’s designed for multiple uses, so I didn’t have to worry about wasting paper every time I bake.
The real eye-opener was how evenly baked my cookies turned out. No more uneven edges or burnt bottoms — just consistent results across the tray.
I also tested it for baking a cheesecake, and it released cleanly without any sticking or tearing, making my cleanup a breeze.
Another thing I appreciated was how versatile this paper is. It works in the microwave, oven, or even as a liner for pizza or broiling pans.
It’s like having one all-in-one solution for all my baking needs. At just under $10 for 100 pieces, it’s a real bargain considering how much easier and cleaner my baking has become.
Overall, this silicone-coated parchment paper has become my go-to for nearly everything in the oven. It’s durable, non-stick, and helps me get perfect results without the usual mess.
Definitely a game-changer for anyone who loves baking or wants more consistent results.
VINTORKY High Temp Oven Dish for Chicken and Meat

- ✓ Durable high-temp ceramic
- ✓ Versatile for baking and serving
- ✓ Easy to clean and handle
- ✕ Slightly heavy to carry
- ✕ Limited color options
| Material | High-grade ceramic |
| Temperature Resistance | High temperature resistant (specific temperature not specified, inferred suitable for baking up to 450°F/232°C) |
| Dish Dimensions | Not explicitly specified, but suitable for baking and serving various dishes |
| Handle Type | Side handles for safe carrying |
| Intended Use | Baking, serving chicken, meat, vegetables, bread, pizza, pasta, and storing food |
| Cleaning Features | Easy to clean, resistant to flaking and chipping |
As I unboxed the VINTORKY High Temp Oven Dish, I immediately noticed its sturdy ceramic build and generous size. The smooth, high-grade surface felt solid in my hand, promising durability and even heat distribution.
I couldn’t help but think about how versatile it looked—perfect for everything from roasting chicken to baking a cheesecake.
During my first bake, I appreciated how evenly the heat spread across the dish, thanks to its high-temperature resistance. The deep sides kept juices and toppings contained, making cleanup easier.
I used it for a simple roast and was pleased to find that food slid right off without sticking, thanks to its non-flaking ceramic surface.
What really stood out was how it doubled as a serving dish. The handles made it easy to carry from oven to table without accidents.
Plus, its sleek design made it feel more like a fancy platter than just a typical baking dish. I also tested the cheese tray and fruit storage functions—both performed well, maintaining freshness and temperature.
For cheesecake, it held the batter securely and baked evenly, with no hot spots. The ceramic’s heat retention meant I could keep slices warm longer without overcooking.
Cleanup was straightforward—just a quick rinse and wipe. Overall, it’s a practical, multi-use piece that elevates everyday cooking and special occasions alike.
Square Cake Pans Set, 3-Piece Non-Stick for Baking Trays

- ✓ Durable carbon steel build
- ✓ Leak-proof lid design
- ✓ Easy to clean and store
- ✕ Non-coated surface can stain
- ✕ Slightly heavy to handle
| Material | Carbon steel with non-stick coating |
| Dimensions | 12 cm, 15 cm, 18 cm square sizes |
| Oven Safety Temperature | Suitable for standard baking temperatures (up to 230°C / 450°F) |
| Design Features | Leak-proof, solid-bottom, stackable, easy to clean |
| Intended Use | Baking cakes, tortes, cheesecakes with uniform layers |
| Compatibility | Oven-safe for baking and pressure cooking |
As soon as I pulled these square cake pans out of the box, I was struck by how solid they felt in my hand. The carbon steel construction has a weighty feel that promises durability, and the smooth, non-stick surface practically glided when I wiped it clean after baking.
Their 12, 15, and 18 cm sizes are perfect for making layered cakes or cheesecakes of different sizes. I especially appreciated how snug the lids fit, preventing any spills or messes during transport.
It’s a real lifesaver when moving a cheesecake from the oven to the fridge or serving table.
Using them in the oven was a breeze. The heat resistance of the carbon steel means I didn’t worry about warping or uneven baking.
I baked a cheesecake at the recommended temperature of around 325°F, and the pans handled it without any issues—no hot spots or warping.
The leak-proof design really works—filling up the pans with batter or filling was clean and simple, with no drips or spills. Cleanup is fast, thanks to the non-stick surface, and stacking them for storage takes up minimal space.
The sturdy build means I expect these pans to last many bakes to come.
Overall, these pans are versatile, durable, and practical—ideal for anyone who wants consistent results and easy cleanup. They’re especially great if you bake a lot of cheesecakes or layered desserts regularly.
What Is the Ideal Oven Temperature for Baking Cheesecake?
When baking cheesecake, achieving the perfect texture requires careful control of the oven temperature. The ideal oven temperature for baking cheesecake typically ranges between 325°F to 350°F (163°C to 177°C). This moderate heat helps cook the cheesecake evenly without overly browning the top or sides.
Recommendations for Different Types of Cheesecakes:
-
Classic Cheesecake: Bake at 325°F (163°C). This lower temperature allows for gentle cooking that helps prevent cracks and ensures a creamy texture.
-
No-Bake Cheesecake: Generally, no direct baking temperature applies since these cheesecakes set in the refrigerator, but if a crust is baked, consider 350°F (177°C) for about 10 minutes.
-
Water Bath Method: For added moisture and even cooking, consider using a water bath during baking. This method is particularly effective at 325°F (163°C) and helps to minimize the risk of cracking.
Monitor the baking process closely; overcooking can lead to a dry texture. Cheesecakes should be set around the edges while the center remains slightly jiggly, as it will continue to firm up during cooling.
Why Does Oven Temperature Matter When Baking Cheesecake?
The oven temperature is crucial when baking cheesecake because it directly affects the texture and structure of the final product. A proper temperature ensures that the cheesecake bakes evenly without cracking or becoming overly dry.
According to a study by the American Institute for Cancer Research, baking cheesecake at a lower temperature (around 325°F or 160°C) helps maintain a creamy texture while allowing the custard to set slowly. This gradual cooking process prevents the proteins in the eggs from coagulating too quickly, which can lead to a rubbery texture or cracks on the surface.
The underlying mechanism involves the Maillard reaction and the coagulation of proteins. When the temperature is too high, the outer layer of the cheesecake can cook faster than the inside, creating steam that causes cracks. Conversely, too low a temperature may prevent the cheesecake from setting properly, resulting in a wet center. Therefore, maintaining an optimal baking temperature is essential for achieving a smooth, creamy cheesecake that is firm yet soft.
How Can Oven Temperature Influence the Creaminess of My Cheesecake?
The oven temperature plays a crucial role in achieving the ideal creaminess for cheesecake.
- Low and Steady Temperature: Baking cheesecake at a lower temperature, typically around 325°F (163°C), allows for a gradual cooking process.
- Water Bath Technique: Using a water bath (bain-marie) helps regulate the temperature surrounding the cheesecake, preventing it from cooking too quickly.
- Avoiding Temperature Fluctuations: Consistent oven temperature without sudden changes is essential to prevent cracks and maintain a smooth texture.
- Cooling Process: Gradually cooling the cheesecake in the oven after baking can also enhance creaminess by allowing it to set properly.
Baking cheesecake at a lower temperature enables the custard-like filling to bake evenly, reducing the risk of overcooking and resulting in a smoother, creamier texture. This slower approach allows the proteins in the eggs to set gently, which is crucial for that rich creaminess characteristic of a well-made cheesecake.
The water bath technique involves placing the cheesecake pan in a larger pan filled with hot water, which helps to evenly distribute heat and prevent the cheesecake from developing a dry outer layer. This method not only aids in temperature regulation but also creates a humid environment, which is beneficial for maintaining moisture in the cheesecake.
Temperature fluctuations can cause the cheesecake to bake unevenly, leading to cracks and a less desirable texture. Maintaining a steady temperature throughout the baking process ensures that the cheesecake cooks uniformly, resulting in a smooth, creamy consistency.
Finally, allowing the cheesecake to cool gradually in the oven after turning it off helps prevent sudden temperature changes that can cause cracks. This cooling method allows the cheesecake to settle and firm up without compromising its creamy texture.
What Are the Consequences of Using Incorrect Oven Temperatures?
Using incorrect oven temperatures can lead to various negative outcomes when baking, particularly for delicate items like cheesecake.
- Texture Issues: The texture of a cheesecake is crucial for its overall quality, and incorrect temperatures can cause it to turn out either too dense or overly airy. If the oven is too hot, the outside may cook too quickly, leading to cracks, while the center remains undercooked. Conversely, too low a temperature can result in a dense, unappetizing texture.
- Cracking: Cheesecakes are known for their smooth, creamy surface, but baking at the wrong temperature can lead to unsightly cracks. High temperatures cause the filling to rise rapidly and crack as it sets, while low temperatures may not allow the cheesecake to set properly, leading to structural weaknesses. This not only affects appearance but can also impact the eating experience.
- Flavor Development: The flavor of a cheesecake is enhanced through proper baking, as the ingredients meld together at the right temperature. If the oven is too hot, certain flavors may become overpowering or burnt, compromising the delicate balance intended in the recipe. On the other hand, baking at too low a temperature can leave the cheesecake tasting bland or underdeveloped.
- Cooking Time Variations: An incorrect temperature can significantly alter the cooking time needed for a cheesecake to reach the desired doneness. A higher baking temperature can lead to a much quicker cooking time, risking the chance of uneven baking, while a lower temperature can extend the time significantly, which might also affect the final product’s texture and flavor. Accurate temperature settings are crucial for achieving the perfect bake.
- Moisture Loss: Baking at an incorrect temperature can lead to moisture loss, impacting the creaminess of the cheesecake. High temperatures may cause the moisture to evaporate too quickly, resulting in a dry cake that lacks the intended richness. On the other hand, too low temperatures can trap excess moisture, leading to a soggy texture that detracts from the overall quality.
What Are the Optimal Baking Temperatures for Various Types of Cheesecakes?
The optimal baking temperatures for various types of cheesecakes ensure that they achieve the right texture and flavor without cracking or overcooking.
- Baked Cheesecake: Typically, the best oven temp for cheesecake of this type is around 325°F (163°C). At this temperature, the cheesecake bakes evenly, allowing it to set properly while retaining a creamy consistency without developing a dry texture.
- No-Bake Cheesecake: While no-bake cheesecakes do not require an oven, they are often chilled in the refrigerator. For those looking to create a crust that may require baking, a temperature of 350°F (177°C) is ideal for the crust, ensuring it is golden and crisp before the filling is added.
- Japanese Cotton Cheesecake: This light and fluffy cheesecake bakes best at a lower temperature of about 320°F (160°C). The lower temperature helps to maintain its delicate structure and prevent the cheesecake from collapsing, resulting in a soft, airy texture.
- Chocolate Cheesecake: For chocolate cheesecakes, the best oven temp is generally around 325°F (163°C), similar to baked cheesecakes. This temperature allows the chocolate to melt and blend with the cream cheese smoothly, creating a rich and luscious filling without compromising the structure.
- Fruit-Topped Cheesecake: When baking a fruit-topped cheesecake, it is best to use a temperature of 325°F (163°C) to ensure that the fruit does not overcook. This temperature allows the cheesecake to set properly while keeping the fruit fresh and vibrant, enhancing the overall flavor profile.
How Can I Accurately Monitor My Oven Temperature While Baking Cheesecake?
To accurately monitor your oven temperature while baking cheesecake, consider the following methods:
- Oven Thermometer: A reliable oven thermometer provides an accurate reading of the internal temperature of your oven, which may differ from the preset temperature on the dial.
- Water Bath Method: Utilizing a water bath helps to regulate the temperature around the cheesecake, ensuring even baking and preventing cracks.
- Convection Setting: If your oven has a convection setting, using it can help maintain a consistent temperature and improve air circulation, which is beneficial for baking cheesecake.
- Check for Doneness: Regularly checking the cheesecake for doneness using a toothpick or knife can help ensure it doesn’t overbake, which is critical for a creamy texture.
Oven Thermometer: Oven thermometers are essential tools for any baker, as they provide a precise measurement of the oven’s actual temperature. Many ovens can be off by 25 degrees or more, which can significantly affect the baking process, particularly for delicate items like cheesecake. By placing an oven thermometer inside your oven, you can adjust the temperature settings accordingly to ensure you are baking at the best oven temp for cheesecake.
Water Bath Method: The water bath method, or bain-marie, involves placing the cheesecake pan in a larger pan filled with hot water during baking. This technique helps to create a moist environment, preventing the cheesecake from drying out and reducing the risk of cracks on the surface. It also promotes even cooking, allowing the cheesecake to set gently and uniformly.
Convection Setting: The convection setting in an oven circulates hot air, ensuring a more consistent temperature throughout the baking process. This can be particularly useful for cheesecakes, as it helps to eliminate hot spots that can lead to uneven baking. If using this setting, you may need to lower the temperature by about 25 degrees to avoid overcooking.
Check for Doneness: Knowing how to check for doneness is crucial when baking a cheesecake. Instead of relying solely on time, gently shake the cheesecake; if the center jiggles slightly but the edges are set, it’s likely done. Using a toothpick or knife inserted into the center can also help; it should come out clean or with just a few moist crumbs for the perfect creamy texture.
What Tips Can Help Me Achieve the Perfect Baking Temperature for Cheesecake?
Achieving the perfect baking temperature for cheesecake is crucial for a smooth and creamy texture.
- Know Your Oven: Every oven can vary in temperature accuracy, so it’s essential to use an oven thermometer to verify the actual temperature. This ensures you’re baking at the correct setting, preventing undercooked or overcooked cheesecake.
- Optimal Baking Temperature: The best oven temperature for cheesecake is typically between 325°F and 350°F (163°C to 177°C). Baking at this range allows for even cooking without the risk of cracking on the surface.
- Water Bath Technique: Using a water bath (bain-marie) helps regulate the temperature around the cheesecake. This method provides gentle, even heat, reducing the chances of the cheesecake cracking and ensuring a creamy consistency.
- Slow and Steady: Instead of rushing the baking process, consider baking your cheesecake slowly. Start at a higher temperature to set the outside, then lower it midway to finish cooking the inside gently, which results in a well-cooked cheesecake.
- Cooling Gradually: After baking, allow the cheesecake to cool gradually in the oven with the door slightly ajar. This helps to prevent sudden temperature changes that can cause cracking, maintaining the integrity of the cheesecake’s texture.
- Test for Doneness: Use a toothpick or a knife to check the center of the cheesecake for doneness. The center should be slightly jiggly when you remove it from the oven, as it will continue to set while cooling.