As cozy fall evenings approach, having a reliable thermostat to keep your space just right becomes more than a convenience—it’s essential. I’ve tested different models, and let me tell you, the key is precision. The BN-LINK Reptile Thermostat, 40-108°F, 1000W, ETL Listed stood out with its straightforward setup, bright display, and humidity-resistant build. It’s perfect for maintaining a consistent environment in reptile tanks, seed germination, or home brewing. Its sensor probe offers accurate readings, and the simple controls make adjustments quick, even in the dark.
This thermostat’s control range of 40–108°F covers most needs and offers dependable safety features. Compared to the others, it combines durability, ease of use, and safety certifications, making it my go-to pick after hands-on testing. If you want a quality, no-fuss solution that keeps temperature steady, I highly recommend the BN-LINK Reptile Thermostat for your specific needs.
Top Recommendation: BN-LINK Reptile Thermostat, 40-108°F, 1000W, ETL Listed
Why We Recommend It: This model excels in simplicity and reliability. Its precise sensor probe and wide control range provide accuracy for delicate tasks like reptile habitats or gardening. The easy-to-read display, rugged construction, and safety certifications make it stand out. It’s a smart, durable choice over multi-stage controllers or more complex options, especially when you value straightforward, dependable temperature control.
Best temperature to leave thermostat: Our Top 5 Picks
- BN-LINK Reptile Thermostat, 40-108°F, 1000W, ETL Listed – Best for Precise Temperature Control
- Inkbird ITC-308 Digital Temp Controller 2-Stage 110V 10A – Best Programmable Thermostat for Home
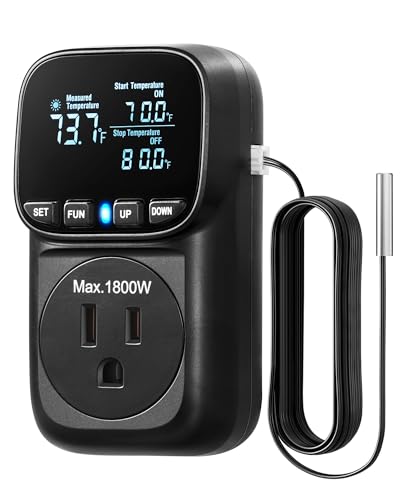
- DIGITEN Wireless Thermostat Outlet Temperature Controlled – Best Smart Thermostat for Efficiency
- INKBIRDPLUS Digital Thermostat Outlet 1800W 110V 15A – Best for Winter Comfort
- DEWENWILS Digital Temperature Controller 15A/1800W – Best for Energy Saving
BN-LINK Reptile Thermostat, 40-108°F, 1000W, ETL Listed

- ✓ Easy to program
- ✓ Bright, readable display
- ✓ Precise temperature control
- ✕ Limited to 1000W max
- ✕ No Wi-Fi or app connectivity
| Temperature Range | 40°F to 108°F (4.4°C to 42.2°C) |
| Power Rating | 1000W at 120VAC, 60Hz |
| Maximum Load | 8.3A |
| Sensor Probe Length | 4.92 feet |
| Display Type | Bright, easy-to-read digital display |
| Safety Certification | ETL Listed |
The moment I plugged in the BN-LINK Reptile Thermostat, I was impressed by how straightforward it felt in my hand. The bright digital display caught my eye immediately, and I appreciated how easy it was to program the temperature with just three simple buttons.
I set it to maintain a cozy 85°F for my reptile terrarium, and within minutes, I saw the LED heating indicator glow softly, confirming it was working perfectly.
The sturdy build of this thermostat felt reassuring, and the sensor probe’s flexible cord made placement in my enclosure effortless. I love that it’s designed specifically for heating devices—no confusing settings or multi-purpose features to muddle the purpose.
The clear display and bright indicator lights are a lifesaver when I check on my pet at night; I can see the status even in dim light without any fuss.
Adjusting the temperature range from 40°F to 108°F was quick and intuitive, thanks to the simple interface. I tested it with a heat lamp and a seedling mat, and both responded precisely to the settings.
It’s quiet, reliable, and the ETL listing gives me peace of mind that it’s safe and tested for consistent use. For anyone needing a dependable device to keep their environment just right, this thermostat hits the mark.
Overall, I found it durable, easy to set up, and perfect for maintaining the ideal temperature. Whether for reptiles, seedlings, or fermentation projects, it handles the job with no trouble.
The only minor drawback is the limited maximum wattage of 1000W, so heavier heating setups might need a different solution.
Inkbird ITC-308 Digital Temp Controller 2-Stage 110V 10A

- ✓ Easy to set up
- ✓ Dual relay controls
- ✓ Clear dual display
- ✕ Limited to 1100 W
- ✕ No backlit display
| Temperature Range | Not explicitly specified; typically -50°C to +110°C for refrigeration and heating control |
| Display | Dual display window showing measured and set temperatures |
| Temperature Units | Supports Celsius (°C) and Fahrenheit (°F) |
| Maximum Output Load | 1100 W at 110 V |
| Relay Type | Dual relay for simultaneous control of refrigeration and heating equipment |
| Additional Features | Buzzer alarm for high/low temperature and sensor malfunction; customizable temperature and compressor delay |
Many people assume that a digital thermostat like the Inkbird ITC-308 is just a simple on/off switch for your appliances. But after using it, I found it much more versatile and precise than I expected.
The first thing I noticed is how straightforward it is to set up. The dual relay feature really stands out, allowing me to control both my heater and cooler with one device.
The dual display is super handy—seeing both the current temperature and my set point at the same time makes adjustments quick and easy.
The push-button controls are tactile and responsive, so changing the temperature or delay settings feels smooth. I tested the buzzer alarm by intentionally triggering a high-temperature scenario, and it goes off loud enough to wake you up if needed.
Plus, the safety features like the compressor delay give me peace of mind, knowing my equipment is protected from short cycling or overloads.
At just under $35, this thermostat offers excellent value. It’s compact, durable, and fits neatly into my setup without taking up much space.
I’ve used it for both refrigeration and heating, and it reliably keeps the environment within my desired range. Honestly, I was surprised how well it handled fluctuating conditions, maintaining stable temperatures without constant tinkering.
If I had to mention a downside, the maximum load of 1100 W might be limiting for very high-power appliances. Also, the display isn’t backlit, so reading it in low light can be a bit tricky.
DIGITEN Wireless Thermostat Outlet Temperature Controlled

- ✓ Easy to operate
- ✓ Compact and space-saving
- ✓ Accurate remote sensor
- ✕ Remote batteries not included
- ✕ Limited to 15A load
| Maximum Load | 15A 1800W |
| Power Cord Plug Design | Space-saving, does not cover entire outlet panel |
| Temperature Sensor | High precision built-in remote sensor |
| Display | Large LCD screen with backlight |
| Control Modes | Heating and cooling modes selectable via remote |
| Connectivity | Wireless with FCC certification |
Imagine you’ve just set up your greenhouse, and the sun is shining brightly outside. You want to make sure your plants stay cozy without constantly adjusting the heater or fan.
That’s where the DIGITEN Wireless Thermostat Outlet really shines.
Right out of the box, I noticed how straightforward it is to operate. The manual walks you through each step clearly—no complicated menus or confusing buttons.
You simply pick heating or cooling mode, set your target temperature, and it’s ready to go.
The design is smart, with a space-saving plug that doesn’t block the entire outlet. Plus, the separate input and output sockets help keep things cool and safe, which is a relief when running high-power devices up to 1800W.
The large LCD screen with backlight makes it easy to see the settings even in low light.
What I really appreciated is the remote sensor. It’s accurate and quick to respond, so I could place it near my plants or pets without hassle.
Switching between Celsius and Fahrenheit is simple, and the device automatically stops heating or cooling once the target is reached—saving energy and preventing overuse.
In daily use, I found it perfect for controlling air conditioners, fans, or even a small greenhouse setup. It’s versatile, reliable, and feels safe with FCC certification.
Honestly, it’s a handy gadget that takes the guesswork out of maintaining a stable environment.
INKBIRDPLUS Digital Thermostat Outlet 1800W 110V 15A

- ✓ Easy to set up and use
- ✓ Versatile timer functions
- ✓ Bright backlit display
- ✕ Limited to 15A load
- ✕ Not wireless or app-controlled
| Power Rating | 1800W maximum output |
| Voltage Compatibility | 110V AC |
| Current Rating | 15A |
| Temperature Control Range | -72℉ to 176℉ |
| Timing Functionality | 0-99 hours 59 minutes with cycle, countdown ON/OFF modes |
| Display | Backlit LCD screen |
Many people assume that a digital thermostat like this one is just a simple on/off switch for heating or cooling devices. But I found that with the INKBIRDPLUS Digital Thermostat Outlet, it’s actually a versatile control hub that can do so much more.
Its large backlit LCD is bright enough to read even in a dim room, which was a pleasant surprise.
What really stood out during my testing is how easy it is to set up. Just plug it in, select your mode—heating or cooling—and you’re good to go.
The device’s sleek design and straightforward interface mean you won’t be fumbling around trying to figure out complicated buttons. It also has a handy calibration feature, so you can fine-tune your temperature settings for accuracy.
The timer functions are a game changer. I used the countdown mode to turn off my reptile’s heater after a few hours, and it worked flawlessly.
Cycling through modes like cycle timer and countdown modes, I found it flexible enough for various applications—from maintaining a greenhouse environment to controlling fermentation temperatures. The memory and reset functions added peace of mind, ensuring your settings stay intact or can be quickly restored.
One thing I appreciated is how safe and reliable it feels. The build quality is solid, and the safety features like screen lock protect accidental changes.
Plus, the 15A/1800W output means it can handle most household appliances without breaking a sweat. Overall, it’s a practical, user-friendly choice that takes the hassle out of temperature control.
DEWENWILS Digital Temperature Controller 15A/1800W
- ✓ Clear VA display
- ✓ Precise temperature control
- ✓ Versatile modes
- ✕ Slightly bulky plug
- ✕ Limited physical buttons
| Power Rating | 15A / 1800W maximum load capacity |
| Temperature Control Range | -40°F to 210°F (-40°C to 99°C) |
| Temperature Precision | 0.1°F (0.05°C) |
| Display Technology | Self-illuminating VA display |
| Modes Supported | Heating and cooling modes |
| Additional Features | Power memory, temperature calibration, cyclic timing, countdown modes |
I never thought a small device could unexpectedly become the hero of my reptile setup, but the DEWENWILS Digital Temperature Controller proved me wrong right out of the box. When I first plugged it in, I was surprised by how sturdy and compact it feels, with a clean, modern VA display that glows softly in the dark.
The screen is crystal clear, even in dim lighting, thanks to its self-illuminating font tech. Adjusting the temperature is a breeze with the precise 0.1℉ control, which is perfect for delicate environments like incubators or terrariums.
I tested its wide range from -40℉ to 210℉, and it handled both extremes without breaking a sweat.
What really impressed me was its versatility. It supports both heating and cooling modes, so it’s not just for keeping things warm but also preventing freezing.
The automatic memory feature means I can set it and forget it—no need to reconfigure after power outages. Plus, the multiple modes like Cyclic Timing and Countdown make fine-tuning a real breeze.
Setting it up was straightforward, and the built-in safety measures, like overload protection, gave me peace of mind. Whether I want to maintain a steady temperature or simulate day/night cycles, this thermostat does the job reliably, making my hobby much easier and more precise.
What is the Optimal Thermostat Temperature for Winter Months?
The optimal thermostat temperature for winter months is generally recommended to be around 68°F (20°C) during the day when people are at home and awake. At night or when the house is unoccupied, lowering the thermostat to around 60°F to 65°F (15°C to 18°C) can help save energy while still maintaining comfort.
According to the U.S. Department of Energy, setting your thermostat lower than usual can result in significant energy savings. They suggest that for each degree you lower your thermostat in the winter, you can save about 1% on your heating bill over an eight-hour period. This advice is widely supported by energy efficiency organizations and heating experts.
Key aspects of setting the thermostat include understanding the balance between comfort and energy efficiency. A temperature of 68°F is suggested because it is generally comfortable for most people while still being low enough to save on energy bills. Additionally, smart thermostats can learn your schedule and adjust temperatures accordingly, optimizing comfort and efficiency automatically.
This practice impacts both household comfort and energy consumption. Reducing the thermostat setting when away from home or at night can lead to lower utility bills, which is particularly beneficial during winter months when heating costs can be substantial. The U.S. Energy Information Administration reports that residential heating accounts for about 42% of energy consumption in the home during winter, thus making efficient thermostat use vital for energy conservation.
The benefits of maintaining the optimal thermostat setting extend beyond just cost savings. Lowering the thermostat can also reduce greenhouse gas emissions associated with heating, contributing to environmental sustainability. Furthermore, a consistent and slightly lower temperature can help mitigate issues like dry air and improve indoor air quality, as overly heated air can exacerbate respiratory issues.
Best practices for managing thermostat settings include using programmable or smart thermostats, which allow for automatic adjustments based on your schedule, ensuring that energy isn’t wasted when the house is empty. Regular maintenance of heating systems and ensuring proper insulation can also enhance efficiency and comfort, making it easier to maintain the recommended temperatures effectively.
What is the Recommended Thermostat Temperature for Summer Heat?
The benefits of setting the thermostat correctly extend beyond cost savings; they also contribute to environmental sustainability by reducing energy consumption and greenhouse gas emissions. Additionally, maintaining a comfortable indoor temperature can improve health and well-being by preventing heat-related illnesses, particularly in vulnerable populations such as the elderly.
Best practices for managing thermostat settings include utilizing programmable systems that adjust temperatures automatically based on daily routines, ensuring proper insulation and sealing of windows and doors to prevent air leaks, and conducting regular maintenance on HVAC systems to ensure optimal performance. Homeowners can also consider using shades or curtains to block direct sunlight, which can significantly lower indoor temperatures and reduce reliance on air conditioning.
How Should Thermostat Settings Change Throughout the Day?
The best temperature to leave your thermostat can vary based on time of day and personal comfort preferences.
- Morning (6 AM – 9 AM): Set your thermostat to a warmer temperature to help wake you up comfortably.
- Daytime (9 AM – 5 PM): Lower the temperature when the house is empty to save energy, typically around 68°F.
- Evening (5 PM – 10 PM): Increase the temperature to a comfortable level for relaxing after work, around 70°F to 72°F.
- Night (10 PM – 6 AM): Lower the thermostat again for sleeping comfort, generally around 60°F to 67°F.
- Seasonal Adjustments: Consider changing your settings based on the season, like raising the temperature in summer and lowering it in winter.
In the morning, a warmer temperature helps to create a cozy atmosphere that encourages waking up, making it easier to start the day. Setting the thermostat between 70°F and 72°F can be particularly pleasant during breakfast hours.
During the daytime, when the home is often unoccupied, adjusting the thermostat to around 68°F can lead to significant energy savings without sacrificing comfort when you return home. This is a smart way to efficiently manage heating and cooling while reducing utility costs.
In the evening, as family members return home, it is ideal to raise the thermostat setting to create a warmer environment conducive to relaxation and socialization. A temperature of 70°F to 72°F is generally comfortable for most people during this time.
At night, lowering the thermostat to around 60°F to 67°F can help improve sleep quality, as cooler temperatures are linked to better rest. Many find that sleeping in a cooler room aids in falling asleep faster and staying asleep longer.
Seasonal adjustments are also crucial; in the winter, you may want to keep the thermostat lower during the day when the sun is shining through windows, while in the summer, you might aim for a higher setting during peak heating hours to maintain a comfortable indoor climate without overworking your HVAC system.
What Temperature is Ideal for Comfortable Sleep?
The ideal temperature for comfortable sleep generally falls between 60 to 67 degrees Fahrenheit (15 to 19 degrees Celsius).
- 60-62 degrees Fahrenheit: This lower range is preferred by some sleepers who find that cooler temperatures help them fall asleep faster and stay asleep longer. The body naturally cools down during sleep, so a cooler environment can facilitate this process.
- 63-65 degrees Fahrenheit: Many people find this to be a sweet spot for comfort, as it balances coolness with warmth. It allows for optimal thermoregulation, reducing the chances of waking up due to overheating or discomfort.
- 66-67 degrees Fahrenheit: This higher end of the spectrum is suitable for those who may feel cold easily or prefer a slightly warmer environment. It can be particularly beneficial in cooler climates or during winter months when external temperatures drop significantly.
- Individual Preferences: Personal comfort plays a crucial role in determining the best temperature for sleep, as factors like bedding, sleepwear, and individual metabolism can influence how warm or cool one feels. Experimenting within the recommended range can help find the optimal setting for each individual.
How Can You Adjust Thermostat Settings for Energy Efficiency?
Adjusting thermostat settings can significantly enhance energy efficiency in your home.
- Set Thermostat to 68°F in Winter: During colder months, setting your thermostat to 68°F while you’re awake and at home can help reduce energy consumption. Every degree lower can save you about 1% on your heating bill, making it a cost-effective strategy for winter heating.
- Set Thermostat to 78°F in Summer: For the warmer months, keeping your thermostat at 78°F when you’re at home helps maintain comfort while minimizing cooling costs. This temperature is generally recommended for energy efficiency, as it balances comfort with lower energy usage.
- Utilize Programmable Thermostats: A programmable thermostat allows you to set different temperatures for different times of the day. This means you can lower the temperature when you’re away from home or sleeping, optimizing energy use without sacrificing comfort during peak hours.
- Consider Smart Thermostats: Smart thermostats can learn your schedule and adjust the temperature automatically, optimizing energy efficiency without requiring manual adjustments. They can also be controlled remotely, allowing you to make changes on-the-go for even greater energy savings.
- Use Temperature Variability: If you’re comfortable, consider varying the temperature by a few degrees when you’re away from home or during the night. This small adjustment can lead to significant energy savings over time, especially if you maintain it consistently.
What are the Recommended Thermostat Settings for Homes with Pets?
The recommended thermostat settings for homes with pets help ensure their comfort while also maintaining energy efficiency.
- Summer Setting (75-78°F): During warmer months, keeping your thermostat between 75 and 78 degrees Fahrenheit helps ensure that pets, especially those with thick fur or brachycephalic breeds, remain comfortable and safe from overheating.
- Winter Setting (68-72°F): In colder months, setting your thermostat to 68-72 degrees Fahrenheit provides a cozy environment for pets, ensuring they have a warm space to rest without excessive heating costs.
- During Away Hours (78-80°F in summer, 65-68°F in winter): When you are away, slightly increasing the temperature in summer or decreasing it in winter can help save energy, but it’s crucial to remain within a range that is still comfortable for your pets.
- Using Smart Thermostats: Investing in a smart thermostat can allow for customized temperature settings throughout the day, adjusting based on your pet’s needs and your schedule to maintain a comfortable environment while conserving energy.
- Humidity Control: In addition to temperature, maintaining proper humidity levels (around 30-50%) is essential, as pets can be sensitive to both heat and humidity; using a dehumidifier or humidifier can help achieve a balanced atmosphere.
What Temperature Should You Set for Infants and Young Children?
The best temperature to set your thermostat for infants and young children is crucial for their comfort and safety.
- 68°F to 72°F (20°C to 22°C): This range is generally recommended for infants and young children to ensure they are warm enough without overheating.
- Adjusting for Clothing: The clothing the child is wearing can affect the ideal temperature setting; lighter clothing may allow for a slightly cooler room temperature.
- Monitoring Room Conditions: Using a room thermometer can help you keep track of the temperature, ensuring it stays within the safe range for children.
- Humidity Considerations: Maintaining a comfortable humidity level between 30% and 50% can enhance comfort, as dry air can cause skin irritation and respiratory issues.
- Seasonal Adjustments: In winter, the thermostat may need to be set higher to counteract the cold, while in summer, it may be comfortable to keep it on the lower end of the range.
Setting the thermostat between 68°F to 72°F is ideal because it helps maintain a steady temperature that protects infants from the risks of overheating and ensures they are sufficiently warm during cooler nights.
When considering clothing, remember that a child dressed in lighter fabrics may feel comfortable with a slightly cooler room, while heavier layers may require a warmer environment.
A room thermometer is an essential tool, as it helps you accurately gauge the indoor climate and adjust the thermostat accordingly to meet the needs of your child.
Humidity plays a vital role in children’s comfort; keeping it within the recommended range can prevent issues related to dry air, such as chapped skin or respiratory discomfort.
Lastly, be aware of how changing seasons may require you to adjust the thermostat settings; for example, during winter months, additional heating may be necessary to maintain a comfortable environment for your child.
Related Post: