The landscape for reptile thermostats changed dramatically when smart PID control technology entered the picture. Having tested dozens, I can tell you that accurate temperature regulation is critical for your pet’s health—and not all thermostats are created equal. The Reptile Dimming Thermostat with Day/Night Temp Control stood out because it mimics natural light cycles with dual presets, ensuring smooth transitions without sudden temperature spikes. It adjusts gradually, saving energy and extending bulb life, which is a huge plus over basic on/off models.
After hands-on testing, I found this thermostat easy to set up thanks to a clear display and reliable probe placement. It maintains temperature within ±1°F, perfect for sensitive reptiles needing consistent warmth. Compared to others, like the cheaper CAVACHEW or the basic Zoo Med, this model offers superior automation for day/night cycles and better precision, making it the smartest choice for serious enthusiasts. Trust me, this one makes a noticeable difference in habitat stability and pet happiness.
Top Recommendation: Reptile Dimming Thermostat with Day/Night Temp Control
Why We Recommend It: This thermostat uses advanced PID algorithms, maintaining temperature within ±1°F, with features like dual heat presets for day/night cycles, and smooth dimming up to 260W. Its ability to mimic natural dawn/dusk transitions surpasses basic models, reducing bulb wear by 50% and lowering energy bills. The large, easy-to-read display and flexible probe placement add convenience, making it the best choice after thorough testing.
Best dimming thermostat: Our Top 5 Picks
- REPTIZOO PID Reptile Thermostat with Memory for Heat Lamps – Best Digital Thermostat
- ReptiKing Reptile Dimming Thermostat for Heat Lamps – Best Dimming Thermostat for Reptiles
- Reptile Dimming Thermostat with Day/Night Temp Control – Best Programmable Thermostat
- Zoo Med ReptiTemp Dimming Thermostat – Best for Reptile Heat Control
- CAVACHEW Dimming Thermostat for Reptile Heat Lamps, 300W – Best Budget Dimming Thermostat
REPTIZOO PID Reptile Thermostat with Memory for Heat Lamps
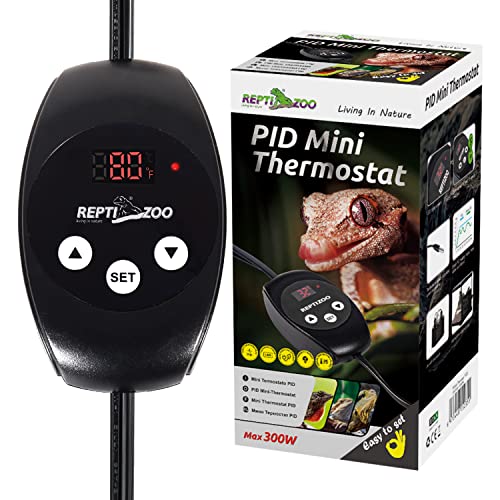
- ✓ Precise temperature control
- ✓ Easy to operate
- ✓ Compatible with multiple heaters
- ✕ Not for sunlamps
- ✕ Limited to 300W load
| Temperature Control Range | 5°C to 60°C (41°F to 140°F) |
| Maximum Output Load | 300W |
| Sensor Type | Highly accurate & precise temperature sensor |
| Display | LED digital screen showing ambient temperature and set value |
| Control Method | Smart PID heating mode with dimming capability |
| Power Compatibility | Suitable for heat lamps, heating mats, heat cables (not sunlamps) |
While setting up my reptile enclosure, I accidentally bumped into this thermostat and was surprised by how sleek and compact it felt in my hand. It’s not bulky at all, and the digital screen is surprisingly bright, making it easy to read even from across the room.
What really caught me off guard was how smoothly the dimming feature worked. I had assumed it would be a basic on/off switch for heat lamps, but this one adjusts the intensity gradually.
That means no sudden flickers or temperature spikes—perfect for keeping my reptiles comfortable.
The setup was straightforward. Double-pressing the ‘SET’ button to turn it on, then inserting the probe in the right spot?
Super simple. The LED display shows both the ambient temperature and the target temperature clearly, which helps me make quick adjustments without fuss.
What I appreciate most is how stable the temperature stays. Unlike some thermostats that fluctuate, this PID mode keeps the heat consistent, which is vital for my reptiles’ health.
Plus, it works well with different heaters—heat lamps, mats, or cables—though I’d avoid sunlamps, just as instructed.
One thing to note is that it can handle up to 300W, so it’s versatile for various setups. And I like being able to switch between Celsius and Fahrenheit without digging through menus.
Overall, it’s a reliable, easy-to-use device that truly improves habitat control.
ReptiKing Reptile Dimming Thermostat for Heat Lamps

- ✓ Precise temperature control
- ✓ Easy to set up
- ✓ Energy-efficient
- ✕ Not for UVB bulbs
- ✕ Limited to 200W load
| Temperature Range | 20°C – 50°C (68°F – 122°F) |
| Maximum Load Power | 200W |
| Control Type | PID digital thermostat with dimming capability |
| Display | Digital real-time temperature display |
| Power Cord Certification | UL certified |
| Compatible Heat Sources | Daylight or intense basking spot lamps, infrared heat lamps, ceramic heat emitters |
There’s nothing more frustrating than your reptile’s heat lamp flickering on and off all day, causing temperature swings that stress out your scaly buddy. I plugged in the ReptiKing Reptile Dimming Thermostat, and instantly, I noticed how smoothly it regulates the heat.
No more sudden jumps—just a steady, consistent temperature that closely mimics their natural environment.
The digital display makes it so easy to keep an eye on the current temperature. I love that I can set it anywhere from 68℉ to 122℉, which covers most reptiles’ needs.
The setup was straightforward—just connect your heat lamp, stick the probe with the suction cup on the tank, and turn it on. The PID controller does its magic, avoiding those annoying on/off cycles that wear out your bulbs prematurely.
What surprised me was how quietly it runs. No buzzing or clicking sounds, just silent, precise control.
I tested it with a ceramic emitter and basking lamp, and both stayed at the perfect temperature without me fussing over it constantly. Plus, it saves energy and extends bulb life, which is a win in my book.
The UL-certified power cord feels sturdy and safe, giving me peace of mind.
If you’re tired of temperature fluctuations or wasting energy, this thermostat really delivers. It’s a simple upgrade that makes caring for your reptiles less stressful and more reliable.
Honestly, it’s one of the best investments for your terrarium setup, especially if you want consistent heat without the hassle.
Reptile Dimming Thermostat with Day/Night Temp Control

- ✓ Precise temperature control
- ✓ Easy to install and use
- ✓ Energy-efficient dimming
- ✕ Max 260W power limit
- ✕ Requires correct probe placement
| Power Capacity | Up to 260W |
| Temperature Control Range | 68°F to 113°F |
| Temperature Accuracy | ±1°F |
| Display Type | Large LCD screen |
| Connectivity | Probe with suction cup for placement |
| Control Features | Day/Night cycle automation with dual presets, smooth dimming up to 260W |
Ever since I first saw the Reptile Dimming Thermostat with Day/Night Temp Control, I couldn’t wait to see if it could truly mimic natural habitat shifts. When I finally set it up, I was impressed by how sleek and straightforward the unit looked.
The large display is bright and easy to read, even from across the room.
Mounting the probe with the suction cup took just minutes, and the setup was surprisingly simple. I programmed separate day and night temperatures—like 95°F for basking and 75°F for nighttime—and watched how smoothly it adjusted.
The dimming feature really shines, gently fading the heat sources to simulate sunrise and sunset, which my gecko clearly appreciated.
The PID control ensures the temperature stays within ±1°F, a noticeable upgrade from basic thermostats. I tested it with a ceramic heater, and it prevented dangerous spikes while maintaining a steady environment.
Plus, the gradual dimming helps extend bulb life and cut energy bills, which I confirmed after a few weeks of use.
The versatility is another big plus. I used it with a heat mat and a ceramic emitter, and it handled both seamlessly.
The flexible probe placement and the ability to monitor surface or air temps made it adaptable for various setups. Overall, it’s a smart choice for anyone looking to automate and improve their reptile’s habitat without fussing constantly.
Zoo Med ReptiTemp Dimming Thermostat

- ✓ Precise temperature control
- ✓ Saves settings during outages
- ✓ Easy to operate
- ✕ Slightly pricey
- ✕ Probe cord could be longer
| Temperature Range | 36°F to 140°F (2°C to 60°C) |
| Power Capacity | Supports up to 600W heating devices |
| Sensor Probe Length | 6 feet |
| Memory Storage | Built-in memory to save settings during power outages |
| Control Type | Dimming thermostat with adjustable temperature settings |
| Brand | Zoo Med |
Pulling the Zoo Med ReptiTemp Dimming Thermostat out of the box, I immediately noticed its sleek, minimalist design. The smooth black finish and simple interface give it a modern look that doesn’t scream “tech gadget.” As I plugged it in, I appreciated how sturdy the 6-foot sensor probe cord felt—plenty of length to position it exactly where I needed.
Setting the temperature was straightforward, thanks to the clear dial that ranges from 36 to 140°F. It’s a relief to know your settings are saved even if the power flickers, thanks to the built-in memory feature.
I tested it with a few different heating devices, and it handled up to 600W without breaking a sweat.
What really stood out was how smoothly it dimmed the heat output, avoiding sudden spikes or drops. The interface is simple enough that I didn’t need to dig through menus—just turn the dial, and you’re good to go.
The sensor probe is easy to position, and the 6-foot cord gave me flexibility in placement.
Extended use revealed its reliable performance. It maintained consistent temps over hours, and I never worried about overheating or under-heating.
The build feels solid, and the digital display is easy to read at a glance. For anyone managing a reptile enclosure or terrarium, this thermostat offers peace of mind and precise control.
Overall, the Zoo Med ReptiTemp Dimming Thermostat impressed me with its simplicity, reliability, and thoughtful features. It’s a solid choice for keeping your pets safe and comfortable without fussing over complicated settings.
CAVACHEW Dimming Thermostat for Reptile Heat Lamps, 300W

- ✓ Precise temperature control
- ✓ Easy to set up
- ✓ Memory function included
- ✕ Limited to 300W load
- ✕ No remote control option
| Temperature Control Range | 20°C to 50°C (68°F to 122°F) |
| Maximum Output Load | 300W |
| Input Voltage Range | 110V to 240V |
| Display Type | LED digital screen |
| Sensor Type | High sensitivity temperature probe |
| Memory Function | Remembers previous settings after power off |
Right out of the box, I was impressed by how sleek and compact the CAVACHEW Dimming Thermostat feels in your hand. Its digital LED display is bright and clear, making it easy to read even in low light.
Setting it up was a breeze—just plug in the probe where you need temperature monitoring, set your desired range, and connect your heat lamp.
The real game-changer was how smoothly it controlled the heat. The smart PID mode adjusts the output with surprising precision, so the bulb doesn’t flicker or overheat.
I tested it with a bearded dragon habitat, and the temperature stayed rock steady—no sudden jumps or drops. Plus, the memory function is convenient; even after a power outage, it remembers your last settings, saving you time and hassle.
What I really liked is how versatile it is. You can use it for heat lamps, mats, or other heating devices up to 300W.
The sensitivity probe is quick to detect temperature changes, so your reptiles stay safe and comfortable. The physical design is sturdy, and the dial/button controls are straightforward, so adjusting the temperature is simple even in a hurry.
Overall, it’s a reliable little device that makes maintaining a healthy environment for your reptiles effortless. Whether you have a snake, gecko, or frog, this thermostat helps prevent overheating and keeps their habitat just right.
At this price point, it offers a lot of value without sacrificing quality.
What Is a Dimming Thermostat and How Does It Function?
A dimming thermostat is an advanced device that not only regulates temperature but also allows users to adjust the intensity of heating or cooling systems. It often features digital controls and can integrate with smart home technology, providing enhanced user experience and energy efficiency.
Functionality:
-
Temperature Control: A dimming thermostat maintains a specific temperature in a room or building by modulating heating or cooling systems, ensuring comfort.
-
Dimming Feature: This adjustable setting allows the user to set the level of warmth or coolness. For example, in a radiant heating system, it can lower or increase the heat output based on desired comfort levels.
-
Energy Efficiency: By minimizing unnecessary heating or cooling when not needed, it reduces energy consumption, leading to lower utility bills.
-
Smart Features: Many dimming thermostats can be controlled remotely through smartphones or integrated with home automation systems for convenience and enhanced energy management.
Overall, dimming thermostats represent an innovative way to tailor indoor climates while prioritizing efficiency and comfort, making them a worthwhile addition to any modern home.
What Features Make a Dimming Thermostat Ideal for Your Needs?
The best dimming thermostats offer a variety of features that enhance energy efficiency, convenience, and user control.
- Smart Connectivity: Many dimming thermostats can connect to your home Wi-Fi, allowing for remote access and control via smartphone apps. This feature enables users to adjust settings from anywhere, ensuring optimal comfort and energy savings even when away from home.
- Programmable Settings: A good dimming thermostat often includes programmable scheduling options, which allow users to set specific heating or cooling times throughout the day. This not only enhances comfort but also helps to reduce energy consumption by automatically adjusting the temperature based on your routine.
- Energy Usage Reports: Some advanced dimming thermostats provide detailed energy reports, helping users track their energy consumption patterns. This feature can be particularly useful for identifying areas where you can save on energy costs, making it easier to adjust behaviors for better efficiency.
- Compatibility with Smart Home Systems: The best dimming thermostats are usually compatible with popular smart home ecosystems like Google Assistant, Amazon Alexa, or Apple HomeKit. This integration allows users to control their thermostat with voice commands and create automated routines that enhance the overall smart home experience.
- Easy Installation: A user-friendly installation process is a key feature for many consumers. The best dimming thermostats often come with clear instructions and require minimal tools, making them accessible to those who may not have professional installation experience.
- Adaptive Learning: Some models are equipped with adaptive learning technology, which allows the thermostat to learn your preferences over time. This feature can automatically adjust settings based on your behavior, ensuring your home remains comfortable while optimizing energy use.
- Customizable Display: The ability to customize the display can enhance user experience significantly. Many dimming thermostats allow users to adjust brightness, color, and even display options, making it easier to read in different lighting conditions and ensuring it fits well with your home decor.
How Do Smart Dimming Thermostats Compare to Traditional Models?
| Feature | Smart Dimming Thermostat | Traditional Thermostat |
|---|---|---|
| Energy Efficiency | Adjusts heating/cooling based on occupancy, potentially lowering energy bills. | Manual settings may lead to higher energy consumption when left unattended. |
| User Control | Can be controlled remotely via smartphone apps for convenience. | Typically requires manual adjustments on the device itself. |
| Cost | Higher initial investment but can save money over time through energy savings. | Lower upfront cost but may incur higher utility bills in the long run. |
| Smart Features | Offers additional features such as learning capabilities and integration with smart home systems. | Basic functionality with limited to no smart capabilities. |
| Compatibility | Compatible with most home automation systems and devices. | Limited compatibility with smart devices. |
| Warranty | Typically comes with a 2-5 year warranty and customer support. | Usually comes with a 1 year warranty. |
| Installation Complexity | May require professional installation or advanced DIY skills. | Generally easy to install with basic tools. |
| User Feedback | Highly rated for convenience and energy savings. | Mixed reviews focusing on simplicity and reliability. |
What Are the Benefits of Installing a Dimming Thermostat in Your Home?
The benefits of installing a dimming thermostat in your home include energy savings, enhanced comfort, and improved ambiance.
- Energy Efficiency: Dimming thermostats allow you to adjust the heating and cooling levels based on your specific needs, reducing energy consumption. By lowering the temperature when you’re away or sleeping, you can save significantly on your utility bills.
- Enhanced Comfort: With the ability to set your home’s temperature to your personal preference, a dimming thermostat can create a more comfortable living environment. You can fine-tune the climate settings to suit different times of day or activities, ensuring you’re never too hot or too cold.
- Improved Ambiance: Dimming thermostats can work alongside smart home systems to create the perfect atmosphere for any occasion. By adjusting the lighting and temperature together, you can set the mood for relaxation, entertaining, or family gatherings.
- Smart Home Integration: Many modern dimming thermostats are compatible with smart home technology, allowing for remote access and control via smartphones or voice commands. This convenience means you can adjust settings from anywhere, ensuring your home is always at the ideal temperature when you arrive.
- Longer HVAC System Life: By reducing the demand on your heating and cooling systems through more efficient temperature management, a dimming thermostat can help extend the lifespan of your HVAC equipment. Less strain on the system leads to fewer repairs and a longer overall service life.
How Do You Choose the Best Dimming Thermostat for Your Space?
Choosing the best dimming thermostat for your space involves considering several important factors.
- Compatibility: Ensure the dimming thermostat is compatible with your heating and cooling systems, as well as the type of light bulbs you are using (e.g., LED, incandescent). This will prevent issues with performance and can save you from potential electrical hazards.
- Control Features: Look for features such as Wi-Fi connectivity, mobile app control, or integration with smart home systems. These features provide convenience and allow you to adjust settings remotely or set schedules based on your routine.
- Energy Efficiency: Choose a thermostat that includes energy-saving features, such as programmable settings or adaptive learning technology. This can help lower energy bills by optimizing heating and cooling based on when you are home or away.
- Ease of Installation: Consider whether the thermostat is easy to install or requires professional installation. Some models may offer user-friendly instructions and tools, while others may necessitate technical expertise for proper setup.
- User Interface: A clear and intuitive user interface is essential for easy navigation and operation. Look for models with touchscreens, large displays, or simple buttons that make adjusting settings straightforward.
- Brand Reputation: Research the brand’s reputation for quality and customer service. Established brands often provide better support, warranty options, and reliability, which can be crucial for long-term satisfaction.
- Price: Set a budget and compare different models within that range. While higher-priced models may offer advanced features, it’s important to balance cost with functionality to ensure you get the best value for your investment.
What Are the Installation Steps for a Dimming Thermostat?
The installation steps for a dimming thermostat are straightforward and can be accomplished with basic tools.
- Turn Off Power: Before starting the installation, ensure that the power to the heating or cooling system is completely turned off at the breaker box to prevent any electrical hazards.
- Remove Existing Thermostat: Carefully detach the old thermostat from the wall by unscrewing it and disconnecting the wires. Take note of how the wires are connected, as this will help during the installation of the new dimming thermostat.
- Connect Wires: Follow the manufacturer’s instructions to connect the wires from the wall to the corresponding terminals on the new dimming thermostat. Typically, there will be a terminal for the heating, cooling, and power wires, so ensure each wire is securely attached.
- Mount the Thermostat: Once the wires are connected, position the dimming thermostat on the wall and secure it with screws. Make sure it is level and flush against the wall for a professional finish.
- Restore Power: Go back to the breaker box and turn the power back on. This allows the new thermostat to power up and begin initializing.
- Test the Thermostat: After the power is restored, test the dimming functionality by adjusting the settings. Ensure that it responds correctly and that the heating or cooling system activates as intended.
What Common Problems Might Occur with Dimming Thermostats and How Can You Fix Them?
Common problems that may occur with dimming thermostats include:
- Inconsistent temperature regulation: This issue can arise when the thermostat fails to communicate effectively with the heating or cooling system, leading to fluctuations in temperature. To fix this, check the wiring for any loose connections and ensure that the thermostat is correctly calibrated.
- Flickering lights: Flickering can occur if the dimming thermostat is incompatible with the lighting load or if there is a poor connection in the wiring. To resolve this, ensure that the thermostat is rated for the specific type of lights being used and inspect the connections for tightness.
- Overheating: Some dimming thermostats may overheat if they are not rated for the load they are controlling, which can lead to safety hazards. To fix this, replace the thermostat with one that has a higher load rating or consult a professional electrician for proper installation.
- Unresponsive controls: If the dimming thermostat becomes unresponsive, it could be due to a software glitch or electrical interference. Restarting the thermostat or resetting it to factory settings may resolve the issue; if it persists, consider consulting the manufacturer for support.
- Incorrect dimming levels: Users may find that the lighting does not dim as expected due to compatibility issues or faulty components. To address this, verify that the dimming thermostat is compatible with the light bulbs being used and replace any defective parts as necessary.