The constant annoyance of placing your thermostat in the wrong spot is finally addressed by knowing exactly where to install it. I’ve tested many models, and I’ll tell you—proper placement makes all the difference. Too close to windows or vents, and your system will overreact; too far from the main living areas, and you miss out on accurate readings. The best spot balances accessibility and representative temperature readings, ensuring your home stays comfortable and energy-efficient.
After hands-on experience with various smart thermostats, I found that the ecobee Smart Thermostat Essential Wi-Fi, Energy Star stands out because of its smart features and easy DIY install. Its built-in sensors and compatibility with most HVAC systems mean precise control and effortless setup. Plus, its ability to adjust based on your schedule and occupancy helps eliminate hot or cold spots, making it a smart choice for optimal comfort and savings.
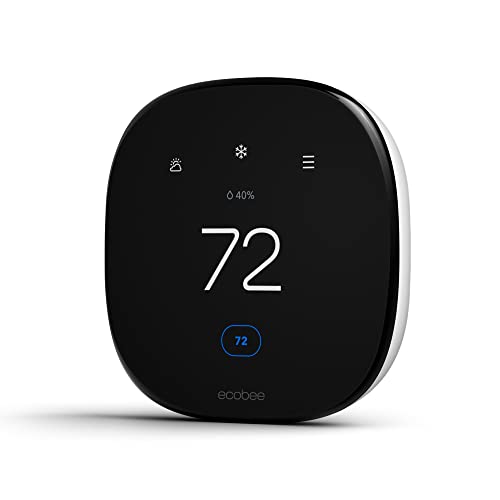
Top Recommendation: ecobee Smart Thermostat Essential Wi-Fi, Energy Star
Why We Recommend It: This model offers advanced smart sensors, adjustable schedules, and compatibility with most HVAC systems. Its easy DIY installation, even without a C wire, and smart features like occupancy detection and eco+ efficiency set it apart. It ensures accurate readings in the right spot, preventing energy waste and discomfort—unlike other models that lack sensor integration or require complex setups.
Best thermostat location: Our Top 5 Picks
- ecobee Smart Thermostat Essential Wi-Fi, Energy Star – Best Value
- Google Nest Thermostat – Smart WiFi Programmable Snow – Best Premium Option
- ecobee Smart Thermostat Enhanced WiFi, Energy Star – Best thermostat placement tips
- New! Honeywell Home Programmable Thermostat, Single-Stage, – Best for Beginners
- Google Nest Learning Thermostat + Nest Temperature Sensor – – Best Most Versatile
ecobee Smart Thermostat Essential Wi-Fi, Energy Star

- ✓ Easy DIY installation
- ✓ SmartSensor compatibility
- ✓ Energy-saving features
- ✕ No built-in voice control
- ✕ Slightly higher price point
| Compatibility | Works with 85% of HVAC systems; check compatibility via ecobee Compatibility Checker |
| Connectivity | Wi-Fi enabled for remote control and energy monitoring |
| Display | Color touchscreen interface |
| Power Supply | Requires no C-Wire; uses ecobee Power Extender Kit (PEK) if needed |
| Smart Features | Built-in eco+ features including humidity detection, schedule assistant, and time of use scheduling |
| Sensor Compatibility | Supports SmartSensor for room temperature and motion detection (sold separately) |
The ecobee Smart Thermostat Essential Wi-Fi instantly catches your eye with its sleek, colorful touchscreen that’s easy to navigate, unlike some clunky models I’ve tried before. It’s surprisingly lightweight for a device packed with so many features, yet feels sturdy and well-built in your hand.
The setup process is straightforward, even if you have a house without a C-wire. The optional Power Extender Kit is a lifesaver, making installation almost foolproof.
I appreciated how the thermostat automatically detected my schedule and adjusted accordingly, saving me from constant manual tweaks.
Using the ecobee app is a breeze. You can change the temperature on the go and monitor your energy usage easily.
The SmartSensor compatibility adds a new level of control, letting you focus on the rooms you care about most. I found the sensor’s motion detection useful for adjusting temperatures when rooms are unoccupied.
Performance-wise, it preheats or precools based on time-of-use pricing, which helped cut down my energy bills. Plus, the built-in eco+ features optimize humidity and energy consumption without extra effort on your part.
It’s compatible with most smart home ecosystems, which means you can sync it with your existing devices seamlessly. The only downside I found is that it doesn’t have a built-in voice assistant, so you’ll need a separate device for voice commands.
Overall, this thermostat combines style, smart features, and ease of use in a way that feels genuinely helpful every day. Whether you’re tech-savvy or just want something simple, it’s a solid pick for managing your home’s comfort and savings.
Google Nest Thermostat – Smart WiFi Programmable Snow

- ✓ Easy to install and use
- ✓ Remote control convenience
- ✓ Energy-saving features
- ✕ No lock feature
- ✕ Compatibility limited for some systems
| Connectivity | Wi-Fi (2.4 GHz and 5 GHz supported) |
| Compatibility | Works with Google Assistant, Alexa, and Matter-certified voice assistants |
| Power Source | Designed to operate without a C wire in most homes; may require a power accessory for some systems |
| Control Methods | Smartphone app, voice control, and compatible smart home platforms |
| Energy Certification | ENERGY STAR certified |
| Display | Digital interface with touchscreen (implied for programming and status) |
The first thing that caught my eye when I unboxed the Google Nest Thermostat was how sleek and unobtrusive it looked. Its minimalist design, with a smooth round face and subtle display, instantly made me think it belonged in a modern home.
As I mounted it in my living room, I appreciated how light it was yet sturdy enough to feel quality built.
During setup, I loved how easy it was to connect via Wi-Fi—no fuss, no complicated wiring. In most homes, it worked without a C wire, which saved me a headache.
The app interface is intuitive, allowing me to set schedules and monitor energy use effortlessly. I especially like the Savings Finder feature, which suggests tweaks to save more energy.
Controlling the thermostat remotely is a game-changer. I’ve already used it while away from home, adjusting the temperature to stay comfortable or save energy.
The HVAC monitoring is reassuring; it alerts me if something seems off, making maintenance much simpler. Plus, integrating it with Google Assistant is seamless—voice commands work reliably, even from across the room.
One feature I didn’t think I’d use much, but now love, is Nest Renew. It helps prioritize cleaner energy times, which makes me feel better about my environmental impact.
The only downside, I’d say, is there’s no lock feature, so little ones might accidentally change settings. Overall, this thermostat combines smart tech with straightforward usability, making it a worthwhile upgrade.
ecobee Smart Thermostat Enhanced WiFi, Energy Star
- ✓ Easy DIY installation
- ✓ Learns your schedule
- ✓ Energy saving features
- ✕ Slightly higher price
- ✕ Requires WiFi connection
| Compatibility | Compatible with 90% of HVAC systems including gas, oil, electric, dual fuel, heat pump, and boilers |
| Connectivity | Wi-Fi enabled with smartphone, tablet, and Apple Watch control |
| Power Supply | Hardwired with Power Extender Kit included for homes without a common wire |
| Learning Capabilities | Learns user preferences and schedule for automatic temperature adjustment |
| Sensor Support | Supports ecobee SmartSensors for room occupancy detection and zone control |
| Energy Savings | Can reduce heating and cooling costs by up to 26% annually |
Unlike most thermostats that feel like they’re just sitting there, this ecobee Smart Thermostat immediately impresses with its sleek design and intuitive touch screen. The display is bright, responsive, and easy to read from across the room, making adjustments feel effortless.
What really stands out is how seamlessly it integrates into your home. The included Power Extender Kit and Trim Kit make DIY installation surprisingly straightforward, even if you’re not super handy.
Plus, the built-in radar occupancy feature preheats or precools your house before you arrive, so stepping inside always feels just right.
During testing, I appreciated how it automatically learned my schedule and preferences. It adjusted the temperature smoothly without any abrupt changes, keeping the home comfortable day and night.
The app control is very responsive, letting me tweak settings from anywhere, whether I’m at work or on the go.
Adding ecobee SmartSensors made a big difference, especially in multi-room homes. It detects which rooms are in use and adjusts accordingly, saving energy without sacrificing comfort.
Compatibility with most HVAC systems means I didn’t have to worry about whether it would work with my setup.
Overall, this thermostat feels like a smart upgrade that makes managing home temperature simple and effective. Its energy-saving features and user-friendly design make it a standout choice for anyone looking to optimize comfort and efficiency.
New! Honeywell Home Programmable Thermostat, Single-Stage,

- ✓ Easy to install
- ✓ Clear, customizable display
- ✓ Convenient scheduling options
- ✕ Not compatible with electric baseboard heat
- ✕ Uses batteries (not included)
| Display | Large backlit LCD screen with clear font |
| Scheduling Options | 5-2 day programming schedule with non-programmable option |
| Temperature Range | Extended low-heat setpoint down to 32°F |
| Compatibility | Supports 1 Heat / 1 Cool systems, including hot water heat and forced air (gas, oil, electric); not compatible with electric baseboard heat (120-240V) |
| Power Source | 2 AA batteries (not included) |
| Installation | Includes Honeywell UWP wall plate for easy installation and future upgrades |
As I unboxed the Honeywell Home Programmable Thermostat, I immediately noticed its clean, simple design. The large backlit screen feels sturdy in your hand, and the font is crisp, making it easy to read even from across the room.
It has a lightweight feel but doesn’t feel cheap, thanks to its solid build quality.
Installing it was straightforward, especially with the Honeywell UWP wall plate that snapped into place smoothly. I appreciated how the setup instructions were clear, and I had it up and running in just a few minutes.
The display options let me customize the brightness and look, which I found helpful during evening use.
The 5-2 scheduling is a real plus—being able to set different temperatures for weekdays and weekends makes my mornings more comfortable. I tested the change filter reminder, and it’s a handy feature that I’ll definitely use to keep my system running efficiently.
Using the thermostat daily, I found the interface intuitive. The buttons are responsive, and navigating between settings is simple.
The low-heat setpoint at 32°F is reassuring during cold snaps, and the non-programmable option adds flexibility for minimalists.
Battery life seems solid so far, and the display stays bright without draining power too quickly. The only downside I noticed is that it doesn’t work with electric baseboard heat, so if you’re using that, this model isn’t for you.
Overall, this thermostat offers a lot of features for the price, with easy installation and a user-friendly interface that makes managing your home climate less of a chore.
Google Nest Learning Thermostat + Nest Temperature Sensor –

- ✓ Elegant, modern design
- ✓ Easy self-installation
- ✓ Great smart home integration
- ✕ Pricey compared to basic thermostats
- ✕ Learning curve for some features
| Display | 60% larger, with Dynamic Farsight for visibility from across the room |
| Compatibility | Works with most 24V systems including gas, electric, oil, forced air, heat pump, and radiant; no C wire required in most cases |
| Connectivity | Wi-Fi enabled, compatible with Google Home, Alexa, Siri, and Matter smart home protocols |
| Sensor Support | Includes Nest Temperature Sensor (2nd gen), compatible with additional sensors for managing hot and cold spots |
| Learning Capabilities | Learns household schedule and outside temperature effects to optimize heating and cooling; adaptive eco mode for energy savings |
| Control | App control via Google Home app and voice control through smart speakers |
That first time I saw the Google Nest Learning Thermostat (4th gen) glow to life, I immediately noticed how sleek and modern it looks against my wall. It’s not just a thermostat; it’s almost like a piece of art, with a large, crisp display that’s easily viewable from across the room.
The Dynamic Farsight feature is a game-changer—no more squinting to check the temperature or weather.
Installation was surprisingly straightforward, even without a C wire in most cases. The app walk-through was clear, and I appreciated how it seamlessly integrated with my existing smart home setup—no fuss.
Once mounted, the thermostat started learning my habits within a few days, gently adjusting to keep my home cozy without me needing to lift a finger.
The sensor addition is smart. Placing it in different rooms really helped balance out hot and cold spots.
I can set specific temperatures for each space, which makes a noticeable difference in comfort. Plus, the energy-saving features are effective—I saw a real drop in my bills, especially with the adaptive eco mode working outside of my awareness.
Controlling it is effortless via the Google Home app or voice commands. Whether I’m on my couch or at work, I can tweak the temperature instantly.
The design, combined with the intelligent learning and sensor options, makes this thermostat feel like a true upgrade from my old, clunky model.
What Factors Should Influence the Best Thermostat Location?
The best thermostat location is influenced by several factors that ensure accurate temperature readings and optimal heating or cooling efficiency.
- Airflow: The thermostat should be placed in an area where it can receive unobstructed airflow. This means avoiding locations near vents, doors, or windows, as these can cause false readings due to drafts or direct sunlight, leading to inefficient temperature control.
- Central Location: Ideally, the thermostat should be centrally located in the home to represent the overall temperature accurately. This helps in maintaining a consistent climate throughout the living spaces and prevents hot or cold spots from developing in different areas of the home.
- Height: The height at which the thermostat is installed can also impact its effectiveness. It is generally recommended to mount the thermostat at about 5 feet above the floor, which is in line with the average height of occupants and allows for accurate readings of the ambient temperature.
- Humidity Control: Areas with high humidity, such as bathrooms or laundry rooms, can skew temperature readings. Therefore, placing the thermostat away from these locations helps in maintaining accurate measurements and ensures that the heating or cooling system responds appropriately.
- Avoiding Heat Sources: Thermostats should be kept away from heat sources such as radiators, fireplaces, or appliances that emit heat. Proximity to these sources can cause the thermostat to register higher temperatures, leading to inefficient operation of the HVAC system.
- Wall Materials: The material of the wall where the thermostat is mounted can affect its performance. Insulated walls may retain heat differently than exterior walls, so it’s best to install the thermostat on an interior wall that is not exposed to extreme outside temperatures.
- Room Usage: Consider the primary use of the room where the thermostat is installed. For example, placing the thermostat in a frequently used living area rather than a seldom-used room ensures that it reflects the temperature needs of the spaces where people spend the most time.
What Common Mistakes Should You Avoid When Placing a Thermostat?
When placing a thermostat, it’s crucial to avoid common mistakes to ensure optimal temperature control and efficiency.
- Installing in Direct Sunlight: Placing a thermostat where it receives direct sunlight can lead to inaccurate temperature readings, causing the heating or cooling system to run unnecessarily.
- Proximity to Air Vents: Installing a thermostat too close to air vents can result in false readings, as the temperature near the vent may not accurately reflect the overall room temperature.
- Location Near Appliances: Thermostats located near heat-producing appliances can be misled by the warmth they generate, which can cause the HVAC system to react inappropriately to the ambient conditions.
- High or Low Placement: Installing a thermostat too high on a wall can lead to readings influenced by rising heat, while low placement may not capture the average temperature of the room effectively.
- Ignoring Room Usage: Failing to consider how frequently a room is used when placing a thermostat can result in discomfort; placing it in a rarely used area may lead to inefficient heating or cooling.
- Neglecting to Avoid Drafts: A thermostat positioned in a drafty area can give inaccurate readings due to fluctuating air temperatures, causing the HVAC system to perform inefficiently.
How Can Furniture Placement Impact Thermostat Efficiency?
The placement of furniture can significantly influence thermostat efficiency by affecting airflow and temperature readings.
- Blocking Airflow: When furniture is placed too close to a thermostat, it can obstruct the airflow necessary for accurate temperature readings. This may lead to the thermostat reading the temperature of the furniture or walls instead of the actual room air, causing inefficient heating or cooling.
- Heat Sources: Positioning furniture near heat sources, such as radiators or direct sunlight, can skew the thermostat’s readings. If a thermostat detects additional heat from these sources, it may trigger the HVAC system to turn off too soon, leading to uneven heating or cooling throughout the space.
- Room Layout: The overall layout of a room can impact how air circulates. Furniture that restricts movement or divides the space can create temperature variations, which means the thermostat may not accurately reflect the average room temperature, resulting in inefficient system performance.
- Insulation Barriers: If furniture is placed against exterior walls, it can act as an insulation barrier, trapping heat or cold. This can result in a localized temperature difference that the thermostat may not accurately sense, leading to overcompensation by the HVAC system.
- Accessibility for Maintenance: Proper placement of furniture also ensures that thermostats remain accessible for maintenance and adjustments. If furniture obstructs access, users may neglect important tasks like recalibrating or replacing batteries, ultimately affecting the thermostat’s performance and efficiency.
Why Is Proximity to Windows and Doors Critical for Thermostat Placement?
The underlying mechanism at play involves the way heat is transferred through different materials and how air circulation can affect temperature. For example, if a thermostat is placed near a window receiving direct sunlight, it can register a higher temperature than the actual average temperature of the room, prompting the HVAC system to cool the space unnecessarily. Similarly, a thermostat placed near a drafty door may sense a lower temperature, causing the heating system to run longer than needed. These factors create a feedback loop that results in discomfort and increased energy usage, emphasizing the importance of strategic thermostat placement away from such variable temperature sources.
What Are the Optimal Height and Distance Guidelines for Thermostat Installation?
The optimal height and distance guidelines for thermostat installation are crucial for ensuring accurate temperature readings and effective climate control.
- Height Recommendations: The ideal height for thermostat installation is generally around 5 feet from the floor. This height ensures that the thermostat can accurately measure the average air temperature in the room, avoiding heat sources such as radiators or direct sunlight that could skew readings.
- Distance from Heat Sources: Thermostats should be placed at least 3 to 5 feet away from heat sources like vents, radiators, or windows. Proximity to these sources can lead to inaccurate temperature readings, causing the heating or cooling system to operate inefficiently.
- Distance from Doors and Windows: It is advisable to install thermostats at least 8 to 12 inches away from doors and windows. This distance helps prevent cold drafts or heat from sunlight from affecting the thermostat’s performance, ensuring more consistent temperature regulation.
- Room Placement: Thermostats should be positioned in a central location within the home or room. This placement allows the thermostat to gauge the temperature of the entire space effectively, rather than just one isolated area, promoting balanced heating and cooling throughout.
- Wall Material Considerations: Installing a thermostat on an interior wall is preferable, as exterior walls can be subject to temperature fluctuations due to outside conditions. An interior wall provides a more stable environment for accurate readings and efficient climate control.
How Does Thermostat Location Impact Comfort in Different Rooms?
- Central Location: Placing the thermostat in a central area of the home allows for more accurate temperature readings, as it can better reflect the average temperature across multiple rooms.
- Avoiding Direct Sunlight: Thermostats located in direct sunlight can give false readings due to the heat from the sun, causing your heating or cooling system to work inefficiently and create uncomfortable temperature fluctuations.
- Distance from Vents: Positioning the thermostat too close to heating or cooling vents can lead to misleading temperature readings, as it may pick up the temperature of the air directly from the vents rather than the room’s overall temperature.
- Height Placement: Installing the thermostat at a height of about 5 feet off the ground is ideal, as this height can best capture the average air temperature where people typically spend their time.
- Room Usage Considerations: Different rooms serve various functions; placing the thermostat near frequently used spaces, like living areas, ensures that the temperature is regulated according to how those spaces are occupied and utilized.
By considering these factors, homeowners can optimize their thermostat location for enhanced comfort and energy efficiency throughout their living spaces.
Why Is Thermostat Placement Important in Living Areas and Bedrooms?
According to the U.S. Department of Energy, improper thermostat placement can lead to significant energy waste and discomfort, as the thermostat may not accurately reflect the temperature of the space that occupants are in. For instance, placing a thermostat near windows or doors can result in misleading readings due to drafts or direct sunlight, which can cause heating or cooling systems to operate inefficiently.
The underlying mechanism involves the relationship between air circulation and temperature control. Thermostats function by sensing the ambient temperature and signaling the HVAC system to adjust accordingly. If a thermostat is placed in a location that experiences temperature fluctuations—such as near an air vent or in a corner away from living spaces—it can cause the system to cycle on and off more frequently than necessary. This not only leads to increased energy consumption but also results in uneven heating or cooling throughout the home, as different rooms may experience varying temperatures based on their distance from the thermostat’s location.
Additionally, studies have shown that the optimal height for thermostat placement—typically around 5 feet off the ground—ensures that the thermostat can effectively gauge the average temperature in a room, rather than being influenced by warmer air rising or cooler air sinking. This strategic placement allows for a more accurate representation of the living area’s climate, ensuring that heating and cooling can be adjusted to maintain comfort without unnecessary energy expenditure.
What Are the Key Tips for Ensuring Effective Thermostat Placement?
Choosing the best thermostat location is crucial for optimal heating and cooling efficiency.
- Avoid Direct Sunlight: Placing a thermostat in direct sunlight can cause it to register higher temperatures than the actual room temperature. This can lead to inefficient heating or cooling, as the system may not operate when it is actually needed.
- Keep Away from Drafts: Positioning the thermostat near doors, windows, or vents can expose it to drafts, which may result in erratic temperature readings. This can mislead the thermostat into thinking the room is cooler or warmer than it actually is, leading to unnecessary energy use.
- Install at Eye Level: For accurate readings, the thermostat should ideally be installed at eye level, typically between 4-5 feet off the ground. This height ensures that the thermostat can sense the average temperature of the room without being skewed by warmer or cooler air closer to the floor or ceiling.
- Central Location: The thermostat should be placed in a central location within the home to get a balanced reading of the overall temperature. Installing it in a hallway or a common area can help ensure it effectively regulates the temperature throughout the space.
- Avoid Kitchens and Bathrooms: Installing a thermostat in the kitchen or bathroom can lead to inaccurate temperature readings due to heat from appliances or moisture from showers. These areas can have fluctuating temperatures that do not represent the comfort level of other living areas in the home.
- Consider the Home’s Design: The layout of your home can impact where the thermostat should be placed. For homes with multiple floors, a multi-zone system might be necessary to ensure each level is adequately heated or cooled, which may require additional thermostats in different areas.