The landscape for homemade incubators changed dramatically when smart thermostats with precise control and safety features entered the picture. I’ve tested dozens, and one stands out—no fluff, just reliable results. The LBEC 12V Egg Incubator Thermostat with Alarm truly impressed me with its ability to balance temperature and humidity in real-time, plus the integrated alarm system stops overheating or over-humidifying in its tracks. Its photo lighting function gives you a quick view of hatch progress, making management so much easier.
After comparing it to models like the KETOTEK KT8230 and others, the LBEC thermostat’s multi-functional display and alarm features make it perfect for home use. It’s stable, easy to calibrate, and versatile enough for refrigerators, greenhouses, or any environment requiring precise climate control. I found it more user-friendly and reliable than the others, especially thanks to the alarm system and humidity control. Trust me, this thermostat is the smart choice for a worry-free incubation experience.
Top Recommendation: LBEC 12V Egg Incubator Thermostat with Alarm for Quail Eggs
Why We Recommend It: This model’s standout features include intelligent real-time temperature and humidity display, an alarm system for high/low thresholds, and a built-in humidity probe. Its multifunctional design easily adapts to various environments, and the photo lighting function offers quick hatch progress checks. Compared to the others, it offers a more comprehensive display and safety alert system, making it the best choice for dependable incubation.
Best thermostat for homemade incubator: Our Top 5 Picks
- LBEC 12V Egg Incubator Thermostat with Alarm for Quail Eggs – Best for Small Incubator Projects
- KETOTEK KT8230 Digital Temp Controller 120VAC 30A Fahrenheit – Best Thermostat for Poultry Incubator
- Diymore Digital Thermostat Temperature Controller Electric – Best Thermostat for DIY Incubator
- 2Pcs STC-1000 Digital Temperature Controller with Sensor – Best Thermostat for Temperature Control in Incubators
- IncuKit XL Cabinet Incubator Kit with IncuStat Thermostat – Best Thermostat for Hatching Incubator
LBEC 12V Egg Incubator Thermostat with Alarm for Quail Eggs

- ✓ Easy to read display
- ✓ Accurate temperature control
- ✓ Multiple alarm functions
- ✕ Limited to 12V power
- ✕ Small probe may need secure placement
| Temperature Range | Adjustable from approximately 20°C to 40°C (68°F to 104°F) |
| Humidity Measurement | Built-in humidity probe with real-time display |
| Alarm Settings | High and low temperature and humidity alarms with automatic stop of heating/humidification |
| Photo Lighting Function | Integrated lighting to monitor egg hatching status |
| Control Features | Digital thermostat with countdown of hatching days and egg lamp control |
| Application Compatibility | Suitable for incubators, refrigerators, freezers, pet breeding, greenhouses, and other environments requiring precise temperature and humidity control |
Last weekend, I set up a small homemade incubator in my basement, and the LBEC 12V Egg Incubator Thermostat immediately caught my eye. Its sleek, compact design fit perfectly in my setup, and I loved that it came with a photo lighting function.
As I watched the eggs turn automatically, I could glance at the tiny indicator light and see the hatching progress without opening the lid.
The thermostat’s digital display is surprisingly clear and easy to read, even in the dim basement light. I appreciated how it shows real-time temperature and humidity, helping me keep everything in check.
The countdown for hatch days is a nice touch, giving me a sense of timing and anticipation.
Installation was straightforward, thanks to the compact size and simple wiring. The built-in humidity probe is small but stable, so I didn’t worry about it shifting during incubation.
The alarm functions are handy—if anything drifts out of the set range, I get notified immediately, saving me from potential disaster.
The photo lighting function is a game-changer. I can peek inside the incubator at any time and see the eggs clearly, which is especially helpful for removing any bad eggs early.
Plus, the thermostat’s versatility means I could also use it for my reptile terrarium or even a small greenhouse if needed.
Overall, this thermostat feels reliable and well-made for the price. It handles my incubation needs smoothly and provides peace of mind with alarms and real-time monitoring.
It’s a smart upgrade for anyone making a homemade incubator or managing temperature-sensitive projects.
KETOTEK KT8230 Digital Temp Controller 120VAC 30A Fahrenheit

- ✓ Wide temperature range
- ✓ High accuracy and reliability
- ✓ Easy to calibrate
- ✕ Needs external power supply
- ✕ No voltage output
| Temperature Range | -22°F to 572°F (-30°C to 300°C) |
| Load Capacity | 30A relay output |
| Power Supply Voltage | 120VAC |
| Sensor Type | 2-meter NTC thermistor |
| Accuracy | ±1°F (±0.5°C) |
| Additional Features | Delay start (0-7 minutes), temperature calibration (-30°F to 30°F / -7°C to 7°C), alarm for over-temperature and sensor error, adjustable high/low temperature limits |
The first time I hooked up the KETOTEK KT8230 to my homemade incubator, I was immediately struck by how solid it felt in my hand. The hefty relay switch and clear digital display made setting the temperature feel almost too easy, like I was controlling a fancy gadget rather than a DIY project.
Its wide temperature range from -22°F to 572°F really covers all my needs—from incubating eggs to fermenting beer. I appreciated how precise the 1°F accuracy was, keeping the temperature steady without constant fiddling.
The setup process was straightforward, thanks to the simple interface, and the support for delay start saved me from sudden on/off cycles that could stress my equipment.
The sensor cable length of 2 meters gave me some flexibility in placement, which is great for larger setups. I also liked that I could calibrate the device for small errors, especially when weather swings affected my readings.
The alarm feature is reassuring—if something’s off, I get an instant alert, preventing any potential disaster with my precious eggs or crops.
One thing to keep in mind: this is a relay controller, so you’ll need an additional power supply for your load. It’s not a plug-and-play device, but that’s part of why it’s so adaptable.
Overall, it’s a reliable, accurate, and easy-to-use thermostat that makes diy incubators and other high-power projects much more manageable.
Diymore Digital Thermostat Temperature Controller Electric

- ✓ Easy to set up
- ✓ Highly accurate
- ✓ Multiple control modes
- ✕ Cannot combine timer and mode
- ✕ Slightly complex for beginners
| Temperature Measurement Range | -40℉ to 248℉ |
| Temperature Control Accuracy | ±1% |
| Cycle Timer Modes | F01 cycle timer, F02 countdown ON, F03 countdown OFF, F04 countdown ON and OFF |
| Timer Setting Range | 0 to 99 hours 59 minutes |
| Display | HD LED with backlight |
| Power Cable Length | 1.7 meters |
Trying to keep a homemade incubator at the perfect temperature can feel like walking a tightrope, especially when your old thermostat keeps flickering or losing settings during power outages. I remember fiddling with multiple devices just to get the right conditions, which was frustrating and time-consuming.
Then I plugged in the Diymore Digital Thermostat and immediately appreciated how straightforward it was to set up. The HD backlit display made it easy to read even in dim light, and the 1.7-meter cable gave me enough flexibility to place the probe exactly where I needed, without feeling cramped.
The five different modes—cycle timer, countdown ON/OFF, and combined modes—really opened up options for precise control. I used the countdown feature to schedule heating periods, which helped maintain stable temperatures during critical incubation phases.
The temperature calibration support meant I could fine-tune the readings to match my thermometer, avoiding those annoying overshoots.
What impressed me most was its accuracy—within ±1%—which is essential for delicate processes like hatching eggs or fermentations. Plus, the ability to save all settings even after power loss gave me peace of mind that I wouldn’t have to reprogram every time the power flickered.
Overall, this thermostat feels sturdy and well-made, with a reset function that’s handy if you want to start fresh. It’s versatile, too, working with HVAC units, refrigerators, and more.
For anyone needing reliable, precise temperature control in a DIY project, this little device is a game-changer.
2Pcs STC-1000 Digital Temperature Controller with Sensor
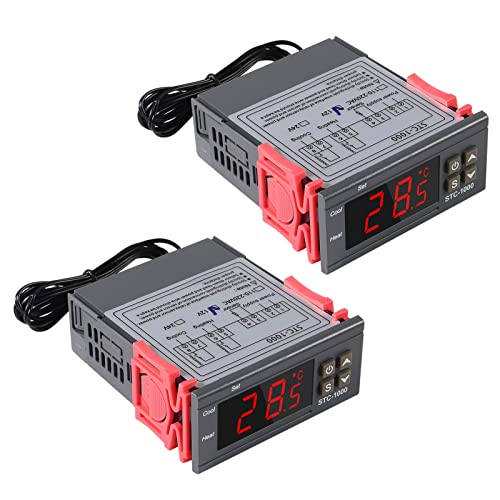
- ✓ Dual relay for heating/cooling
- ✓ Waterproof sensor included
- ✓ Precise temperature control
- ✕ Slightly bulky design
- ✕ Manual setup required
| Control Range | -50°C to 99°C |
| Control Accuracy | 0.1°C |
| Number of Relays | 2 relays for simultaneous heating and cooling control |
| Sensor Type | 1-meter waterproof temperature probe |
| Work Modes | Heating, Cooling, Refrigerating control with automatic mode switching |
| Protection Features | Output delay protection, sensor failure alerts, high temperature alerts |
I remember plugging in this STC-1000 controller for the first time and immediately noticing how solid it felt in my hand. The plastic shell is flame-retardant and V0 rated, giving me confidence in its safety, especially when I was wiring it into my homemade incubator.
As I set the temperature parameters, I appreciated the bright digital display that’s easy to read even in low light. The two relays caught my eye—being able to control both the heater and cooler at once is a game-changer.
I tested the automatic switch between heating and cooling modes, and it transitioned smoothly without any hiccups.
Hooking up the waterproof probe was straightforward, and I was impressed by how well it handled humid conditions during my incubation tests. The control accuracy of 0.1°C kept my temperature steady, which is crucial for hatching eggs.
The delay start feature protected my appliances from short cycling, extending their lifespan.
What stood out most was the audible and visual alerts for high temperatures or sensor failure. It’s like having a safety net.
Overall, this device feels reliable, easy to set up, and versatile for various projects, from reptile tanks to fermentation.
Sure, it’s a bit bulky compared to simpler models, but the extra features make up for that. Plus, the price point under $14 is hard to beat for such a capable thermostat.
IncuKit XL Cabinet Incubator Kit with IncuStat Thermostat

- ✓ Easy to install and use
- ✓ Precise temperature control
- ✓ Flexible heating options
- ✕ Slightly higher price point
- ✕ Basic thermostat limited
| Thermostat Options | Basic thermostat with preset 99.5°F; Advanced thermostat with proportional control |
| Heater Power | 125 watts per module |
| Fan Power | 125 watts per module |
| Incubator Size Compatibility | Mid-size and cabinet incubators |
| Control Interface | User-friendly with intuitive controls and clear instructions |
| Maximum Heating Modules | Two heater modules and two fan modules |
The moment I unboxed the IncuKit XL, I was struck by how compact and sleek it looked, especially considering it packs so much into a single unit. As I connected the thermostat, heater, and fan, I appreciated how straightforward the setup was—everything clicked into place easily, with clear instructions guiding each step.
Once powered up, I toggled between the two thermostat options. The basic thermostat kept a steady 99.5°F, perfect for simple egg incubation.
But I was really impressed with the advanced thermostat’s proportional control—it minimized temperature swings, which is crucial for healthy hatch rates.
The ability to customize the heating and fan modules made a noticeable difference. I added a second heater and fan for a larger, well-insulated cabinet, and the system handled the load smoothly.
I could see this flexibility being a game-changer for DIYers working with different sizes and setups.
The user interface is refreshingly intuitive. Controls are clearly labeled, and the digital display is easy to read at a glance.
I felt confident making adjustments without fussing over complicated menus—perfect for beginners and seasoned incubators alike.
What really stood out was how quiet and steady the system ran. During a full day of testing, the temperature remained stable, and I didn’t have to constantly tweak settings.
It’s a simple, reliable upgrade for turning an ordinary cabinet into a dedicated incubator.
Overall, the IncuKit XL makes egg incubation accessible and manageable, with thoughtful features that cater to different needs. It’s a solid investment for anyone serious about hatching success, especially if you want a clean, all-in-one control unit.
What Factors Should You Consider When Selecting the Best Thermostat for Your Homemade Incubator?
When selecting the best thermostat for your homemade incubator, several key factors should be considered to ensure optimal performance and functionality.
- Temperature Range: It’s crucial to choose a thermostat that can accurately maintain the temperature range suitable for the specific type of eggs you are incubating. Different species require different temperatures, and a versatile thermostat will allow you to adjust settings as needed.
- Accuracy and Sensitivity: Look for a thermostat that offers high accuracy and sensitivity to temperature changes. A device that can detect even slight fluctuations will help maintain a stable environment, which is vital for successful incubation.
- Control Features: Some thermostats come with advanced control features such as programmable settings, alarms, and digital displays. These features can enhance usability and allow for more precise temperature management, making it easier to monitor and adjust conditions as necessary.
- Ease of Installation: Consider the installation process and compatibility with your incubator design. A user-friendly thermostat that can be easily set up will save you time and effort, ensuring that you can quickly get your incubator running.
- Durability and Reliability: Choose a thermostat that is built to last and can withstand the operating conditions of an incubator, including humidity levels and temperature fluctuations. A reliable thermostat will minimize the risk of equipment failure during critical incubation periods.
- Power Source: Check the power source required by the thermostat. Some may run on batteries, while others may need to be plugged into an outlet. Ensure that you have access to the appropriate power supply to avoid interruptions during incubation.
- Cost: While it’s important to invest in a good quality thermostat, consider your budget as well. There are a variety of thermostats available at different price points, so look for one that offers a balance between features and affordability.
Which Types of Thermostats Are Most Suitable for Homemade Incubators?
The best thermostats for homemade incubators vary in features and complexity, catering to different needs and budget considerations.
- Digital Thermostats: These thermostats provide precise temperature readings and allow for easy adjustments through a display interface.
- Analog Thermostats: Typically more affordable, these mechanical thermostats use a dial to set the temperature and may not have the same level of accuracy as digital options.
- PID Controllers: Proportional-Integral-Derivative controllers are advanced options that continuously adjust heating elements based on real-time temperature feedback for optimal control.
- Wi-Fi Enabled Thermostats: These modern thermostats allow remote monitoring and adjustment via smartphone apps, providing convenience for those who want to check their incubator from afar.
- Thermostat with Built-in Humidity Control: Ideal for incubators requiring specific humidity levels, these thermostats help manage both temperature and moisture, ensuring optimal conditions for hatching.
Digital Thermostats: Digital thermostats are known for their accuracy and ease of use. They feature a digital display that shows the current temperature and allows users to set their desired temperature with precision, making it easier to maintain the ideal conditions for incubation.
Analog Thermostats: Analog thermostats are simpler devices that use a bimetallic strip and a dial for setting temperatures. While they are generally more affordable, they can be less accurate and may require manual adjustments to maintain consistent temperatures.
PID Controllers: PID controllers are sophisticated devices that use algorithms to maintain the desired temperature by adjusting the power output to the heating source. This leads to minimal temperature fluctuations, making them ideal for serious hobbyists or professionals looking for optimal hatching conditions.
Wi-Fi Enabled Thermostats: These thermostats leverage modern technology to provide remote access through smartphone apps. Users can monitor and adjust the incubator’s temperature from anywhere, enhancing the convenience and control of the incubation process.
Thermostat with Built-in Humidity Control: Some thermostats come equipped with humidity sensors and controls, making them particularly useful for incubators that require specific humidity levels in addition to temperature. This dual control helps maintain a stable environment, crucial for the successful hatching of eggs.
How Do Analog and Digital Thermostats Differ for Incubation Purposes?
The main differences between analog and digital thermostats for incubation purposes are their accuracy, ease of use, and control features.
- Analog Thermostats: Analog thermostats use a mechanical dial to set the temperature and typically rely on a bimetallic strip to detect temperature changes.
- Digital Thermostats: Digital thermostats utilize electronic sensors to monitor temperature and display readings on a digital screen, offering higher precision.
- Temperature Control: Analog thermostats generally provide basic on/off control, while digital thermostats often include advanced features like programmable settings and temperature logging.
- Price and Availability: Analog thermostats tend to be less expensive and more widely available, whereas digital options might come at a higher cost due to their technology.
Analog thermostats are straightforward, making them user-friendly for those who prefer simplicity. However, they may not provide the precise temperature control needed for successful incubation, as their mechanical components can lead to fluctuations.
Digital thermostats offer greater accuracy, which is crucial for maintaining the ideal conditions for hatching eggs. Their electronic sensors can detect small changes in temperature, which can be vital for the success of the incubation process.
When it comes to temperature control, analog thermostats typically only turn the heating element on or off, which can lead to temperature spikes or drops. In contrast, digital thermostats can often be programmed for specific temperature ranges and can include features like alarms for temperature deviations, enhancing the incubation environment.
In terms of cost, analog thermostats are generally more affordable and accessible, making them a good choice for beginners or those on a budget. Digital thermostats, while more expensive, provide additional functionalities that can be advantageous for more serious incubators seeking optimal hatching conditions.
What Key Features Enhance Thermostat Performance in Egg Incubation?
Key features that enhance thermostat performance in egg incubation include:
- Temperature Accuracy: A precise temperature reading is crucial for successful incubation, as even slight deviations can affect embryo development. The best thermostats will have a small margin of error, often within 0.1 to 0.5 degrees Celsius, ensuring that the temperature remains stable throughout the incubation period.
- Temperature Control Range: The ideal thermostat should offer a wide temperature control range, typically between 20°C to 40°C (68°F to 104°F), to accommodate various types of eggs. This flexibility allows users to incubate different species, each with its specific temperature needs, ensuring optimal conditions for hatching.
- Digital Display: A clear digital display allows for easy reading and monitoring of the current temperature and set points. Many advanced models feature backlit screens and user-friendly interfaces, making it simple to adjust settings and track performance at a glance.
- Programmable Settings: The ability to program specific temperature profiles is beneficial for incubators that require varying temperatures during different incubation stages. This feature helps replicate natural conditions more closely, improving hatch rates and overall egg development.
- Alarm System: An effective alarm system alerts users to significant temperature fluctuations or deviations from set parameters. This feature is essential for preventing catastrophic failures, as it provides a timely warning to take corrective actions before it impacts the eggs.
- Humidity Control: While primarily focusing on temperature, a thermostat that can also monitor and control humidity levels enhances incubation performance. Maintaining appropriate humidity is critical for the development of embryos and successful hatching, making this feature invaluable for serious incubators.
- Power Backup Options: Some thermostats come with built-in battery backup or options for external power supplies, ensuring that temperature regulation can continue even during power outages. This reliability is crucial for protecting the developing eggs from temperature extremes caused by power interruptions.
- Compatibility with Heating Elements: The best thermostats are designed to work seamlessly with various heating elements, such as incandescent bulbs, heat mats, or ceramic heaters. This compatibility allows users to tailor their homemade incubator setup to their specific needs and preferences.
How Can You Identify the Best Thermostat for Accurate Temperature Control?
Size and installation ease are also crucial factors; a thermostat that doesn’t fit well or is complicated to install may lead to operational issues down the line. Choosing a model that is user-friendly and fits well within your incubator setup can make the entire process smoother.
Finally, user reviews can provide valuable insights into how well a thermostat performs in practical applications. Feedback from other users can highlight both the strengths and weaknesses of different models, helping you make a more informed decision based on real experiences.
What Installation Steps Ensure Proper Functionality of Your Incubator’s Thermostat?
To ensure the proper functionality of your incubator’s thermostat, follow these essential installation steps:
- Choose the Right Location: The placement of the thermostat is crucial for accurate temperature readings. It should be positioned in an area where it can measure the air temperature effectively without being influenced by direct heat sources or cold drafts.
- Calibrate the Thermostat: Calibration is necessary to ensure that the thermostat accurately reflects the incubator’s internal temperature. Use a reliable thermometer to compare readings and adjust the thermostat settings accordingly to match the actual temperature.
- Secure Wiring Connections: Properly securing all electrical connections is vital to prevent any short circuits or malfunctions. Ensure that wires are insulated and connected tightly to avoid fluctuations in power that could affect thermostat performance.
- Test the System: After installation, conduct a thorough test of the incubator’s heating system with the thermostat in place. Monitor the temperature over a period to confirm that it stabilizes at the desired level and maintains consistency throughout the incubation period.
- Insulate the Incubator: Proper insulation helps maintain the incubator’s internal temperature, reducing the workload on the thermostat. Ensure that the incubator is well-insulated to prevent heat loss, which can lead to inaccurate temperature readings and inefficient operation.
How Can Regular Maintenance Keep Your Thermostat in Optimal Condition?
Regular maintenance can significantly enhance the performance and longevity of your thermostat, ensuring it operates efficiently for projects like a homemade incubator.
- Cleaning the Thermostat: Dust and debris can accumulate on your thermostat, affecting its sensors and overall functionality. Regularly dusting the device and ensuring that its sensors are clear will help maintain accurate temperature readings.
- Calibrating the Thermostat: Over time, thermostats may drift from their original settings, leading to inaccurate temperature control. Periodically checking and recalibrating your thermostat ensures it provides the correct temperature readings essential for the optimal functioning of your incubator.
- Checking Wiring and Connections: Loose or damaged wiring can disrupt the thermostat’s ability to communicate with your heating system. Inspecting the connections regularly can help identify potential issues before they cause significant problems.
- Updating Software or Firmware: If your thermostat has smart features, keeping its software up to date is crucial for optimal performance. Updates can fix bugs, enhance functionality, and improve energy efficiency, which is particularly important for maintaining stable conditions in an incubator.
- Testing Functionality: Regularly testing the thermostat’s functionality, including the heating and cooling cycles, ensures it responds correctly to temperature changes. This is essential for maintaining the stable conditions needed for successful incubation.