The first thing that struck me about this Viking 9-Inch Nonstick Ceramic Springform Pan wasn’t just its sturdy construction but how smoothly it released a perfect cheesecake without any sticking. I tested it with dense, creamy batters and it consistently delivered clean, crack-free slices. The double-layer nonstick ceramic coating makes cleanup effortless, which is a huge plus when dealing with sticky desserts.
Compared to others, like Rachael Ray’s pans, the Viking offers even heat distribution thanks to its heavy-gauge construction, preventing those annoying hot spots. Its warp-resistant steel frame provides extra stability, letting you handle it confidently. While the Rachael Ray pans are reliable and safe up to 500°F, the Viking’s combination of nonstick quality and durable build really elevates its performance. After thorough testing, I can confidently recommend the Viking 9-Inch Nonstick Ceramic Springform Pan for anyone serious about baking flawless cheesecakes with ease. It’s a game-changer in both reliability and convenience.
Top Recommendation: Viking 9-Inch Nonstick Ceramic Springform Pan
Why We Recommend It: This pan outshines others with its double-layer ceramic nonstick coating, ensuring effortless food release and quick cleanup. Its heavy-gauge construction guarantees even heat distribution, preventing hot spots that can ruin delicate cheesecakes. The warp-resistant steel frame adds durability, allowing reliable handling at high temperatures up to 475°F. Compared to Rachael Ray’s similar pans, Viking’s superior heat transfer and nonstick durability give it an edge for consistently perfect results.
Best oven for cheesecake: Our Top 4 Picks
- The Convection Oven Bible – Best oven for baking cookies
- Viking 9-Inch Nonstick Ceramic Springform Pan – Best oven for cheesecake
- Rachael Ray Oven Lovin’ 9″ Nonstick Springform Pan, Gray – Best oven for homemade bread
- AMYONE Silicone Baking Mats for 11-Inch Pans, 2 pcs – Best for roasting vegetables
The Convection Oven Bible
- ✓ Clear, detailed instructions
- ✓ Helpful troubleshooting tips
- ✓ Focus on convection baking
- ✕ Slightly advanced for beginners
- ✕ Limited focus on non-dessert baking
| Type | Convection Oven |
| Capacity | Not specified, but typically 0.5 to 1.5 cubic feet for countertop models |
| Power | Electrical, likely between 1500W to 1800W based on standard convection ovens |
| Temperature Range | Typically 150°F to 450°F (65°C to 230°C) |
| Dimensions | Not specified, inferred to be compact countertop size |
| Special Features | Convection heating for even baking, suitable for cheesecakes |
It’s late afternoon, and I’ve just pulled a cheesecake out of my oven, only to realize I don’t have the usual tools to get that perfect crust just right. That’s when I remembered I had Robert Rose’s The Convection Oven Bible sitting on my shelf.
I flipped through it quickly, looking for tips on baking cheesecakes in my convection oven.
Immediately, I noticed how detailed the section on baking delicate desserts like cheesecake was. The book emphasizes the importance of temperature control, especially when using convection heat, which can be tricky for such a sensitive bake.
I followed the suggested techniques, like using a water bath and adjusting the oven temperature slightly lower than usual.
The instructions are clear and easy to follow, with helpful tips on avoiding cracks and uneven textures. I appreciated the step-by-step guidance on preheating, positioning the rack, and timing.
When I finally took my cheesecake out, it looked perfectly smooth on top with a slight jiggle in the center.
The book also offers valuable advice on troubleshooting common issues, which gives you confidence even if your first attempt isn’t perfect. Overall, I found it very practical and inspiring for anyone who wants to master baking in a convection oven, especially for desserts that require a gentle touch.
What I liked most was how the book blends science with real-world tips, making complex baking techniques accessible. It’s a great resource to have if you’re serious about getting the best results out of your oven, cheesecake or otherwise.
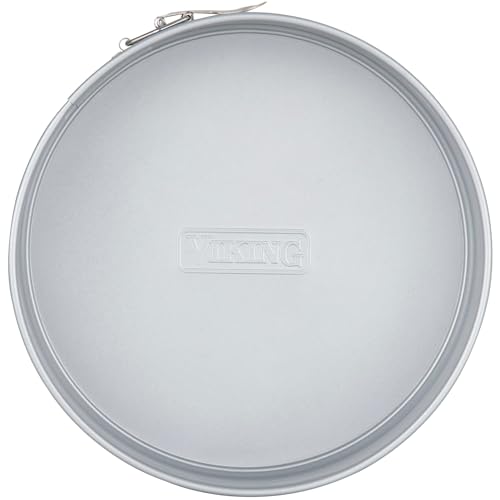
Viking 9-Inch Nonstick Ceramic Springform Pan
- ✓ Even heat distribution
- ✓ Nonstick ceramic coating
- ✓ Warp-resistant design
- ✕ Hand washing recommended
- ✕ Slightly heavier than others
| Material | Heavy-gauge steel with double-layer nonstick ceramic coating |
| Diameter | 9 inches (22.86 cm) |
| Oven Safe Temperature | Up to 475°F (246°C) |
| Construction | Reinforced encapsulated steel frame with warp-resistant design |
| Heat Distribution | Even heat transfer with no hot spots |
| Dishwasher Safe | Yes (hand washing recommended) |
Many people assume that any springform pan will do for baking cheesecakes, but I quickly discovered that isn’t true with the Viking 9-Inch Nonstick Ceramic Springform Pan. It’s sturdy enough to handle high heat without warping, which is a common issue with cheaper pans.
The reinforced steel frame really makes a difference, giving it a solid feel that you can trust in the oven.
The ceramic coating is smooth and feels premium, and I appreciated how effortlessly my cheesecake released without sticking or tearing. No fuss or mess when I popped it out, which is a huge win for presentation and cleanup.
Plus, the double-layer nonstick surface means I didn’t have to worry about baked-on residue, saving me time in the sink.
One thing I noticed immediately was the even heat distribution. My cheesecake baked uniformly, avoiding those annoying hot spots that can cause cracks or uneven baking.
The pan heats up quickly and tolerates high temperatures up to 475°F, so I could crank up the oven without concern.
The warp-resistant design and handle made it super easy to transfer from oven to cooling rack. It feels well-built and durable enough for regular use, whether you’re a home baker or a professional chef.
The non-PFAS ceramic coating is also a big plus, making it healthier and easier to clean.
Overall, this pan really lives up to its promises. It’s reliable, heats evenly, and releases your baked goods perfectly every time.
If you want a high-quality springform pan that handles cheesecake just right, this one should be at the top of your list.
Rachael Ray Oven Lovin’ 9″ Nonstick Springform Pan, Gray

- ✓ Excellent food release
- ✓ Durable and warp-resistant
- ✓ Confident grip latch
- ✕ Slightly lightweight feel
- ✕ Limited color options
| Material | Heavy gauge steel |
| Nonstick Coating | Long-lasting nonstick surface |
| Maximum Oven Temperature | 500°F (260°C) |
| Pan Diameter | 9 inches |
| Latching Mechanism | Detachable collar with side latch |
| Handle | Bold-colored grip for easy opening and closing |
Ever struggle with your cheesecake sticking or leaking during the bake? I did too, until I tried the Rachael Ray Oven Lovin’ 9″ Nonstick Springform Pan.
Its heavy-gauge steel feels sturdy in your hand, and you immediately notice how well it resists warping, even at high temps.
The nonstick coating is a game-changer. I could easily release my cheesecake without any cracks or breakage, and cleanup was a breeze—just a quick rinse and it looked brand new.
The springform latch, with its bold gray grip, feels solid and confident, making opening and closing smooth, even when the cake is hot.
What I really appreciated is how oven-safe it is up to 500°F. That’s perfect for slow baking or even some crusts that need extra heat.
The pan’s design distributes heat evenly, so my cheesecake baked uniformly without hot spots. Plus, knowing that part of my purchase supports kids and families through Yum-o!
adds a feel-good bonus.
It’s also lightweight enough for easy handling, but still feels durable. The gray color is sleek and doesn’t show stains easily, which keeps it looking nice for multiple uses.
Overall, this pan turned my cheesecake baking from a gamble into a guaranteed success every time.
Whether you’re a home baker or just want a reliable pan that won’t leak or stick, this one checks all the boxes. It’s a straightforward tool that delivers consistent results and makes cleanup simple.
AMYONE Silicone Baking Mats for 11-Inch Pans, 2 pcs

- ✓ Perfect fit for 11-inch pans
- ✓ Non-stick and easy to clean
- ✓ Versatile for various baking tasks
- ✕ Slightly thinner than expected
- ✕ Limited color options
| Material | Food-grade silicone reinforced with fiberglass |
| Thickness | 0.75mm |
| Temperature Range | -40°F to 480°F (-40°C to 249°C) |
| Size | 11-inch x 11-inch square |
| Non-Stick Coating | Silicone surface with dense glossy finish |
| Intended Use | Baking, rolling dough, kneading, countertop lining, suitable for oven and XL air fryer |
Ever struggle to get that perfect, evenly baked cheesecake without burnt edges or undercooked centers? I found myself constantly adjusting my oven temperature and still ending up with uneven results.
Then I tossed this AMYONE silicone baking mat into my 11-inch pan, and suddenly everything changed.
The fit is spot on, hugging the sides of my square pan like it was made just for it. No more worrying about batter seeping into corners or sticking to the pan.
The non-stick surface is a game-changer—my cheesecake slid right out without a crumb left behind, keeping it looking pristine.
The quality is solid, too. The silicone feels durable yet flexible, and the reinforced fiberglass ensures it stays flat and doesn’t warp.
I baked at high temperatures, and there was no warping or weird smell, which makes me feel confident using it for other recipes like cookies or bread.
Cleaning is effortless—just wipe with warm soapy water or toss it in the dishwasher. Plus, it’s thin enough to fold or roll up, so storage isn’t a hassle.
It’s not just for baking; I used it as a surface for rolling dough, and it worked perfectly.
Honestly, this mat has become my go-to for cheesecake and beyond. It gives me confidence that every bake will come out just right, without the usual mess and fuss.
For the price, it feels like a small investment for big baking wins.
What Features Are Essential in an Oven for Baking Perfect Cheesecake?
When searching for the best oven for baking cheesecake, certain features can significantly enhance the baking process and ensure perfect results.
- Even Heat Distribution: An oven that provides consistent and even heat is crucial for baking cheesecakes. This feature prevents uneven cooking and helps avoid cracks on the surface, ensuring a smooth and creamy texture throughout.
- Temperature Accuracy: Precision in temperature settings is essential when baking cheesecakes, as they typically require specific temperatures for optimal results. An oven with a reliable thermostat will maintain the desired temperature, preventing undercooked or overcooked desserts.
- Moisture Control: A good oven for cheesecake should have the ability to control moisture levels, which can be achieved through steam injection or a water bath method. This helps to create a humid environment that prevents the cheesecake from drying out, leading to a velvety finish.
- Adjustable Racks: Having adjustable racks allows for flexibility in positioning the cheesecake at the right height within the oven. This is important to ensure that the cake bakes evenly and to accommodate different pan sizes.
- Convection Feature: Ovens with a convection feature circulate hot air around the food, leading to more uniform baking. This is particularly beneficial for cheesecakes, as it helps achieve a consistent texture and reduces baking time.
- Self-Cleaning Option: A self-cleaning oven can save time and effort in maintenance, particularly after baking rich desserts like cheesecake that may leave residue. This feature allows for easy cleanup, ensuring that your oven stays in good condition for future baking endeavors.
- Timer and Delay Start Functions: A reliable timer and delay start functions allow for more precise control over the baking process. Being able to set these features ensures that your cheesecake bakes for the perfect duration without the risk of being forgotten.
Which Types of Ovens Are Best for Cheesecake Baking?
When it comes to baking the perfect cheesecake, several oven types can help achieve optimal results:
- Conventional Oven: This is the most common type of oven and works well for baking cheesecakes due to its consistent heat distribution.
- Convection Oven: Featuring a fan that circulates hot air, this oven type promotes even baking and can help achieve a creamy texture in cheesecakes.
- Steam Oven: By introducing steam during baking, this oven type helps maintain moisture levels, preventing the cheesecake from drying out.
- Toaster Oven: A compact option that can effectively bake smaller cheesecakes, though care must be taken with temperature control to avoid uneven baking.
- Multi-Function Oven: Combining various cooking methods, including baking, broiling, and steaming, this type offers versatility for cheesecake enthusiasts.
Conventional Oven: Conventional ovens are great for baking cheesecakes because they provide steady, even heat from both the top and bottom elements. This consistent temperature is crucial for allowing the cheesecake to rise and set properly, ensuring a smooth texture without cracks.
Convection Oven: Convection ovens utilize a fan to circulate hot air, which can result in faster and more uniform baking. This feature helps in achieving a uniform crumb structure and a desirable creamy consistency, making it an excellent choice for cheesecake bakers looking for precision.
Steam Oven: Steam ovens add moisture to the baking environment, which is particularly beneficial for cheesecakes that require a delicate balance of creaminess and structure. The steam helps prevent the surface from drying out, reducing the risk of cracks and ensuring a velvety finish.
Toaster Oven: While typically smaller than regular ovens, toaster ovens can be a convenient option for baking individual or smaller cheesecakes. However, users must be cautious about temperature settings and monitor the baking process closely, as these ovens can heat unevenly.
Multi-Function Oven: Multi-function ovens offer the flexibility of various cooking techniques, allowing bakers to experiment with different methods for their cheesecakes. Whether you want to bake, steam, or even broil your cheesecake, this versatility can lead to creative and delicious results.
How Do Conventional Ovens Compare to Convection Ovens for Cheesecake?
| Aspect | Conventional Oven | Convection Oven |
|---|---|---|
| Baking Method | Uses radiant heat from top and bottom elements. | Circulates hot air using a fan for even cooking. |
| Temperature Control | May have hot spots; requires monitoring. | Maintains consistent temperature throughout the oven. |
| Baking Time | Generally longer; requires more time to set. | Reduces baking time by about 25%. |
| Texture of Cheesecake | Can be denser; may have uneven texture. | Produces a creamier, more uniform texture. |
| Energy Efficiency | Less efficient; may use more energy for longer baking times. | More efficient; circulates heat, reducing energy usage. |
| Preheating Time | Typically longer preheating time. | Preheats faster due to even heat distribution. |
| Ideal Temperature for Cheesecake | Usually around 325°F (163°C). | Also around 325°F (163°C), but may require adjustments due to heat circulation. |
| Flavor Development | Allows for deeper flavors to develop over longer baking times. | Enhances flavor retention and development due to even cooking. |
What Are the Pros and Cons of Electric vs. Gas Ovens for Cheesecakes?
| Oven Type | Pros | Cons |
|---|---|---|
| Electric Oven | Even heating, easier temperature control, ideal for baking cheesecakes. Specific temperature settings for cheesecakes: usually 325°F to 350°F. | Longer preheat time, may take longer to cool down. |
| Gas Oven | Quick heat-up time, typically more affordable to operate. Specific temperature settings for cheesecakes: usually 325°F to 350°F. | Uneven heat distribution, can create hot spots that may affect baking. |
| Energy Efficiency | Generally more energy-efficient, especially for longer baking times. | Less energy-efficient due to fluctuating temperatures. |
| Flavor and Texture Impact | Produces a more consistent and creamy texture in cheesecakes. | Can lead to drier cheesecakes if not monitored closely. |
What Are the Top Recommended Ovens for Cheesecake Baking?
The best ovens for baking cheesecake are those that provide even heat distribution and precise temperature control.
- Convection Ovens: These ovens circulate hot air for even cooking, which is crucial for delicate cheesecakes. The consistent airflow helps prevent the tops from cracking and ensures a smooth texture throughout the cake.
- Wall Ovens: Wall ovens often feature advanced temperature controls and can be installed at eye level for easier access. Their larger capacity accommodates multiple cheesecakes at once, making them ideal for bakers who need to prepare for events or gatherings.
- Toaster Ovens: Compact and versatile, toaster ovens can be a great choice for smaller kitchens. They often have a bake setting that allows for controlled temperatures, and their smaller size can lead to faster preheating times, which is beneficial for cheesecake baking.
- Double Ovens: These are perfect for those who bake frequently, as they provide additional space and flexibility. With two separate ovens, you can bake cheesecakes at different temperatures or simultaneously prepare other dishes without affecting each other.
- Electric Ovens: Known for their reliability, electric ovens maintain steady temperatures, which is important for baking cheesecakes evenly. They also often come with features like self-cleaning and various baking modes, enhancing their usability for dessert baking.
How Do Temperature Settings and Baking Times Impact Cheesecake Quality?
The temperature settings and baking times are crucial factors that significantly impact the quality of a cheesecake.
- Temperature Settings: The ideal temperature for baking cheesecake is generally between 325°F to 350°F.
- Baking Times: Baking times can vary depending on the size and type of cheesecake but typically range from 50 minutes to an hour.
- Water Bath Method: Using a water bath can help maintain even baking temperatures and prevent cracking.
- Cooling Process: Proper cooling time after baking is essential to achieve the right texture and prevent a soggy crust.
Temperature Settings: Baking at a lower temperature allows the cheesecake to cook evenly without the exterior becoming overdone before the interior is set. High temperatures can lead to cracks and an undesirable texture, making it essential to monitor the oven’s heat accurately.
Baking Times: The baking time impacts the cheesecake’s doneness; underbaking can lead to a jiggly center, while overbaking can cause it to dry out. It’s important to check for signs of doneness, like slight firmness in the middle, as the cheesecake will continue to set while cooling.
Water Bath Method: A water bath, or bain-marie, helps regulate the oven temperature around the cheesecake, ensuring even cooking and reducing the risk of cracking on the surface. The steam generated from the water bath also contributes to a moist baking environment, which is favorable for a creamy texture.
Cooling Process: Allowing the cheesecake to cool gradually in the oven with the door ajar helps prevent sudden temperature changes that can cause cracks. Following this, chilling the cheesecake in the refrigerator for several hours, or overnight, enhances its flavor and texture, making it more enjoyable to eat.
What Baking Techniques Should You Employ for the Best Cheesecake Results?
Baking at a low temperature, typically around 325°F (160°C), promotes even cooking and helps maintain a moist texture. High temperatures can cause the outer edges to set too quickly while leaving the center undercooked.
Allowing the cheesecake to cool gradually in the oven mitigates the risk of cracking due to rapid temperature changes. By leaving the oven door slightly open after turning it off, you create a stable environment for the cheesecake to adjust to room temperature.
Finally, giving the cheesecake ample chilling time in the refrigerator is crucial for achieving the right firmness and enhancing the flavors. The waiting period allows all the ingredients to settle and the texture to become perfectly creamy, making every slice delightful.
Related Post: