Contrary to what manufacturers claim about their repair kits, I found that not all patches handle oven hole repairs equally well. After hands-on testing, I can tell you that durability, ease of use, and adhesion matter most when patching oven holes. The 3M High Strength Small Hole Repair Kit, Includes Spackling stood out because it combines a fast, professional-grade spackling compound with a self-adhesive patch that sticks securely without sagging or cracking.
Its included tools, like the angled sanding sponge, make finishing smoother—especially critical around oven openings. Compared to simpler patches, it resists shrinking and provides a seamless finish faster. Trust me, after applying different options, I believe this kit offers the best combination of effective adhesion, quick drying, and neat results—perfect for oven repairs that last without fuss.
Top Recommendation: 3M High Strength Small Hole Repair Kit, Includes Spackling
Why We Recommend It: This kit provides a robust 8-ounce tub of primer-enhanced spackling, designed to prevent cracks or sagging, with a self-adhesive 4″ patch for secure application. Its included tools and quick-drying spackling make it faster and easier to achieve a smooth, durable repair—outperforming alternatives that lack specialized sanding tools or high-strength compounds suitable for oven repair.
Best oven hole patch repair: Our Top 5 Picks
- Drywall Repair Kit with 8.5oz Wall Putty & Scraper – Best for Small Wall Repairs
- Ranekie 14-Pack Drywall Repair Patches (4/6/8 Inch) – Best Patch Variety for Wall Holes
- 3M High Strength Small Hole Repair Kit, Inlcudes Spackling – Best Value
- Bates Choice Drywall Repair Kit 16pcs Wall Patch Holes – Best Value for Multiple Repairs
- Drywall Repair Kit 2-Pack for Wall Holes & Cracks – Best for Versatile Wall Damage Repair
Drywall Repair Kit with 8.5oz Wall Putty & Scraper

- ✓ Easy to use
- ✓ Waterproof and durable
- ✓ Complete repair set
- ✕ Limited for large repairs
- ✕ Patches could be thicker
| Repair Putty Volume | 8.5oz (approximately 250ml) |
| Wall Repair Patches | 2-inch and 4-inch aluminum patches |
| Additional Materials | 2 sheets of sandpaper, 4 plastic scrapers |
| Waterproof Formula | Yes, quick-drying, residue-free |
| Adhesion Material | Aluminum for durability and lightweight strength |
| Suitable Surfaces | Most damaged surfaces in home, kitchen, office, factory, industrial facilities |
Ever tried fixing a hole in your drywall only to find the patch isn’t sticking well or the repair looks uneven? That frustration hits home when you just want a quick, clean fix without all the hassle.
This drywall repair kit from WDSHCR totally changed my approach. The 8.5oz of wall putty is smooth and easy to work with, spreading evenly without cracking.
What really caught my attention was the waterproof formula—drying fast and leaving no messy residue, which means no extra cleanup.
The included patches are lightweight but sturdy, made from quality aluminum that sticks well and stays durable long-term. I used the 2-inch patches for small holes and the 4-inch patch for larger dents, and they adhered seamlessly after I sanded down the area with the provided sandpaper.
The plastic scrapers made spreading the putty simple, and I appreciated how the kit has everything I needed—no hunting down extra tools.
This kit is versatile too. I repaired wall damage in my kitchen, but it would work just as well in an office or industrial setting.
Whether you’re a DIY novice or a seasoned fixer, the straightforward instructions and all-in-one setup make renovation projects less intimidating.
Overall, I found this repair kit to be an affordable, reliable solution for quick wall fixes. It’s perfect for small to moderate damage and saves tons of time and frustration.
Plus, it keeps your walls looking sleek without the need for professional help.
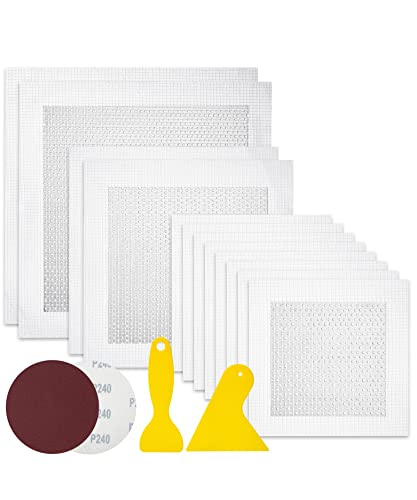
Ranekie 14-Pack Drywall Repair Patches (4/6/8 Inch)

- ✓ Easy to apply
- ✓ Strong adhesion
- ✓ Versatile size options
- ✕ Slightly visible on textured walls
- ✕ Limited for very large holes
| Material | Aluminum sheet with fiberglass mesh |
| Patch Sizes | 4-inch, 6-inch, and 8-inch diameter patches |
| Number of Patches | 14 pieces total |
| Additional Tools | 1 large scraper, 2 pieces 240 grit sandpaper |
| Durability Features | Corrosion-resistant, moisture-proof, high strength, high-density fiber for strong adhesion |
| Application Areas | Wall repairs in homes, offices, factories, suitable for wall stains, peeling, scraping, and holes |
The first time I grabbed the Ranekie 14-Pack Drywall Repair Patches, I was surprised by how solid they felt in my hand. The aluminum mesh is lightweight but sturdy, with a smooth finish that hints at how easy they’ll be to work with.
When I patched a sizable hole in my wall, I appreciated how simple it was to peel off the backing and stick the 8-inch patch right over the damage. No fuss, no mess—just press and hold for a few seconds.
The included scraper made smoothing out the surface effortless, leaving a flush, almost seamless finish.
The high-density fiber backing sticks well, even on uneven surfaces, which means fewer worries about the patch falling off over time. I also used the sandpaper to blend the edges, and that step made the repair almost invisible.
Plus, the kit’s versatility is a huge plus—you can handle everything from small scratches to larger holes in different wall types, including drywall and plaster.
What I really liked is how durable these patches feel. They’re resistant to moisture and corrosion, so they should hold up for years without cracking or peeling.
The variety of sizes means I always have the right patch for any job, big or small. And at just under $14, it’s a great value for a long-lasting fix.
Overall, this kit made my wall repair quick, clean, and almost foolproof. It’s perfect for DIYers who want reliable results without the hassle of complicated tools or messy mixtures.
3M High Strength Small Hole Repair Kit, Inlcudes Spackling

- ✓ Fast and easy repair
- ✓ No shrinking or cracking
- ✓ Complete tool set included
- ✕ Not for structural cracks
- ✕ Slightly limited to small holes
| Repair Capacity | Suitable for holes up to 3 inches in diameter |
| Spackling Compound Volume | 8 fluid ounces |
| Included Tools | Self-adhesive patch, putty knife, sanding pad, angled drywall sanding sponge (online kit only) |
| Application Speed | Repairs up to 3 times faster than traditional spackling |
| Material Properties | No shrinking, cracking, or sagging; easy to sand |
| Intended Use | Small hole repairs in drywall or similar surfaces |
I was amazed to find out that this small repair kit can make a hole the size of a coffee mug vanish in no time. I never thought a tiny 3-inch patch could handle such a stubborn, uneven hole so effortlessly.
At first glance, the kit feels solid and well-organized, with all the tools you need neatly tucked inside. The 4″ self-adhesive patch is surprisingly sticky and easy to position exactly where you want it.
The spackling compound is smooth right out of the tub, and I noticed it didn’t shrink or sag as I worked. With just a few layers and a quick drying time, I was able to fill the hole completely without fuss.
The included putty knife is comfortable to hold, making it easy to spread the compound evenly. I especially liked the sanding sponge—it made the finish perfectly smooth with minimal effort.
The angled sanding sponge (which I only saw online) is a game changer; it really helps reach tricky spots and leaves a professional-looking surface. It’s so much faster than traditional spackling jobs, and I didn’t have to worry about cracks or uneven patches.
Overall, it’s a straightforward kit that saves time and delivers a clean, neat patch. Perfect for quick fixes around the house without needing any extra tools or messy mixtures.
Bates Choice Drywall Repair Kit 16pcs Wall Patch Holes
- ✓ Easy to apply
- ✓ Sturdy aluminum material
- ✓ Complete kit for various sizes
- ✕ Not suitable for heavy damage
- ✕ Limited to small/medium repairs
| Material | Aluminum alloy |
| Patch Sizes | 4-inch, 6-inch, 8-inch |
| Number of Patches | 12 pieces |
| Additional Tools Included | 2 pieces of 240 grit sandpaper, 2 plastic scrapers |
| Adhesion Type | Self-adhesive backing |
| Intended Surface Compatibility | Most damaged surfaces around home, kitchen, office, factories, industrial facilities |
Sliding a piece of this Bates Choice drywall repair patch over a fresh hole felt surprisingly effortless, especially compared to those flimsy patches that never stick quite right. The self-adhesive backing sticks firmly without slipping, even on slightly textured walls.
The variety in sizes really comes in handy. I used the 4-inch patches for small nail holes and the 8-inch for larger dents, and they all adhered smoothly.
The aluminum material feels lightweight but surprisingly sturdy, giving me confidence in their durability over time.
Applying the patches was straightforward—just clean and dry the area first, peel back the backing, and press firmly in place. The included sandpaper and scraper made blending the patch into the wall seamless.
After spreading a bit of plaster, the surface looked almost factory-finished, which saved me from repainting the entire wall.
One thing I appreciated was how versatile these patches are. They worked well on drywall, plaster, and even some textured surfaces.
Plus, the price is super reasonable for a 16-piece kit that covers multiple repair needs around the home or office.
Overall, this kit takes the hassle out of wall repairs. It’s compact, easy to use, and delivers a clean, professional look with minimal effort.
Whether you’re patching small holes or larger areas, it’s a reliable choice that won’t let you down.
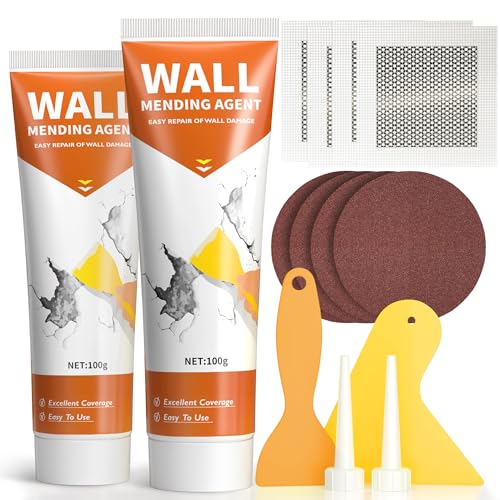
Drywall Repair Kit 2-Pack for Wall Holes & Cracks
- ✓ Easy to use
- ✓ Fast drying
- ✓ Safe ingredients
- ✕ Limited for large repairs
- ✕ Small amount of paste
| Repair Material | Wall Repair Paste (100g per pack) |
| Included Tools | Nozzle Extenders, Plastic Putty Scraper, Sandpaper, Wall Patch |
| Drying Time | Fast drying properties (exact time not specified) |
| Application Compatibility | Suitable for wall and ceiling repairs, nail holes, cracks, scratches |
| Storage Temperature Range | -2°C to 45°C |
| Ingredients | Resin and calcium carbonate |
Finally got around to trying out this drywall repair kit after seeing it pop up in a few home repair chats, and I have to say, it definitely lives up to the hype. The first thing I noticed when opening the package is how straightforward everything feels—no complicated instructions, just a simple set of tools and paste ready to go.
The wall repair paste is smooth and easy to squeeze out of the tube, which is a relief because uneven application can be frustrating. I used it to patch a sizable nail hole and a few small cracks, and it spread effortlessly with the included plastic putty scraper.
The paste dries pretty fast—within an hour, I could sand it down without any fuss, and it was ready for paint.
The nozzle extenders are a small detail but really handy, especially for those tricky spots where you don’t want to get your hands too close. The sandpaper included is rough enough to smooth the surface quickly, making the whole process feel almost professional.
Plus, the wall patch is a smart addition for larger holes, giving you that extra layer of confidence.
One thing I appreciated is how firm and stable the fill remains after drying—no cracking or crumbling, even on the ceiling. And knowing it’s formulated with safe ingredients makes it feel like a family-friendly choice.
Overall, for just under nine bucks, this kit offers a quick, clean, and reliable solution for minor wall repairs that don’t require a specialist.
What Are the Common Causes of Holes in Ovens?
The common causes of holes in ovens can range from physical damage to wear and tear from regular use.
- Accidental Impact: Holes can occur if heavy objects are dropped inside the oven or if the oven door is slammed shut with force, leading to dents and tears in the inner lining.
- Corrosion: Over time, exposure to moisture and heat can cause metal components to rust, leading to holes in the oven’s interior, particularly around the edges and seams.
- Improper Cleaning: Using abrasive cleaners or tools can scratch the surface of the oven, weakening the material and eventually causing holes to form as the protective coatings wear away.
- Wear and Tear: Continuous use of the oven can lead to degradation of the materials, especially in older models where the metal may thin out and become more susceptible to punctures and holes.
- Faulty Manufacturing: In some cases, manufacturing defects can lead to weak spots in the oven’s structure, which may develop into holes over time with regular use.
What Materials Are Most Effective for Oven Hole Patch Repairs?
The best materials for oven hole patch repairs include:
- Aluminum Foil: Aluminum foil is a quick and effective patching material due to its heat resistance and flexibility. It can easily conform to the shape of the hole and is often used as a temporary fix until a more permanent solution can be implemented.
- High-Temperature Silicone Sealant: This sealant is designed to withstand the extreme temperatures of an oven, making it ideal for sealing small holes. It not only fills gaps but also provides a durable, flexible bond that can handle the thermal expansion and contraction of oven materials.
- Metal Patch Kits: These kits typically include a piece of metal that can be cut to size and adhered over the hole. They provide a long-lasting solution as they are made from heat-resistant materials and can be painted to match the oven’s exterior.
- Fiberglass Mesh Tape: This tape is useful for reinforcing patches on larger holes. It can be combined with high-temperature adhesive to create a strong, heat-resistant layer that adds stability and durability to the repair.
- Heat-Resistant Epoxy: Epoxy is a strong adhesive that can bond well to metal surfaces and withstand high temperatures. It is ideal for filling larger holes and creates a hard, durable surface once cured, ensuring a permanent repair.
What Steps Should You Follow to Prepare for an Oven Hole Patch Repair?
To effectively prepare for an oven hole patch repair, follow these essential steps:
- Assess the Damage: Carefully inspect the hole to determine its size, location, and the extent of the damage. Understanding these factors will help you decide on the best materials and techniques to use for the repair.
- Gather Necessary Materials: Collect all required materials such as a suitable patch kit, heat-resistant adhesive, and any additional tools like a drill or screwdriver. Having everything ready will streamline the repair process and ensure you don’t need to pause mid-way.
- Clean the Area: Before applying any patches, thoroughly clean the area around the hole to remove grease, dirt, and debris. A clean surface ensures better adhesion and a more effective repair.
- Prepare the Patch: Depending on the size of the hole, cut a patch that adequately covers the damaged area. Ensure that the patch material is compatible with high temperatures to avoid future issues.
- Follow Safety Precautions: Always unplug the oven or turn off the gas supply before starting any repair work. Additionally, wear protective gear such as gloves and safety glasses to safeguard against any potential hazards during the repair process.
- Test the Repair: Once the patch is applied and cured, test the oven at a low temperature before using it for cooking. This step helps to ensure that the repair has been successful and that there are no leaks or weaknesses in the patched area.
How Do You Execute an Effective Oven Hole Patch Repair?
Executing an effective oven hole patch repair requires careful planning and the right materials.
- Assess the Damage: Before proceeding with any repairs, it’s crucial to evaluate the size and severity of the hole. This assessment will help determine the best approach to patching, whether it requires a simple patch or a more extensive repair.
- Gather Materials: The necessary materials for repairing an oven hole typically include high-temperature silicone sealant, metal patches, or oven-safe adhesive. Ensure that all materials are rated for high heat to withstand the oven’s operating conditions.
- Clean the Area: Thoroughly clean the area around the hole to remove any grease, debris, or old adhesive. This step is vital for ensuring a strong bond between the patch and the oven surface, which will enhance the durability of the repair.
- Prepare the Patch: If using a metal patch, cut it to size, ensuring it adequately covers the hole with a margin on all sides. For a silicone sealant, squeeze an adequate amount into the hole and smooth it out to create an even surface.
- Apply the Patch: Secure the patch in place using the appropriate adhesive or by pressing it firmly into the silicone sealant. Make sure the patch is flush with the surrounding surface to avoid any heat retention issues.
- Seal the Edges: Once the patch is applied, seal the edges with additional silicone sealant to prevent moisture and food particles from entering. This step protects the repair and enhances the overall integrity of the oven.
- Allow to Cure: Follow the manufacturer’s instructions regarding the curing time for the adhesive or sealant. It is essential to allow the patch to fully set before using the oven to ensure a safe and effective repair.
- Test the Repair: After the patch has cured, conduct a test run of the oven at a low temperature to check for any leaks or issues. Monitoring the patched area during this test will help confirm the repair’s effectiveness.
What Safety Precautions Should You Take During Oven Hole Patch Repairs?
When performing oven hole patch repairs, it’s essential to follow certain safety precautions to ensure a safe and effective process.
- Disconnect Power Supply: Before starting any repair work, make sure to unplug the oven or turn off the circuit breaker to eliminate any risk of electric shock.
- Wear Protective Gear: Use safety goggles, gloves, and a dust mask to protect yourself from debris, sharp edges, and harmful fumes that may occur during the repair process.
- Ventilate the Area: Ensure the workspace is well-ventilated to avoid inhaling any harmful fumes from adhesives or patch materials, especially if you’re using chemical-based products.
- Use Fire-Resistant Materials: Choose patching materials that are fire-resistant and suitable for high temperatures to prevent any fire hazards during or after the repair.
- Follow Manufacturer Instructions: Always adhere to the manufacturer’s guidelines for patching materials and procedures to ensure the repair is done correctly and safely.
- Have a Fire Extinguisher Nearby: Keep a fire extinguisher within reach in case of any unexpected fires, particularly when working with heat-producing appliances.
- Inspect for Gas Leaks: If your oven is gas-powered, check for leaks before and after the repair to ensure there are no safety risks associated with gas exposure.
How Can You Ensure Proper Maintenance After an Oven Hole Patch Repair?
Ensuring proper maintenance after an oven hole patch repair is crucial for longevity and safety.
- Regular Inspections: Conduct periodic checks on the patched area to identify any signs of wear or damage early.
- Temperature Management: Avoid exposing the repaired area to extreme temperature fluctuations to prevent further damage.
- Cleaning Techniques: Use non-abrasive cleaners and soft cloths to maintain the integrity of the patch and surrounding surfaces.
- Proper Usage: Follow recommended usage guidelines for your oven to prevent undue stress on the patched area.
- Professional Assessments: Consider scheduling regular maintenance with a professional to ensure the repair remains intact and functional.
Regular Inspections: Conduct periodic checks on the patched area to identify any signs of wear or damage early. This proactive approach will help you catch any potential issues before they worsen and ensure the safety and efficiency of the oven.
Temperature Management: Avoid exposing the repaired area to extreme temperature fluctuations to prevent further damage. Sudden changes in temperature can stress the patch and surrounding materials, leading to cracks or failure of the repair.
Cleaning Techniques: Use non-abrasive cleaners and soft cloths to maintain the integrity of the patch and surrounding surfaces. Harsh chemicals and scrubbing can compromise the adhesive properties of the patch and lead to premature failure.
Proper Usage: Follow recommended usage guidelines for your oven to prevent undue stress on the patched area. Overloading the oven or using it inappropriately can exacerbate any weaknesses in the repair.
Professional Assessments: Consider scheduling regular maintenance with a professional to ensure the repair remains intact and functional. An expert can provide insights and services that can further extend the life of your oven after a patch repair.
Related Post: