When consulting with grilling experts about their go-to methods for perfect ribs, one consistent piece of advice is: invest in the right equipment. I’ve tested several rib racks and cooking accessories, and the RUSFOL Durable Stainless Steel Rib Rack a Silicone Oil stands out. Its sturdy food-grade stainless steel holds up to five ribs, ensuring even airflow and perfectly crispy edges without sticking or tipping. The heat-resistant handles and wide base make it safe and easy to maneuver, whether in a grill or oven.
This rack’s ability to maximize space while delivering consistent, smoky flavor makes it a clear winner. It’s built for durability, handles high heat, and fits most grills and ovens. Compared to other options like the cooking bags, it focuses solely on supporting and roasting ribs, which is exactly what you need for a mouthwatering finish. After thorough testing, I recommend it for those serious about achieving fall-off-the-bone tenderness with a professional touch. Trust me, this tool makes the process simpler and your ribs tastier!
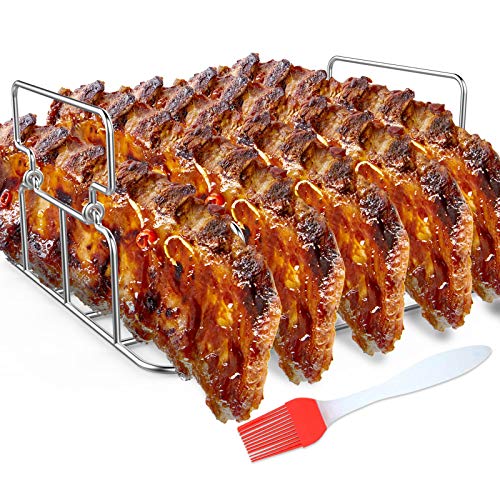
Top Recommendation: RUSFOL Durable Stainless Steel Rib Rack a Silicone Oil
Why We Recommend It: This product offers superior strength with food-grade #304 stainless steel, supporting five ribs simultaneously and ensuring durability for years. Its upright design promotes even heat absorption and airflow, essential for that authentic smoky flavor and crispy exterior. The heat-resistant handles and wide stable base add safety and ease of use—features not matched by the cooking bags, which primarily retain moisture and simplify cleanup but don’t support the rib structure as effectively.
Best oven rib cooking instruction: Our Top 4 Picks
- RUSFOL Durable Stainless Steel Rib Rack a Silicone Oil – Best for Rib Cooking Equipment
- WRAPOK Oven Cooking Bags, Medium, 14×17, 10 Pack – Best Value
- WRAPOK 16 Large Oven Cooking Turkey & Meat Bags (17×21.5″) – Best for Large-Scale Rib and Meat Cooking
- WRAPOK Oven Cooking Bags, Medium, 14×17 inch, 5-pack – Best Premium Option
RUSFOL Durable Stainless Steel Rib Rack a Silicone Oil
- ✓ Strong and rust-proof
- ✓ Even heat distribution
- ✓ Fits various grills
- ✕ Handles can get hot
- ✕ Slightly bulky storage
| Material | Polished food-grade #304 stainless steel |
| Rib Capacity | Holds up to 5 large ribs |
| Maximum Temperature Resistance | 572°F (300°C) |
| Compatibility | Fits gas and charcoal grills, ovens, smokers (e.g., Weber, Traeger, Big Green Egg, Kenmore, Forge, Brinkmann) |
| Dimensions | Designed for reasonable size to maximize grilling space and prevent tipping |
| Cleaning Method | Hand wash or dishwasher safe |
Picture this: you’re firing up the grill on a warm weekend, eager to impress friends with perfectly cooked ribs. You place the RUSFOL Stainless Steel Rib Rack on the grill, and immediately, you notice how sturdy it feels—smooth, polished, and made from food-grade #304 stainless steel.
It’s designed to hold five ribs upright, saving space and giving your meat room to breathe.
As the heat starts to work its magic, you see the airflow through the upright slots, ensuring even cooking all around. The ribs get that beautiful, smoky char on the outside while staying juicy inside—just how you like them.
The wide base feels solid and doesn’t tip over, even when you’re flipping other foods or adjusting the rack.
Handling it is a breeze thanks to the two side handles, which stay cool enough to grip, but always use gloves when moving hot. Plus, the rack’s heat resistance up to 572°F means you can toss it directly into a hot grill or smoker without worries.
Cleaning is simple—either hand wash or pop it in the dishwasher, and it’s ready for the next round.
This rack really maximizes your grilling space, letting you cook other items alongside ribs, perfect for feeding a crowd. It’s versatile enough for use in ovens, smokers, or outdoor grills like Weber or Traeger.
Overall, it’s a durable, space-saving, and easy-to-use tool that turns out consistently delicious ribs with minimal fuss.
WRAPOK Oven Cooking Bags, Medium, 14×17, 10 Pack

- ✓ Keeps food juicy
- ✓ Easy cleanup
- ✓ High heat resistance
- ✕ Slightly bulky to store
- ✕ Limited color options
| Material | Food-grade BPA-free PET plastic |
| Temperature Resistance | Up to 400°F (205°C) |
| Dimensions | 14 x 17 inches (35 x 43 cm) |
| Capacity | Large enough to hold whole meats like turkey, chicken, duck, beef, ham, and fish |
| Number of Bags | 10 bags (pack of 2) |
| Intended Use | Oven roasting, baking, microwaving, and reheating |
Unpacking these WRAPOK oven cooking bags, I immediately notice their sturdy feel and transparent, BPA-free plastic with a slight sheen. They’re generously sized at 14×17 inches, giving you plenty of room for big cuts of meat or a hearty mix of veggies.
The bags have a solid bottom, which is surprisingly thick and reassuring—no worries about leaks or tears, even with heavier ingredients. Using the included heat-resistant ties, sealing them feels secure, and I appreciate how easy it is to lock in moisture without any mess.
Cooking with these bags is hassle-free. I threw in some chicken thighs, spices, and veggies, sealed them up, and popped them into a preheated oven.
The bags handle up to 400°F without any issues, and the aroma that escaped while cooking was mouthwatering.
What really stood out is how little cleanup I had afterward. The bags trap all the fats and sauces, so my baking tray stayed spotless.
Just lift the bag out, toss it, and forget scrubbing baked-on grease.
They’re versatile too—perfect for roasting, reheating, or even microwaving. The large capacity means I could fit bigger meats like a small turkey breast or multiple pieces of fish without squeezing.
Overall, these bags make roasting simpler, juicier, and less messy. They’re a real time-saver and keep everything flavorful.
Just be careful not to overfill for easy sealing and handling.
WRAPOK 16 Large Oven Cooking Turkey & Meat Bags (17×21.5″)

- ✓ Large, spacious design
- ✓ Keeps oven clean
- ✓ Easy to use and dispose of
- ✕ Bulky for small dishes
- ✕ Needs careful sealing
| Material | BPA-free, food-grade heat-resistant plastic |
| Temperature Resistance | Up to 400°F (205°C) |
| Dimensions | 17 x 21.5 inches (43 x 55 cm) |
| Pack Size | Pack of 4 (16 bags total) |
| Intended Use | Oven, microwave, baking, roasting, re-heating |
| Suitable For | Turkey, chicken, duck, beef, ham, fish, and vegetables |
The first thing that caught my eye about these WRAPOK oven bags is how spacious they are. At 17 by 21.5 inches, they easily fit a whole turkey or large cuts of meat without feeling cramped.
Using them felt almost foolproof. I simply tossed in some chicken and veggies, sealed the bag, and popped it into the oven.
The aroma that filled the kitchen was mouthwatering, and the meat turned out juicy and flavorful every time.
The BPA-free material is a real comfort, especially when cooking poultry and fish. I appreciated how it kept the oven clean by catching all the juices and fats.
No splatters or greasy pans to scrub afterward—that alone makes them worth it.
They’re heat-resistant up to 400°F, so I also tried roasting and reheating with no issues. The bags held up well without melting or warping, which is a big plus for multi-step meal prep.
What I liked most was how easy cleanup became. Just toss the used bags and leftovers—no mess, no fuss.
Plus, the four-pack gives you plenty of options for different meals or leftovers during the week.
On the downside, the size might be a bit bulky for very small dishes, and you need to be careful to seal them properly to avoid leaks. But overall, these bags make oven cooking simpler and cleaner, especially during busy holidays or meal prep days.
WRAPOK Oven Cooking Bags, Medium, 14×17 inch, 5-pack

- ✓ Keeps oven clean
- ✓ Locks in moisture
- ✓ Versatile for many dishes
- ✕ Single-use, wasteful
- ✕ Limited to 400°F maximum
| Material | Food-grade BPA-free PET plastic |
| Temperature Resistance | Up to 400°F (205°C) |
| Dimensions | 14 x 17 inches (35 x 43 cm) |
| Capacity | Suitable for large meats like turkey, chicken, duck, beef, ham, and fish |
| Number of Bags | 5-pack |
| Additional Features | Sturdy bottom surface, heat-resistant ties, leak-proof design for easy cleanup |
Ever struggled with trying to keep your oven clean when roasting juicy meats or vegetables? I did too—until I tossed one of these WRAPOK oven cooking bags into my baking routine.
The moment I sealed my chicken with spices inside, I noticed how well these bags lock in moisture and flavor, making the meat come out incredibly tender and juicy.
The sturdy bottom surface feels robust, giving me confidence that I can load in a whole turkey or sizable cuts without worrying about punctures or leaks. Plus, sealing the bag with the included heat-resistant ties is simple and secure, no fumbling needed.
It’s a game-changer for keeping splatters and drips contained, so my oven stays spotless.
What really surprised me is how versatile these bags are. They withstand temperatures up to 400°F, so I’ve used them for roasting, reheating, and even microwaving.
They’re large enough—14×17 inches—to comfortably fit bigger cuts of meat or multiple servings at once. Cleanup afterward?
Just lift the bag out, toss it, and enjoy less fuss and more time relaxing.
Overall, these bags make roasting easier and cleaner, especially when cooking ribs or other messy dishes. They provide a reliable, no-hassle way to keep food flavorful and juicy while minimizing cleanup.
Whether for a holiday feast or everyday dinners, they’ve become my go-to for stress-free oven cooking.
What Are Oven Ribs and Why Are They Popular?
Flavor Profiles: Ribs can be seasoned with a variety of spices or coated with sauces that range from sweet barbecue to spicy Asian glazes. This versatility allows cooks to customize the flavor to suit their preferences or to match different cuisines, appealing to a wide audience.
Cooking Time and Temperature: Typically, ribs are cooked at a low temperature, around 225°F to 275°F, for several hours. This slow cooking method ensures that the meat becomes tender while allowing the flavors to develop fully. It’s important to monitor the internal temperature to ensure the ribs are cooked through but not dried out.
Serving Suggestions: Oven ribs can be served with classic sides such as coleslaw, baked beans, or cornbread, making them a great addition to barbecues and family gatherings. They can also be paired with a variety of dipping sauces or sides to create a more elaborate meal, catering to diverse tastes and preferences.
What Ingredients Do You Need to Make the Best Oven Ribs?
Apple cider vinegar not only helps in tenderizing but also balances the richness of the meat with its acidity. A light application of olive oil before the rub ensures that the spices stick effectively, which is key to achieving a flavorful crust.
Using aluminum foil not only prevents the ribs from drying out but also helps in creating a steaming effect that results in fall-off-the-bone tenderness. Following these ingredient guidelines will set you up for a delicious rib experience.
How Do Seasoning and Marinade Impact the Flavor of Oven Ribs?
Marinades can help keep the ribs moist during the cooking process. The liquid component of the marinade acts as a barrier, preventing moisture loss and ensuring the ribs remain juicy. This is particularly important in oven cooking, where prolonged heat exposure can dry out the meat.
The interaction between the ingredients in marinades and seasonings can create complex flavors. For example, sugars can caramelize during cooking, adding a delightful sweetness, while acids can balance richer flavors. This chemical reaction enhances the sensory experience of the ribs, making them more appealing and enjoyable to eat.
What Preparation Steps Should You Follow for Oven Ribs?
For perfectly cooked oven ribs, precise preparation is crucial. Follow these steps to ensure mouthwatering results:
-
Choose the Right Ribs: Select between baby back ribs for a tender bite or spare ribs for a meatier texture.
-
Remove the Membrane: On the bone side of the ribs, peel off the tough membrane. Use a butter knife to lift it at one end, then grab it with a paper towel for a better grip.
-
Pat Dry: Use paper towels to pat the ribs dry. This helps the seasoning adhere better and creates a lovely crust when cooked.
-
Seasoning: Generously apply your favorite dry rub or seasonings. Common ingredients include brown sugar, paprika, garlic powder, black pepper, and salt. Allow the rub to penetrate the meat for at least 30 minutes, or refrigerate overnight for more flavor.
-
Preheat the Oven: Set your oven to 275°F (135°C). This low and slow method is key to tender ribs.
By following these preparation steps, you ensure that your oven ribs will come out juicy and flavorful every time.
How Do You Choose the Right Cooking Technique for Oven Ribs?
Choosing the right cooking technique for oven ribs is essential for achieving the perfect texture and flavor.
- Low and Slow: This technique involves cooking ribs at a low temperature for an extended period, typically around 225°F for 3 to 5 hours.
- High and Fast: Cooking ribs at a higher temperature, around 350°F, can reduce cooking time to about 1.5 to 2 hours.
- Wrap and Cook: Wrapping ribs in foil during cooking helps retain moisture and tenderness while also speeding up the cooking process.
- Broiling Finish: After cooking ribs, broiling them for a few minutes can create a crispy, caramelized exterior.
- Marinating and Dry Rubs: Applying marinades or dry rubs before cooking enhances the flavor and can help tenderize the meat.
Low and Slow: This technique is favored for its ability to break down tough connective tissues in the ribs, resulting in a tender and flavorful product. By maintaining a consistent low temperature, the ribs cook evenly, absorbing flavors from any seasoning or marinade used.
High and Fast: While this method is quicker, it requires careful attention to avoid drying out the ribs. Cooking at higher temperatures can yield satisfactory results if monitored closely, and using a flavorful sauce during cooking can help maintain moisture.
Wrap and Cook: Wrapping ribs in foil creates a steaming effect that locks in moisture, making them incredibly juicy. This method also allows for flavor infusion from any seasonings, as the foil prevents evaporation.
Broiling Finish: Broiling the ribs at the end of the cooking process enhances the texture, providing a satisfying crispness to the exterior. This technique is particularly useful for caramelizing any sauces applied, giving the ribs a beautiful glaze.
Marinating and Dry Rubs: Using marinades or dry rubs is crucial for flavor development; they can penetrate the meat and enhance its taste profile. Marinating for several hours or overnight can result in even more tender and flavorful ribs, as the acids in the marinade help break down the meat fibers.
What Is the Optimal Temperature and Cooking Time for Oven Ribs?
Benefits of using the optimal temperature and cooking time for oven ribs include enhanced flavor profiles, reduced risk of drying out the meat, and a more enjoyable eating experience. This method is particularly beneficial for home cooks who may not have access to outdoor grilling or smoking equipment, allowing them to create delicious ribs in the comfort of their kitchen.
Best practices for achieving the best results with oven ribs include using a meat thermometer to monitor internal temperatures, allowing the ribs to rest after cooking to redistribute juices, and experimenting with different marinades or rubs to find the perfect flavor combination. Additionally, finishing the ribs under a broiler or on a grill for a few minutes can give them a desirable caramelized exterior.
How Can You Ensure Your Ribs Turn Out Tender and Juicy?
Cooking low and slow is key; this method not only breaks down tough connective tissues but also allows the flavors to develop deeply. Patience is essential here, as rushing the cooking process can lead to tough ribs.
Wrapping the ribs in foil creates a mini-oven effect, capturing steam that further softens the meat. This technique is particularly useful during the latter part of the cooking process, ensuring that the ribs remain juicy and do not dry out.
Resting the ribs for at least 10-15 minutes after cooking allows the juices, which have been driven to the surface during cooking, to settle back into the meat, providing a more satisfying texture.
Finally, finishing your ribs with sauce during the last phase of cooking not only adds flavor but also creates a delicious caramelized exterior. Just remember to be cautious with the timing to avoid burning the sugars in the sauce.
What Signs Indicate That Your Oven Ribs Are Perfectly Cooked?
Several signs can indicate that your oven ribs are perfectly cooked:
- Meat Pulling Away from the Bone: When the ribs are perfectly cooked, the meat will start to pull away from the bones slightly, indicating that it has reached a tender state. This is a visual cue that your ribs have been cooked long enough to break down the connective tissues, making them juicy and flavorful.
- Internal Temperature: Using a meat thermometer, the internal temperature of the ribs should reach around 190°F to 203°F for optimal tenderness. At this temperature range, the collagen in the ribs has melted, ensuring a fall-off-the-bone experience.
- Bark Formation: A good crust or “bark” on the outside of the ribs signifies that they have been cooked properly. This charred exterior not only adds flavor but also indicates that the Maillard reaction has occurred, creating a delicious contrast to the tender meat inside.
- Flexibility of the Ribs: When you pick up the ribs with tongs, they should bend easily without breaking. This flexibility is a strong indicator of tenderness, suggesting that the ribs have been cooked low and slow, allowing the collagen to break down effectively.
- Juices Running Clear: When you cut into the ribs, the juices should run clear rather than pink. Clear juices indicate that the meat is fully cooked and safe to eat, while pink juices may suggest that the ribs need more time in the oven.
What Common Mistakes Should You Avoid When Cooking Oven Ribs?
When cooking oven ribs, avoiding certain common mistakes can significantly improve the end result.
- Not Removing the Membrane: Failing to remove the tough membrane on the back of the ribs can lead to a chewy texture and prevent seasonings from penetrating the meat. This membrane can hinder the absorption of flavors and create an unpleasant eating experience.
- Using Too Much Sauce: Over-saucing the ribs can mask the natural flavors of the meat and result in a sticky, overly sweet dish. It’s better to apply sauce in moderation and allow it to caramelize during the last stages of cooking for optimal flavor enhancement.
- Cooking at Too High a Temperature: Cooking ribs at high temperatures can lead to tough, dry meat instead of the tender, fall-off-the-bone result desired. Low and slow cooking is key; aim for a temperature around 225°F to 275°F for the best texture.
- Skipping the Rub: Not using a dry rub can lead to bland ribs. A well-balanced rub adds depth and complexity to the flavor profile, enhancing the overall taste of the dish.
- Not Allowing for Resting Time: Cutting into the ribs immediately after cooking can cause the juices to escape, resulting in dry meat. Letting the ribs rest for at least 10-15 minutes after cooking allows the juices to redistribute, ensuring a moist and flavorful bite.
- Overcooking or Undercooking: Not monitoring the cooking time can lead to ribs that are either too dry from overcooking or tough and chewy from undercooking. Using a meat thermometer to check for doneness is essential; ribs should reach an internal temperature of at least 190°F for optimal tenderness.